
Finding the right width for a slim shoe rack in a narrow hallway depends on balancing your household’s storage needs with the physical limits of your entryway. For most narrow corridors and apartment entryways, a slim shoe rack with a width of 50 cm to 80 cm offers the ideal balance, allowing you to store two to three pairs of adult shoes per tier. If you have a longer, uninterrupted wall, extending the width up to 100 cm or 120 cm maximizes storage without encroaching further into your walking path.
The defining feature of a truly “slim” shoe rack is actually its depth, which typically ranges from a mere 15 cm to 24 cm. By utilizing tipping buckets or slanted shelves, these units keep footwear upright or angled, ensuring the cabinet does not protrude into tight walkways. To choose the perfect width, you must measure your available wall space, account for architectural obstacles, and ensure your household can move safely through the area every day.
Measuring Your Hallway and Entryway Space
Before browsing online marketplaces or visiting furniture showrooms, you must establish the exact physical boundaries of your entryway. Start by measuring the length of the wall segment where you plan to position the shoe rack. This measurement determines your maximum allowable width, but you should subtract at least 10 cm from this total to allow for comfortable positioning and to prevent the unit from looking cramped against adjacent walls or door frames.
Products mentioned in this guide
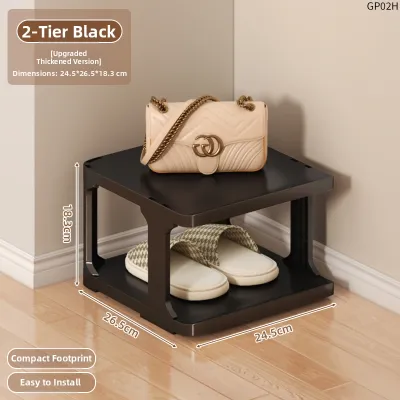
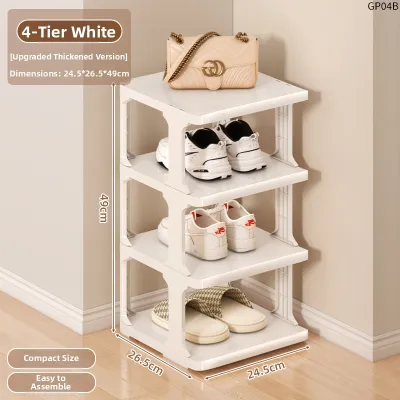
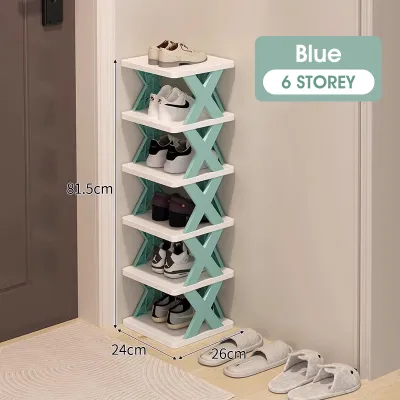
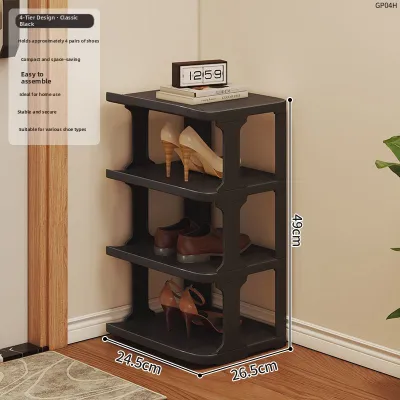
Prices are valid at publication and may change. Please refer to the product page for the latest price.
Next, measure the depth of the hallway from the wall to the edge of the active walking path. In tight apartment layouts, every centimetre counts, making it essential to account for architectural details that do not appear on floor plans. Take note of skirting boards or baseboards along the bottom of the wall, as these can prevent a flat-backed cabinet from sitting flush against the wall, effectively increasing the depth it occupies.
You must also map out the swing radiuses of all nearby doors, including your main entrance door, gate, bedroom doors, or utility closets. A shoe rack that is too wide or deep can block a door from opening fully, leading to annoying daily collisions and potential damage to both the door and the cabinet. Check the locations of electrical outlets, light switches, and distribution box covers to ensure your chosen rack width does not block access to critical home controls.
Safety and local building guidelines must dictate your final layout decisions. In high-density housing, such as apartments and condominiums, maintaining a clear evacuation route is a legal and practical necessity. For instance, local fire safety regulations often require a minimum clear escape path of 1.2 metres along common corridors and entryways. Ensure that even when the shoe rack compartments are fully opened, there is still ample space for residents to pass safely during an emergency.
Matching Slim Shoe Rack Dimensions to Your Layout
Once you have your spatial boundaries, you can evaluate how different slim shoe rack designs utilize their width and depth. Traditional flat-shelved shoe racks require a depth of at least 30 cm to 35 cm to accommodate adult shoes horizontally. In contrast, slim shoe racks employ clever internal configurations, such as vertical tipping compartments or slanted tiers, to reduce the external depth to as little as 15 cm.

Slanted tier designs place shoes at an angle, which slightly increases the required cabinet depth compared to tipping buckets but allows for easier visibility and access. Tipping bucket designs store shoes almost vertically, dropping them forward when you pull the compartment open. While tipping buckets offer the shallowest profile, they require you to check the internal clearance dimensions carefully, as bulky sneakers or high heels may prevent the compartment from closing smoothly.
To compensate for a shallow depth, slim shoe racks often scale upward, utilizing vertical height to boost storage capacity. However, a tall, narrow cabinet with a small footprint naturally has a higher center of gravity, making it prone to wobbling or tipping. When choosing a tall unit—such as one exceeding 100 cm in height—you must prioritize structural stability and plan to secure the unit directly to the wall.
When shopping, never rely solely on generic marketing terms like “ultra-slim” or “space-saving” to guide your purchase. Always check the manufacturer’s detailed product specification sheet for the exact outer dimensions, including any protruding handles, baseboard cutouts, or hardware. Comparing these precise specifications against your on-site measurements ensures the cabinet will fit perfectly into your designated alcove without unexpected overhangs.
Installation and Safety Checks for Narrow Spaces
Installing furniture in high-traffic, confined areas requires careful attention to safety and structural integrity. Because slim shoe racks are exceptionally shallow, they are highly susceptible to tipping forward when multiple heavy drawers are opened simultaneously. To prevent accidents, almost all tall or ultra-slim cabinets must be anchored securely to the wall using appropriate brackets and wall plugs.
Before drilling, identify your wall material—such as concrete, drywall, or brick—to ensure you use the correct drill bits, wall anchors, and screws. If you are renting and cannot drill into the walls, you may need to opt for a lower-profile, wider shoe rack that maintains a lower center of gravity and does not require wall mounting. Always verify the manufacturer’s assembly instructions regarding weight distribution, placing heavier shoes on the bottom tiers to maximize stability.
Floor protection is another critical consideration, especially if your entryway features delicate flooring like vinyl, laminate, or polished tile. Check if the shoe rack comes with adjustable leveling feet or rubber floor protectors to prevent scratches and compensate for slightly uneven floors. Leveling the unit properly ensures that the tipping compartments operate smoothly and do not swing open unexpectedly.
Finally, ensure the placement of your shoe rack does not compromise the comfort and functionality of your entryway. Avoid blocking natural light sources, ventilation grilles, or intercom systems mounted near the door. A well-placed shoe rack should blend seamlessly into the architectural lines of your home, keeping your entryway organized and welcoming without creating dark corners or stuffy pockets.
Alternative Space-Saving Shoe Storage Solutions
If your measurements reveal that even the slimmest floor-standing shoe rack will obstruct your hallway, alternative storage methods can help keep your entryway clutter-free. Over-the-door shoe organizers are an excellent, zero-footprint option for utility closet doors or secondary entryways. These organizers use fabric or plastic pockets to hold shoes vertically, keeping them completely off the floor.
Wall-mounted shoe pegs or floating shoe shelves offer another flexible alternative, allowing you to customize the layout to fit irregular corners or awkward alcoves. When installing wall-mounted solutions, always check the load-bearing capacity of your wall and the mounting hardware. Ensure the brackets are anchored securely to studs or solid masonry to prevent the shelves from sagging under the weight of multiple pairs of shoes.
Modular or stackable plastic shoe boxes provide a highly customizable system that you can configure to match the exact shape of your space. You can stack them vertically in narrow niches or arrange them horizontally under low windows or benches. This modular approach allows you to expand your storage incrementally as your footwear collection grows, without committing to a single large piece of furniture.
Multi-functional furniture, such as an entryway bench with integrated shoe slots or a hidden bottom compartment, is ideal for wider but shallow entryways. These benches provide a convenient place to sit while putting on shoes while keeping daily footwear neatly tucked out of sight. When selecting a storage bench, verify that the seat’s load capacity matches your household’s needs and that the materials are easy to clean. Whether you are looking at budget-friendly plastic options under S$50 or premium wooden cabinets, checking the exact dimensions remains the most critical step.
Frequently Asked Questions (FAQ)
How do I measure shoe depth for a slim rack?
To determine if your footwear will fit inside a slim shoe rack, measure your longest pair of shoes from the tip of the toe to the back of the heel. Compare this measurement directly against the manufacturer’s specified internal compartment depth, rather than the cabinet’s external depth. Keep in mind that high-top sneakers, boots, and high heels require more vertical clearance and depth than flat sandals or loafers. If your shoes exceed the internal depth of a standard tipping bucket, look for models featuring adjustable internal dividers or removable shelves that let you customize the angle and height of each tier.
Can I place a slim shoe rack outside my apartment door?
Placing a shoe rack in a shared common corridor depends entirely on your building’s management rules and local municipal guidelines. In Singapore, for example, the Housing & Development Board (HDB) and the Civil Defence Force enforce strict rules regarding corridor obstructions to ensure clear escape paths during emergencies. If you are permitted to place a rack outside, it must not obstruct the minimum required clearance of 1.2 metres, and it should be constructed from durable, weather-resistant materials like treated metal or heavy-duty plastics that can withstand humidity and occasional rain splashes.

Community discussion
Share your experience or ask a question. Comments are reviewed before publication.