
Assembling a modular metal rack is a highly effective way to maximize storage space in apartments, utility rooms, or household bomb shelters. The process involves preparing a flat workspace, systematically building the frame from the ground up, securing the shelves at your desired heights, and fine-tuning the leveling feet to ensure absolute stability. By following a structured approach and verifying each connection before tightening, you can construct a durable, wobble-free storage system that safely holds your household items without damaging your floors or the rack itself.
Pre-Assembly Preparation and Space Checks
Before opening any boxes, clear a dedicated assembly zone. In typical residential layouts, space can be tight, so clearing a flat area in your living room or hallway is essential. Lay down a large piece of cardboard, a clean drop cloth, or an old blanket to protect your flooring—whether it is vinyl, laminate, parquet, or polished tiles—from accidental scratches during the build process.
Unbox all components carefully. Group similar parts together: vertical upright posts, horizontal beams, shelf panels, and small hardware items like plastic sleeves, clips, leveling feet, or safety brackets. Cross-reference every item with the parts list in the manufacturer’s instruction manual. Verifying that you have the correct count of every screw, bracket, and shelf support before you begin prevents frustrating delays mid-assembly.
Products mentioned in this guide
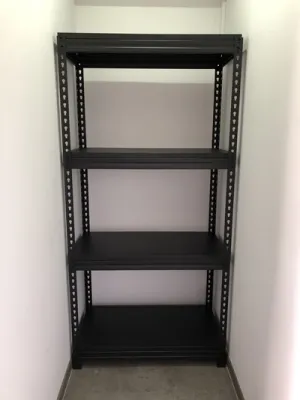
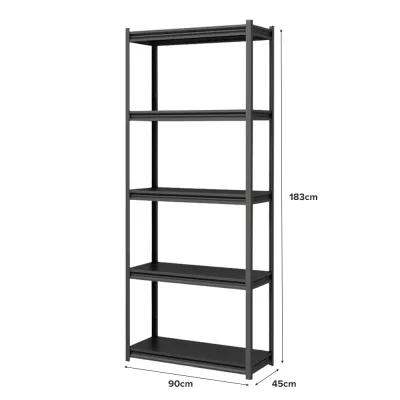
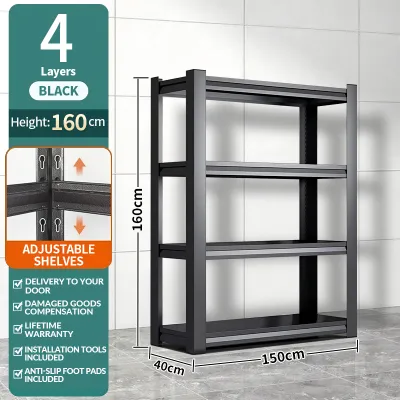
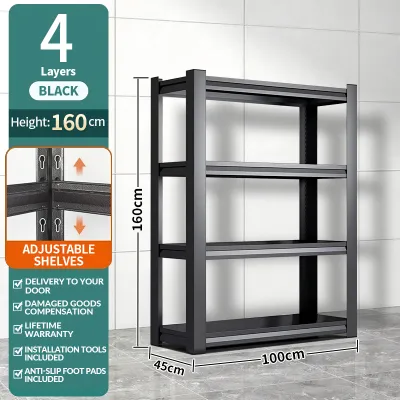
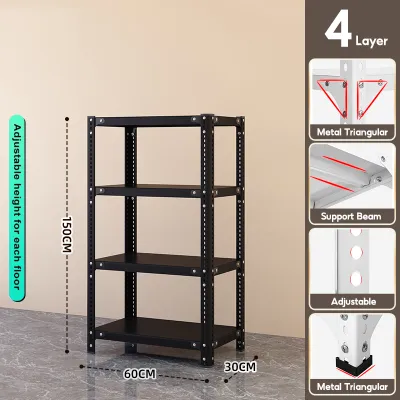
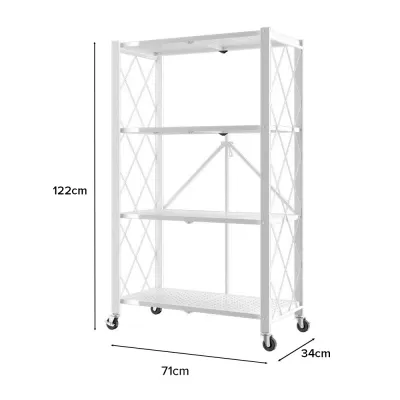
Prices are valid at publication and may change. Please refer to the product page for the latest price.
Inspect each component for shipping damage. Look for bent metal tabs, warped shelf panels, or chipped powder coating. If you notice any structural defects, contact the seller or manufacturer before proceeding, as assembling a compromised frame can affect its overall load capacity and safety.
Gather the necessary tools. While many modular metal racks feature a boltless design that theoretically requires no tools, having a few basic implements on hand makes the job significantly easier. A rubber mallet is invaluable for seating components firmly without denting the metal. A spirit level is crucial for ensuring the shelves are perfectly horizontal, and a standard screwdriver or hex key may be required for specific locking mechanisms or wall anchors.
Step-by-Step Assembly of the Metal Rack
Constructing a modular metal rack requires a methodical, bottom-up approach. Deviating from the manufacturer’s specified sequence can lead to structural misalignment, making it difficult to fit the final shelves or secure the joints properly. Following the official manual step-by-step also ensures you maintain any product warranties and that the rack performs according to its engineered specifications.

Building the Base and Vertical Frames
Begin by preparing the bottom of the vertical upright posts. If your modular rack includes adjustable leveling feet, screw them fully into the threaded inserts at the base of each post. For units with casters, ensure the locking wheels are positioned at the front or in an easily accessible location so you can secure the rack in place once assembly is complete. If the kit includes simple plastic end caps, press them firmly onto the bottom of the posts to prevent the raw metal edges from scraping your floor.
Next, identify the bottom-most horizontal braces or the lowest shelf support beams. Connect these horizontal pieces to the vertical posts to establish the footprint of the rack. For boltless rivet systems, insert the rivets on the horizontal beams into the keyhole slots on the upright posts. Ensure the narrow end of the keyhole slots points downward, as gravity will help lock the beams into place when weight is applied.
Keep all connections slightly loose during this initial stage. Do not drive the joints home with a mallet or tighten any screws completely yet. Keeping the frame slightly flexible allows you to adjust and square the base easily.
Measure diagonally from corner to corner of the base frame to verify that it is square. If the two diagonal measurements are equal, your base is perfectly rectangular. Once you confirm the base is square, gently tap the horizontal beams downward into the keyhole slots using your rubber mallet, or lightly tighten the base screws to lock the foundation in place.
Installing and Securing the Shelves
With the base frame stabilized, you can begin installing the shelf supports or panels. For wire shelving units that use split-sleeve plastic collars, snap the collars onto the designated groove on each vertical post at your desired height. Ensure all four collars are aligned at the exact same height marker on the posts, with the “top” arrow on the plastic sleeves pointing upward.
Slide the shelf frame down from the top of the vertical posts until it rests firmly over the plastic sleeves or brackets. The tapered design of the sleeves ensures that as weight is applied to the shelf, the connection becomes tighter and more secure.
If your rack uses a boltless rivet or tab-and-slot design, align the shelf beams with the slots on the uprights at your chosen height. Use a rubber mallet to tap the corners of the shelf beams downward. Always place a block of wood or a thick cloth over the metal if you are using a standard metal hammer, as direct metal-on-metal impact can chip the protective powder coating and lead to rust over time.
Verify that all four corners of the shelf are fully seated and flush against the upright posts. An unevenly seated shelf can cause the rack to wobble, reduce its overall stability, and place uneven stress on the joints, which may lead to structural failure under load. Repeat this process for each subsequent shelf tier, working your way from the bottom to the top.
Adjusting Shelf Heights and Fine-Tuning Stability
One of the primary benefits of a modular metal rack is the ability to customize shelf heights to accommodate items of varying sizes, such as bulky storage boxes, kitchen appliances, or luggage. To adjust the height of a shelf, you must first unload all items from that tier. For split-sleeve wire systems, gently tap the underside of the shelf corners upward with a rubber mallet to release the friction fit, slide the shelf up, and reposition the plastic sleeves to your new desired height before reseating the shelf.
For boltless rivet or tab systems, tap the shelf beams upward from the bottom to disengage the rivets from the keyhole slots. Move the beams to the new slots on the vertical posts, ensuring they are level across all four corners, and tap them back down securely.
Once all shelves are positioned, place a spirit level on the middle and top shelves. Check the levelness from left to right and from front to back. If the bubble in the spirit level is not centered, use the adjustable leveling feet at the base of the upright posts to compensate for any unevenness in your floor. Turn the feet clockwise to lower a corner or counterclockwise to raise it.
After achieving a perfectly level and plumb structure, perform a final check of all fasteners and joints. If your rack uses bolts, tighten them securely with a wrench or hex key. For boltless systems, give each shelf corner a final, firm tap with the rubber mallet to ensure every connection is fully locked into place.
Post-Assembly Verification and Safety Checks
Before placing your modular metal rack into service, conduct a thorough safety inspection. Begin by loading the rack strategically. Always place your heaviest items—such as water bottles, heavy tools, or large storage bins—on the bottom shelf. This lowers the overall center of gravity of the unit, significantly reducing the risk of accidental tipping.
Gently shake the rack from side to side and front to back to check for any residual wobble. If you notice any movement, re-examine the leveling feet and ensure all shelf connections are fully seated. A stable rack should feel solid and rigid when light force is applied.
Evaluate the need for wall anchoring, which is highly recommended for any rack that is tall, narrow, or loaded with top-heavy items. If you have children or pets in your home, wall anchors are essential to prevent tip-over accidents if someone attempts to climb the shelves. Many manufacturers include wall-mounting brackets or straps in the packaging.
To install a wall anchor, position the rack against the wall, mark the anchor points through the bracket holes, and drill into the wall using appropriate wall plugs for your wall type. For concrete walls common in many apartments, use suitable masonry plugs and screws. Secure the brackets to both the wall and the metal frame of the rack, ensuring there is no slack in the connection.
Frequently Asked Questions (FAQ)
Can I assemble this metal rack alone?
Yes, smaller or low-profile modular metal racks can generally be assembled by a single person. However, for taller units or heavy-duty industrial racks, having a second person is highly recommended. A helper can hold the vertical upright posts steady and keep the frame square while you align and secure the first few horizontal beams, preventing the components from tipping over and causing injury or damage during the initial stages of construction.
How do I prevent the metal rack from scratching my floor?
To protect your floors from scratches, dents, or rust stains, always install the protective plastic or rubber end caps provided by the manufacturer onto the bottom of the vertical posts. If your rack has bare metal feet or if you want extra protection for delicate parquet or vinyl flooring, you can apply heavy-duty adhesive felt pads to the bottom of the leveling feet. For heavy-duty racks placed in high-traffic utility areas, placing a durable rubber utility mat under the entire footprint of the rack provides excellent floor protection and dampens vibrations.
What should I do if the parts do not align during assembly?
If you find that the shelf beams or panels do not align with the slots on the vertical posts, do not force them into place, as this can bend the metal and permanently damage the locking mechanisms. Instead, stop and loosen the connections on the lower tiers of the frame. Often, a frame that is slightly out of square will cause alignment issues higher up. Once the lower joints are loosened, gently nudge the frame until it is square, align the problematic upper components, and then systematically retighten or tap all connections back into place. If a component appears warped or manufactured incorrectly, consult the manual or contact the seller for a replacement part.

Community discussion
Share your experience or ask a question. Comments are reviewed before publication.