
Building a modular rack storage shelf is one of the most practical ways to maximize vertical space in your home or office. Whether you are organizing a utility room, a pantry in a Singapore apartment, or a creative workspace, these systems offer unparalleled flexibility. Unlike fixed furniture, modular shelving allows you to customize shelf heights, add accessories, and reconfigure the layout as your storage needs evolve over time.
Taking on this project as a do-it-yourself task is highly achievable and eliminates the need for expensive professional installation services. By understanding the structural logic of these systems, you can confidently assemble a sturdy, safe, and perfectly aligned unit. This comprehensive guide walks you through every stage of the process, from initial space planning and base assembly to safety checks and long-term maintenance.
Pre-Assembly Preparation and Space Planning
Before unboxing your new rack storage shelf, thorough preparation is essential to ensure a smooth assembly process. The first step is to measure your designated floor space and ceiling height accurately. In compact living environments, vertical space is highly valuable, but you must leave enough clearance at the top to comfortably maneuver components during assembly.
Products mentioned in this guide
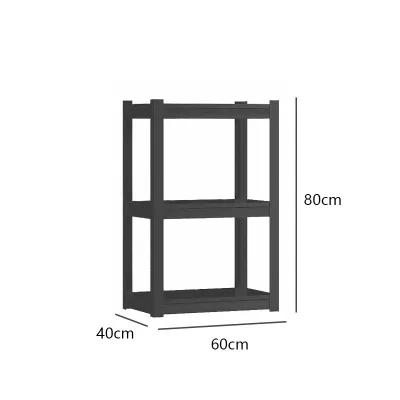

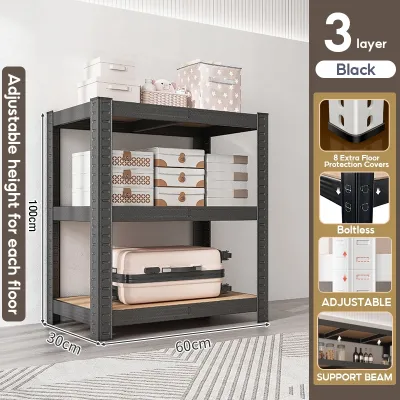
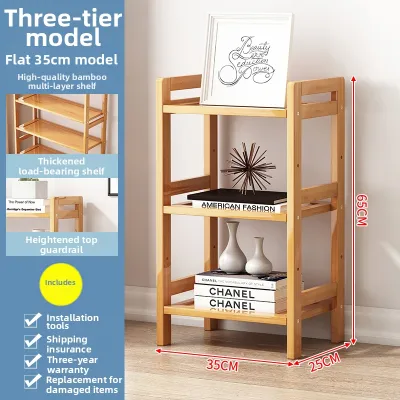
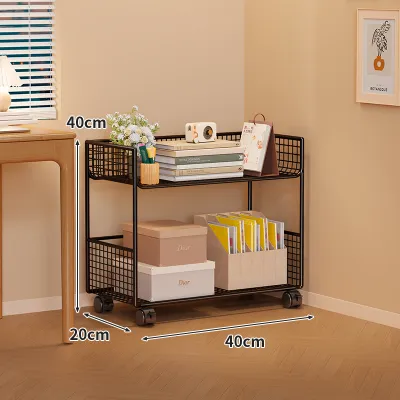
Prices are valid at publication and may change. Please refer to the product page for the latest price.
Additionally, measure the clearance of your doorways, staircases, and passenger lifts. If you plan to assemble the unit in a larger room and move it to its final location, ensure the fully built frame can navigate these tight corners and openings. If the clearance is tight, it is highly recommended to assemble the shelving unit directly inside the room where it will permanently stand.
Once you have confirmed the spatial dimensions, clear a generous workspace on the floor. Lay down a clean blanket, cardboard sheets, or a protective tarp to prevent scratching your floor tiles or damaging the finish of the shelving components. Unpack all boxes carefully, grouping similar parts together such as upright posts, horizontal beams, shelf panels, and hardware packets.
Locate the manufacturer’s instruction manual and find the inventory checklist. Cross-reference every single item in the box against this list before you begin assembly. Identifying a missing locking pin, bracket, or screw early saves you from the frustration of pausing midway through the build. If any parts are visibly bent, cracked, or damaged during transit, contact the manufacturer for replacements before proceeding.
Gather the necessary hand tools ahead of time so you do not have to search for them mid-assembly. Most modular rack systems require only basic tools, such as a standard flathead or Phillips screwdriver, a rubber mallet for securing interlocking joints, and a spirit level to verify alignment. Avoid using high-powered impact drivers unless specifically recommended by the manufacturer, as excessive force can easily strip threads or warp metal frames.
Step-by-Step Assembly of the Base and Vertical Frames
The stability of your entire rack storage shelf depends heavily on the integrity of its foundation. Begin by assembling the base components exactly as specified in your product manual. Depending on the model, this may involve attaching flat base plates, heavy-duty casters for mobility, or adjustable leveling feet.

If your unit features adjustable leveling feet, thread them into the bottom of the vertical posts but do not tighten them completely. These feet are crucial for compensating for uneven floors, which are common in utility areas and older buildings. If you are installing casters, ensure that the locking casters are positioned on the front or outer corners so you can easily access the brake levers once the unit is loaded.
Next, connect the vertical upright posts to the base assembly. Many modern modular racks utilize boltless keyhole slot designs or slip-sleeve collar systems. For slip-sleeve designs, snap the plastic sleeves onto the desired groove on the post, then slide the shelf collar down over them until they lock firmly in place. For boltless steel racks, insert the tabs of the horizontal base beams into the keyhole slots of the upright posts.
Use a rubber mallet to gently tap the horizontal beams downward into the slots. A rubber mallet is preferred over a metal hammer because it distributes the impact force and prevents chipping the protective powder coating or paint. Ensure that all locking pins, safety clips, or screws are fully engaged and seated properly before you attempt to stand the frame upright or apply any weight.
Once the basic outer frame is standing, verify its vertical alignment and squareness. Place a spirit level against the vertical posts on both the front and side faces. You can also check for squareness by measuring the diagonal distances from corner to corner of the frame; if the two diagonal measurements are equal, your frame is perfectly square. Adjust the leveling feet or gently tap the joints to correct any misalignment before tightening any structural bolts completely.
Installing Shelves and Configuring Modular Components
With the main vertical frame securely standing and squared, you can begin planning the layout of your shelves and modular accessories. Take a moment to evaluate the items you plan to store. Measure the height of your tallest storage boxes, appliances, or containers to determine the optimal spacing between each shelf tier.
As a fundamental safety rule, always plan to place your heaviest items on the lowest shelves. This keeps the center of gravity low, which significantly reduces the risk of the rack tipping forward. Lighter items, such as plastic bins, seasonal decorations, or soft goods, should be reserved for the upper tiers.
Install the shelf supports, beams, or clips at your pre-determined heights. It is critical to ensure that the supports on all four upright posts are set to the exact same height level. Even a single slot deviation can cause the shelf to sit at an angle, leading to uneven weight distribution and potential structural failure. Double-check each level with your spirit level before placing the shelf panels onto the supports.
Once the primary shelves are in place, you can configure any optional modular add-ons that came with your system, such as pull-out drawers, vertical dividers, or side hanging hooks. Install these accessories strictly according to the manufacturer’s guidelines. Ensure that drawers slide smoothly without binding, which could indicate that the frame is slightly out of square.
When attaching side hooks or hanging organizers, remember that these alter the lateral balance of the rack. Avoid hanging heavy tools or bags on one side of the unit without balancing the load on the opposite side. Always refer to the product manual to verify if there are specific weight limits for individual accessories or side attachments.
Stability Checks, Anchoring, and Safety Boundaries
Before declaring your DIY project complete, you must conduct a thorough safety and stability assessment. Stand in front of the assembled rack storage shelf and perform a gentle wobble test by grasping the frame at shoulder height and applying light pressure. If the unit sways, rocks, or makes creaking noises, immediately inspect all joints, leveling feet, and fasteners to identify and tighten any loose connections.
Evaluating the need for wall anchoring is a critical step that should never be overlooked, especially for tall units. If your shelving unit is tall, narrow, or top-heavy, wall anchoring is highly recommended. This safety measure is particularly vital in households with young children or pets, who may attempt to climb the shelves, creating a severe tip-over hazard.
Many modular rack packages include anti-tip wall anchoring kits, which typically consist of brackets, straps, and wall anchors. Install these kits by securing one end to the metal frame of the rack and the other end directly into a wall stud or solid masonry wall. If you are mounting to drywall or concrete walls in a Singapore home, ensure you use the correct wall plugs and drill bits rated for that specific wall material.
Once the rack is anchored and in use, establish clear safety boundaries regarding weight limits. Visually inspect the shelves regularly for any signs of overloading, such as bowing shelf panels, leaning vertical posts, or buckling brackets. Never exceed the maximum load capacities printed on the product packaging or labels.
To maintain structural integrity, distribute weight evenly across the entire surface of each shelf rather than concentrating heavy items in the center. Concentrated loads can cause localized bending, which permanently weakens the shelf material. If you notice any permanent deformation or bowing, immediately unload the shelf and redistribute the items to lighter storage zones.
Maintenance and Reconfiguration Guidelines
A modular rack storage shelf is designed to last for years, but routine upkeep is necessary to preserve its structural integrity and appearance. Schedule periodic maintenance checks, ideally every six months, to inspect the unit. Vibrations from daily use, loading and unloading, or nearby foot traffic can gradually loosen fasteners and clips over time.
During these checks, use your tools to tighten any screws, bolts, or leveling feet that may have drifted. Inspect the joints of boltless systems to ensure the tabs remain fully seated in their slots. If your rack is equipped with casters, check that the wheel locks still function correctly and that the wheels spin freely without debris buildup.
When cleaning the surfaces of your shelving unit, always follow the specific care instructions provided on the product label. For powder-coated steel or plastic components, a soft cloth dampened with mild soapy water is usually sufficient. Avoid using harsh chemical cleaners, abrasive scrubbing pads, or solvent-based solutions, as these can strip away protective coatings, leaving the underlying metal vulnerable to rust and corrosion, particularly in humid climates.
One of the greatest advantages of a modular system is the ability to reconfigure or move it as your needs change. When you decide to adjust shelf heights or disassemble the unit, safety must remain your top priority. Never attempt to adjust shelf supports or remove components while items are still stored on the rack.
Always empty the entire unit completely before making any structural changes. Work systematically from the top down when disassembling, removing the upper shelves and accessories first to keep the unit stable. Adjust or move only one section at a time, ensuring the remaining frame remains balanced and secure throughout the reconfiguration process.
Frequently Asked Questions (FAQ)
Can I assemble a modular rack storage shelf alone?
Yes, smaller or medium-sized modular rack storage shelves can generally be assembled by a single person. However, for taller, wider, or heavier industrial-style units, having a second person to assist is highly recommended. A helper can hold the long vertical posts steady and keep the frame aligned while you secure the initial base beams and lower shelves. Attempting to balance tall, unbraced vertical posts alone can lead to the components tipping over, which may cause personal injury or damage your floors and the shelving parts.
How do I know if the floor can support the fully loaded shelf?
To determine if your floor can support a fully loaded rack storage shelf, you must calculate the total weight of the unit combined with the maximum weight of the items you plan to store. Compare this total weight against the load-bearing capacity of your floor. Standard residential properties are designed to support typical household loads, but heavy-duty industrial racks filled with dense items can exceed these limits. If you are planning to place exceptionally heavy racks on upper floors, in older buildings, or within a residential unit in Singapore, it is best to consult your building manager or a qualified structural professional to verify the floor’s load limits.
Community discussion
Share your experience or ask a question. Comments are reviewed before publication.