
Quick Answer: Which Shoe Rack Style Fits Your Closet?
Finding the right shoe rack depends on your closet’s physical layout, your storage habits, and whether you own or rent your home. The ideal setup keeps your footwear visible, accessible, and protected from dust and moisture without obstructing your daily routine.
A stackable shoe rack is the most versatile option for standard closets. It sits on the floor, requires no permanent installation, and can expand vertically as your footwear collection grows. This style is highly recommended for renters or anyone who prefers a modular, low-effort setup.
A wall-mounted shoe rack is best if you have limited floor space but plenty of unused vertical wall area. By lifting your shoes off the ground, you keep the closet floor clear and easy to clean. This style requires secure installation and is ideal for narrow walk-in closets or reach-in wardrobes with empty side walls.
Products mentioned in this guide
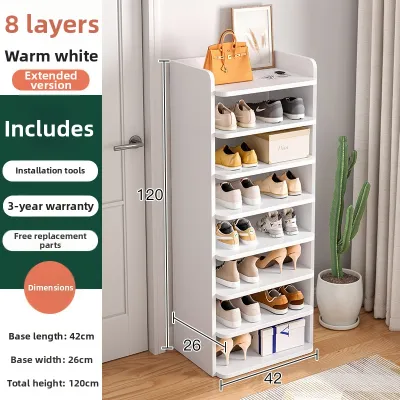
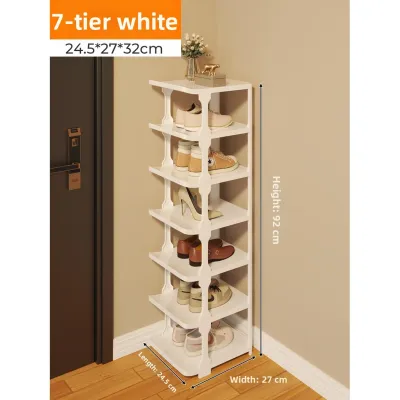
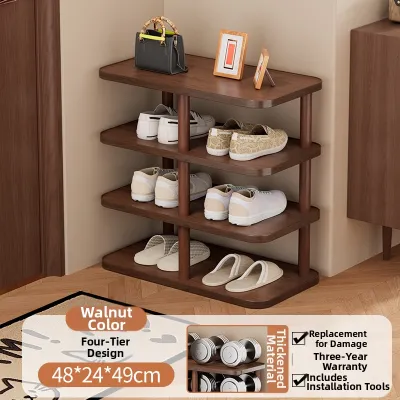
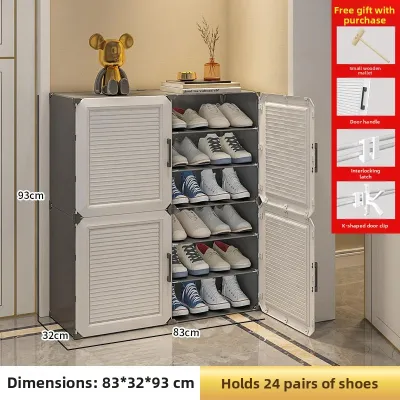
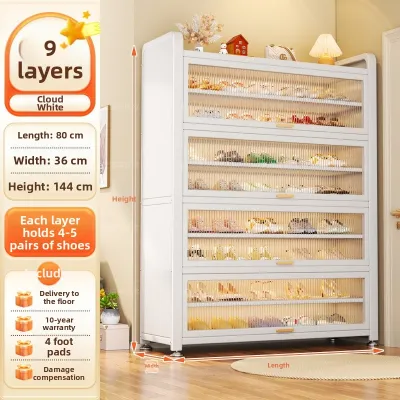
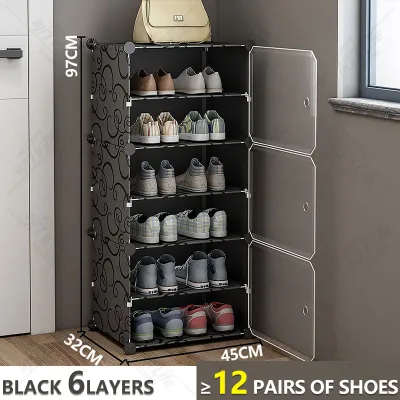

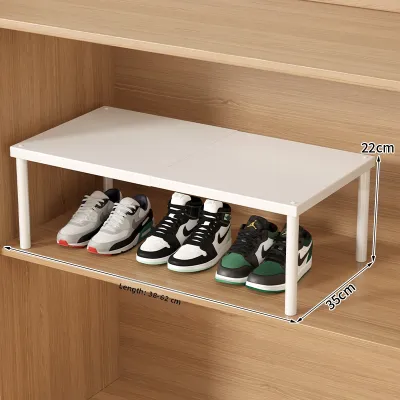
Prices are valid at publication and may change. Please refer to the product page for the latest price.
A rotating shoe rack, or carousel, works best in deep walk-in closets or underutilized corner spaces. It maximizes high-volume storage by utilizing depth rather than width, allowing you to access dozens of pairs with a simple spin. However, it requires a larger dedicated footprint and clear rotational clearance.
Before making a purchase, always verify your closet’s dimensions, wall construction, and door swing paths. Choosing a style that matches your specific structural constraints ensures your organizer remains stable, safe, and functional for years to come.
Stackable Shoe Racks: Flexible Floor Storage
Stackable shoe racks offer a highly customizable approach to wardrobe organization. These modular units typically consist of two-tier or three-tier frames that lock together vertically. Because you can add or remove tiers as needed, they adapt easily to changing storage requirements.

When planning for a stackable system, first evaluate the vertical clearance beneath your hanging clothes. If your closet has a single high rod, you can stack units higher. However, if you have double-hung rods, you must ensure the top tier of the rack leaves enough clearance so your shoes do not press against hanging shirts or trousers.
Stability is a critical factor when stacking multiple units. As you build upward, the center of gravity shifts, making the assembly more prone to wobbling. Look for units with secure interlocking joints, such as heavy-duty dowels, snap-lock clips, or steel nesting pins, rather than models that simply rest loosely on top of one another.
Weight distribution is your primary defense against tipping. Always place your heaviest footwear, such as work boots, leather dress shoes, and thick-soled sneakers, on the bottom shelves. Reserve the upper tiers for lightweight items like sandals, slippers, and canvas flats.
Adjustability within the individual tiers is also essential. Fixed-height shelves may accommodate standard sneakers but fail to fit high heels or ankle boots. Opt for designs with removable or slatted shelves that allow you to customize the height of specific levels to prevent crushing your footwear.
In humid climates, such as in Singapore, airflow is vital for preventing mold and mildew on leather and fabric shoes. Wire grid or slatted wooden shelves are excellent choices because they allow air to circulate freely around the soles and uppers, keeping your footwear dry and fresh.
Wall-Mounted Shoe Racks: Maximizing Vertical Space
Wall-mounted shoe racks are excellent space-saving solutions that transform empty walls into functional storage zones. By elevating your footwear, you open up valuable floor space for luggage, storage bins, or simply a cleaner, more spacious closet floor.
Before installing a wall-mounted rack, you must identify your wall type. In many modern apartments and flats, closet walls may consist of solid concrete, brick, or lightweight drywall. Solid masonry walls require masonry drill bits and heavy-duty wall plugs to support the weight, while drywall requires specialized toggle bolts or stud-finding tools to anchor the brackets securely.
Door clearance and walkway obstruction are common issues with wall-mounted designs. If your closet has sliding doors, the rack must not protrude past the door track. For walk-in closets with swing doors, ensure the rack is mounted far enough from the entrance so the door can open fully without striking your shoes.
The depth of the rack determines how far it extends into your walking path. Standard shoe shelves project about 30 to 35 centimeters from the wall. If your closet walkway is narrow, consider tilted or vertical shoe pockets, which hold shoes at an angle to reduce the overall depth profile to under 20 centimeters.
Weight capacity is a major safety consideration. A single pair of adult shoes can weigh between 0.5 and 1.5 kilograms. When multiplied by ten or fifteen pairs, the cumulative load on a wall-mounted bracket is substantial. Always check the manufacturer’s specified weight limits and distribute the load evenly across the brackets.
Regular maintenance of wall-mounted systems includes checking the mounting screws periodically. Over time, the repeated action of placing and removing shoes can cause minor vibrations that loosen wall anchors, especially in softer drywall. A quick tighten once or twice a year keeps the system secure.
Rotating Shoe Racks: High-Capacity Corner Storage
Rotating shoe racks, often designed as multi-tiered lazy Susans or vertical carousels, are the ultimate high-capacity storage solution for deep closets. They turn hard-to-reach corner spaces into highly accessible display areas, allowing you to view your entire collection with a quick spin.
The primary trade-off with a rotating rack is its footprint. Unlike flat shelves that sit flush against a wall, a rotating carousel requires a square or circular floor area that accommodates the full diameter of the shelves. This makes them less suitable for shallow reach-in closets but highly efficient for deep walk-in wardrobes.
Rotational clearance is crucial for smooth operation. You must leave several centimeters of free space around the entire circumference of the carousel. If the rack is placed too close to hanging clothes, side walls, or closet doors, the shoes will catch and drag during rotation, potentially damaging both the footwear and the rack.
The heart of any rotating rack is its bearing mechanism. Look for units equipped with heavy-duty steel ball bearings and a wide, weighted base. A narrow or lightweight base can cause the entire tower to wobble or tilt when spun, especially if the weight of the shoes is not perfectly balanced.
Organizing a rotating rack requires a strategic layout. Because you access the shoes from all sides, group your footwear by frequency of use or style per tier. Keep your daily wear on the middle shelves at waist height for easy access, while placing seasonal or formal footwear on the very top and bottom levels.
Cleaning a rotating rack is slightly more complex due to the moving parts. Dust and debris from shoe soles can accumulate in the rotating tracks over time, causing friction. Choosing a model with removable shelves or easy-to-wipe plastic trays simplifies maintenance and keeps the rotation smooth.
How to Measure Your Closet and Make the Final Choice
Selecting the perfect shoe rack requires precise measurements of your closet space. Guessing your wardrobe’s dimensions often leads to returned items, blocked doors, or unstable installations. Follow a systematic approach to measure your space before making a decision.
Start by measuring the available floor width, depth, and vertical height. Use a metal measuring tape for accuracy. When measuring the floor, do not measure from wall to wall; instead, measure between the baseboards, as these trim pieces can reduce your usable width by a few centimeters.
Next, account for all potential obstructions within the closet. Note the height of existing hanging rods and the length of the clothes currently hanging on them. Ensure your proposed shoe rack leaves at least 10 to 15 centimeters of clearance below hanging garments to prevent them from dragging on your shoes.
Evaluate the door swing path and internal lighting. Open your closet doors fully and measure the clearance. If you have bifold or sliding doors, measure the maximum opening width to ensure you can easily reach the sides of a stackable or wall-mounted rack. Ensure the rack will not block low-voltage lighting fixtures or floor vents.
Once you have your measurements, compare them against the product specifications. Always look for the “assembled dimensions” rather than the packaging dimensions. Allow for a safety margin of at least 2 to 3 centimeters on all sides to accommodate minor structural variations in your walls or floors.
Finally, match your shoe collection to the rack design. Count your shoes and categorize them by height and width. If you own mostly flat shoes and sneakers, a standard stackable rack with tight shelf spacing works well. If you have a diverse collection of boots, heels, and bulky trainers, look for adjustable or rotating options that offer variable shelf heights.
Frequently Asked Questions (FAQ)
Can I install a wall-mounted shoe rack on a hollow closet door?
Mounting a heavy shoe rack directly onto a hollow core closet door is generally not recommended. Hollow doors consist of thin wood veneer over a cardboard honeycomb core, which lacks the structural integrity to hold drywall anchors or standard wood screws under a heavy load. Over time, the weight of the shoes can cause the screws to pull out, damaging the door face.
If you must utilize door space, opt for lightweight over-the-door organizers that hang from metal hooks over the top of the door frame. These systems distribute the weight across the top edge of the door rather than relying on screws driven into the fragile hollow face. Alternatively, use a slim, floor-standing rack that rests against the door but transfers its weight to the floor.
How do I prevent stackable shoe racks from tipping over?
To prevent stackable shoe racks from tipping, always prioritize proper weight distribution. Place your heaviest shoes on the lowest shelves to lower the overall center of gravity. Avoid stacking units higher than the manufacturer’s recommended limit, as excessive height significantly increases the risk of instability.
For stacks exceeding three tiers or in homes with active pets, secure the rack to the wall using an anti-tip kit or a simple nylon strap anchored into a wall stud. If you are renting and cannot drill into the walls, place the rack flush against a corner to limit lateral movement, and ensure the interlocking connectors between tiers are fully engaged and locked in place.

Community discussion
Share your experience or ask a question. Comments are reviewed before publication.