
Choosing the right door hanger rack depends on your door’s physical structure, surface material, and your current housing tenure. Over-door racks are ideal for thick, solid doors and strict rental agreements where surface modifications are prohibited, as they require no adhesives or screws. Conversely, adhesive racks are better suited for smooth, non-porous surfaces like glass or metal doors, provided your lease allows surface contact and the door’s structural integrity can support the intended load. Making the wrong choice can lead to jammed doors, damaged paint, or fallen items, so understanding how each mounting type interacts with your home is essential.
Before purchasing any organizing accessory, evaluating your specific living situation prevents costly damage and ensures your storage setup remains stable. This guide breaks down the mechanical differences, material compatibility, and rental implications of both mounting styles to help you select the perfect space-saving solution for your home.
Understanding the Core Mounting Mechanisms
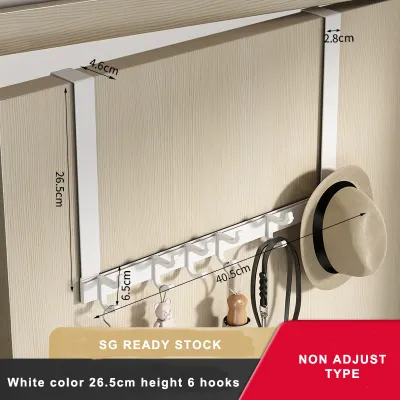
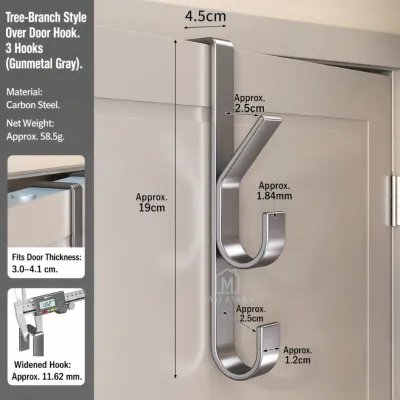
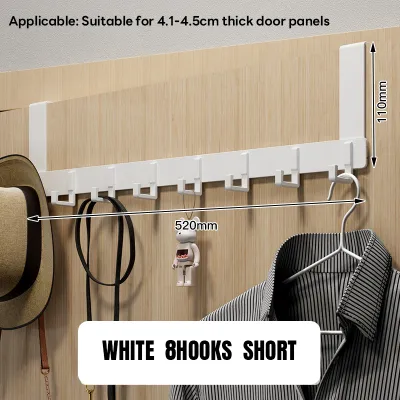
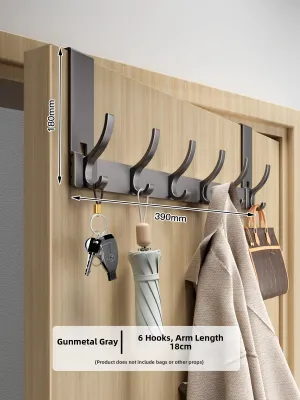
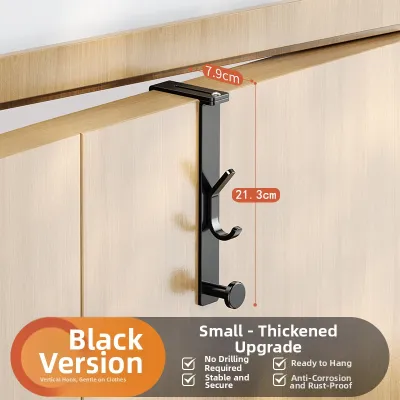
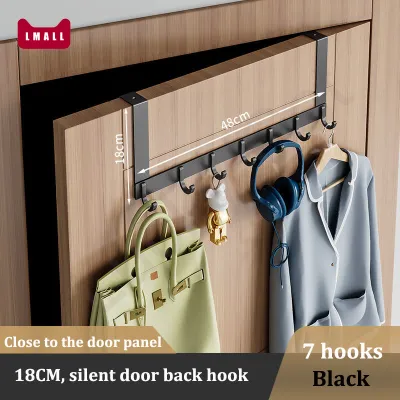
Over-door racks rely on gravity and mechanical leverage to stay in place. The bracket of the rack wraps over the top edge of the door, transferring the downward pull of your hanging items directly to the door’s structural frame. For this system to function smoothly, the bracket depth must closely match the door’s thickness, and there must be sufficient clearance between the top of the door and the frame. If the gap is too tight, the bracket will scrape against the frame every time you open or close the door, leading to friction damage and alignment issues.
Products mentioned in this guide
![[Ship in 24h]Behind Door Hanger Hooks No Drill Aluminum Clothes Hooks Wall Hook Over-The-Door Hooks/Hangers For HDB Door Main Door Bedroom Door Kitchen Door](https://img.lazcdn.com/g/p/f316264f7858512fb01a8a8222a3394f.jpg_400x400q80.jpg_.webp)
Prices are valid at publication and may change. Please refer to the product page for the latest price.
Adhesive racks, on the other hand, rely entirely on chemical bonding to resist gravity. These organizers use a flat backing plate coated with double-sided foam tape, acrylic adhesive, or silicone-based compounds that grip the face of the door. Instead of hanging from the top, they distribute the weight across the surface area of the backing plate. Because they do not require top clearance, adhesive racks can be placed at any height on the door, making them highly versatile for households with children or shorter reach requirements.
The fundamental trade-off between these two methods lies in structural hooking versus surface bonding. Structural hooking is highly reliable and immune to environmental factors like humidity, but it is physically constrained by door dimensions. Surface bonding offers complete placement freedom and a sleek look, but its strength is entirely dependent on the quality of the adhesive, the smoothness of the door surface, and the weight of the items you hang.
Matching the Rack to Your Door Material and Structure
Solid wood and composite doors are excellent candidates for over-door racks. These doors are heavy, dense, and highly stable, meaning they can easily support the weight of a fully loaded rack without warping or sagging. When choosing an over-door rack for a solid wood door, measure the door thickness carefully. Standard interior doors often measure between 35mm and 40mm in thickness; purchasing a bracket that is too wide will cause the rack to wobble and slide, which can scratch the wood finish over time.

Glass and metal doors, which are common in modern bathrooms, kitchens, and utility yards, require a different approach. Over-door brackets rarely fit these doors properly due to tight frame tolerances, and metal brackets sliding on glass pose a significant scratching or shattering risk. For these non-porous, incredibly smooth surfaces, adhesive racks are the superior choice. High-quality adhesives form an exceptionally strong bond with glass and powder-coated metal, providing a clean, drill-free storage solution that stays firmly in place.
Hollow core doors require careful handling due to their internal construction. These doors consist of a thin outer veneer of plywood or medium-density fibreboard (MDF) wrapped around a lightweight cardboard honeycomb core. Because the face of a hollow core door is thin and fragile, applying a heavy-duty adhesive rack to it is risky. If the rack is overloaded, the downward force can easily delaminate the veneer or tear the outer paint layer. For hollow core doors, an over-door rack is generally safer because it transfers the load to the solid wood rails at the very top of the door structure.
Navigating Rental Agreements and Property Rules
For renters, protecting the property’s fixtures is paramount to securing the return of the security deposit. Landlords during move-out inspections look closely at doors for scratches, chipped paint, and sticky residues. Before installing any door hanger rack, review your tenancy agreement to see if there are specific clauses banning surface modifications or adhesive hooks. Even if there is no explicit ban, you are still responsible for returning the property in its original condition, minus fair wear and tear.
While over-door racks do not require drilling or glue, they are not entirely risk-free for renters. The constant movement of the door causes the metal bracket to rub against the top edge of the door frame. Over several months, this friction can wear away the paint or lacquer, leaving bare wood or metal exposed. To prevent this, look for over-door racks that feature soft felt padding or silicone bumpers on the inside of the brackets, or apply your own protective tape to the door’s top edge before hanging the rack.
Adhesive racks present a different set of challenges during lease handovers. While they avoid the friction issues of over-door brackets, removing them can be incredibly difficult without pulling off patches of paint or leaving behind a stubborn, dark residue. If you choose an adhesive mount, ensure you have a clear plan for safe removal. Keep a checklist of necessary tools, such as a hairdryer to soften the glue and a plastic scraper, to ensure you can restore the door to its original state before the final inspection.
Weight Capacity and Daily Usage Considerations
Before deciding on a mounting style, take an honest inventory of what you plan to hang on the rack. If you need a place to store heavy backpacks, wet bath towels, winter coats, or multiple pairs of jeans, an over-door rack is the practical choice. Because the weight is supported by the door’s hinges and frame, these racks can handle substantial loads. Always check the manufacturer’s specified weight limit on the packaging rather than assuming a metal rack can hold unlimited weight, as the weak point is often the bracket’s resistance to bending.
Adhesive racks are best reserved for lightweight, daily-use items. Keys, lanyards, light jackets, dry hand towels, and empty tote bags are ideal for adhesive mounting. Exceeding the weight limit of an adhesive rack will result in a sudden failure, often taking a layer of paint or veneer down with it. When shopping, look for products that explicitly state their maximum load capacity on the label, and always err on the side of caution by staying well under that limit.
Environmental factors also play a massive role in adhesive longevity. In high-humidity environments, such as unventilated bathrooms or kitchens, moisture can slowly seep behind the adhesive backing. Over time, this moisture breaks down the chemical bonds, causing the adhesive to soften and slide down the door face. If you are installing a rack in a damp area, verify that the adhesive is rated for wet environments, or opt for an over-door model that is completely unaffected by ambient humidity.
Decision Framework: Which Door Hanger Rack Should You Choose?
To make the final decision simple, use this straightforward framework to match your home’s physical characteristics with the right product type.
Choose an over-door rack if:
- Your door is made of solid wood or sturdy composite material.
- You have at least 2mm of clearance at the top of the door frame (a quick way to check this is to see if a standard S$1 coin can slide smoothly between the closed door and the frame).
- You are renting and want to avoid any risk of adhesive residue or paint peeling on the door face.
- You plan to hang heavy items like loaded bags, thick coats, or multiple wet towels.
Choose an adhesive rack if:
- Your door is made of glass, metal, or is too thin to accommodate standard over-door brackets.
- The clearance gap at the top of your door is too tight to allow a metal bracket to pass without scraping.
- You want to position the hooks at a specific, lower height for easier access.
- You only plan to hang lightweight items and can verify that the door's paint or surface finish is stable and fully cured.
Before committing to either purchase, always measure your door’s thickness, test the top clearance, and inspect the surface texture. Taking these quick steps ensures your new door hanger rack remains a helpful organizational tool rather than a source of household damage.
Frequently Asked Questions (FAQ)
Can I use an adhesive rack on a freshly painted door?
No, you should avoid applying adhesive racks to freshly painted doors. While paint may feel dry to the touch within a few hours, the underlying layers take several weeks to fully cure and harden. Applying an adhesive backing during this curing phase traps moisture and solvents, preventing the paint from bonding properly to the door. If you apply weight to the rack before the paint is fully cured, the adhesive will pull the soft paint layer away from the wood, resulting in unsightly peeling and damage. Always check the paint manufacturer’s guidelines for full cure times, which typically range from two to four weeks, before applying any adhesive mounts.
How do I safely remove an adhesive rack without damaging the surface?
To remove an adhesive rack safely, you must soften the chemical bond before attempting to pull it off. Use a hairdryer on a medium-heat setting to apply warm air directly to the backing plate for two to three minutes. Once the adhesive becomes warm and pliable, take a piece of dental floss or a thin plastic card and gently slide it behind the rack, slicing through the softened adhesive layer from top to bottom. Do not yank or pry the rack outward, as this can tear the door’s paint or veneer. Once the rack is free, clean up any remaining sticky residue using a mild adhesive remover or warm, soapy water, testing a small, hidden area of the door first to ensure the cleaner does not discolor the finish.

Community discussion
Share your experience or ask a question. Comments are reviewed before publication.