
A standard narrow slim shoe rack typically holds between 6 and 18 pairs of shoes, depending on the number of tiers, the width of the unit, and the style of footwear you own. For ultra-slim tipping-bucket designs with a depth of just 15 to 24 centimeters, capacity is often limited to 2 or 3 pairs per compartment. Traditional open-slat slim racks with a width of 50 to 70 centimeters generally accommodate 2 to 3 pairs of adult shoes per shelf. Understanding how your specific footwear collection translates into physical dimensions is the key to choosing a storage solution that keeps your entryway organized without overcrowding your living space.
Understanding Slim Shoe Rack Dimensions and Tier Configurations
In small apartments and tight entryways, floor space is at a premium. A shoe rack is generally classified as “slim” or “narrow” when its depth measures between 15 and 30 centimeters, allowing it to sit comfortably in hallways without obstructing foot traffic. The width of these units typically ranges from 50 to 80 centimeters, making them ideal for placement behind doors, alongside wardrobes, or in recessed wall niches.
To maximize storage without expanding the physical footprint on your floor, slim shoe racks rely on vertical height. Adding tiers is the most effective way to scale up capacity. A three-tier unit occupies the exact same floor area as a five-tier unit, yet it offers significantly less storage. When floor space is limited, choosing a taller model with more vertical shelves is the most logical path to keeping your footwear organized.
Products mentioned in this guide
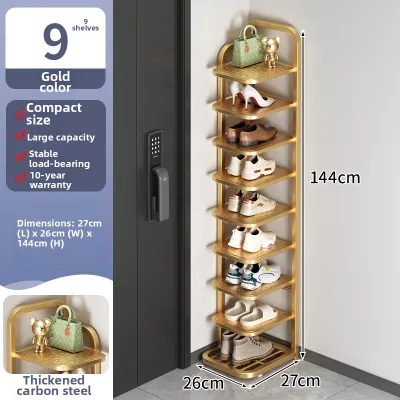
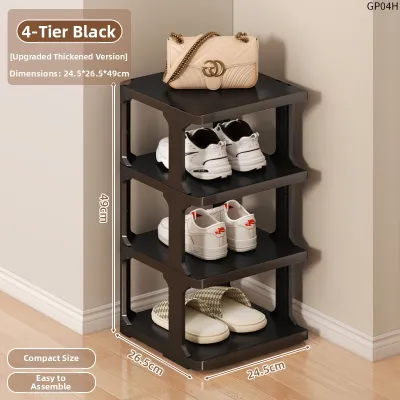
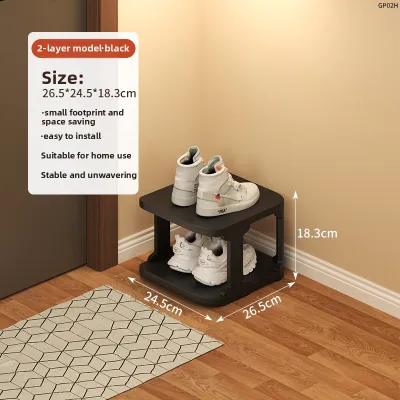
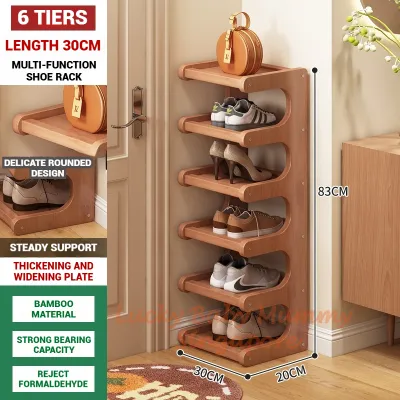
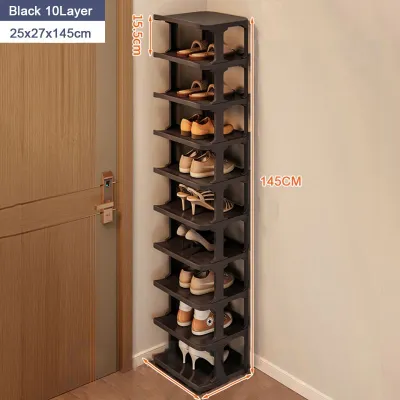
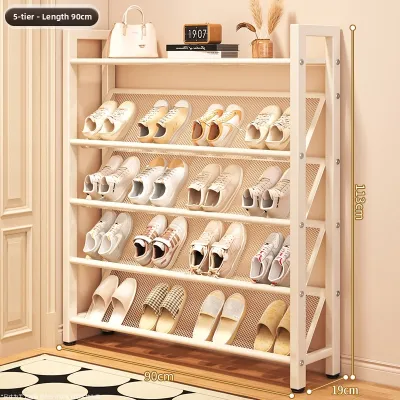
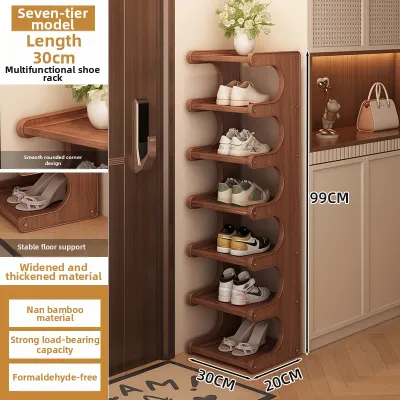
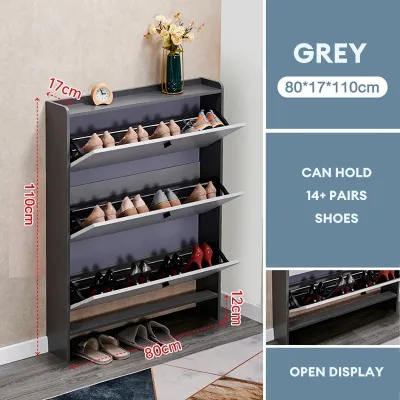
Prices are valid at publication and may change. Please refer to the product page for the latest price.
The internal mechanism of the shelves also plays a critical role in determining usable capacity. Traditional flat shelves require a depth of at least 30 centimeters to accommodate average adult shoes placed straight inside. To bypass this limitation, many slim designs feature slanted shelves or drop-down tipping compartments. These configurations tilt the shoes at an angle, reducing the required cabinet depth to as little as 17 centimeters while still allowing standard shoes to fit securely.
Calculating Realistic Shoe Capacity by Width and Depth
When browsing product listings, you will often see maximum capacity ratings that seem highly generous. Manufacturers frequently calculate these numbers using small footwear, such as children’s shoes, flat sandals, or narrow plimsolls. If your wardrobe consists of chunky sneakers, leather brogues, or platform heels, the actual number of pairs you can fit will be lower than the advertised limit.

To calculate a realistic capacity for your household, start by measuring the width of your most frequently worn shoes. An average pair of men’s shoes requires about 20 to 24 centimeters of horizontal space, while women’s flats or heels typically need 16 to 20 centimeters. Divide the usable interior width of the shoe rack shelf by these measurements to determine how many pairs will realistically fit side-by-side on a single tier.
Shelf depth also dictates how you must arrange your footwear. If you purchase a rack with a depth of less than 28 centimeters and it has flat, fixed shelves, larger shoes may not fit facing forward. In such cases, you might need to place shoes sideways, stagger them with one shoe facing forward and the other backward, or overlap them slightly. While these techniques help shoes fit, they also reduce the total number of pairs you can store on each shelf.
The design of the back of the rack is another factor to consider. Open-back shoe racks offer a bit of flexibility, as they allow the heels or toes of larger shoes to overhang slightly at the back or front without falling off. Enclosed cabinets, on the other hand, have rigid back panels that offer zero flexibility. If a shoe is even half a centimeter longer than the internal cabinet depth, the cabinet door will not close properly.
Space Planning: Measuring Your Entryway and Clearance Needs
Before purchasing any slim furniture, a precise measurement of your target area is essential. Begin by measuring the available width, height, and depth of the wall space where the rack will stand. Use a reliable measuring tape and record the dimensions in centimeters to match standard product specifications. Do not rely on visual estimation, as even a discrepancy of one centimeter can prevent a door from opening or block a walkway.
Pay close attention to architectural details that might interfere with the installation. Baseboards and skirting boards along the bottom of the wall often prevent slim furniture from sitting completely flush against the wall. If a shoe rack cannot sit flush, it will protrude further into the room than its specified depth, potentially blocking nearby doors or drawers. Measure the height and thickness of your skirting boards to ensure the unit can accommodate them, or look for designs with a baseboard cutout.
Maintaining adequate walking clearance is vital for safety and comfort, especially in narrow apartment corridors. As a general rule, aim to leave at least 90 centimeters of clear walkway in front of the shoe rack to allow people to pass comfortably. If your entryway is particularly tight, ensure that opening the cabinet doors or tipping drawers does not completely block the passage or create a tripping hazard during busy morning routines.
Finally, remember to plan the delivery and assembly path for your new furniture. If you are purchasing a tall, fully assembled multi-tier unit, verify that it can fit through your main entrance, apartment lift, and any tight corners in your hallway. For flat-packed items, ensure you have enough floor space near the final location to safely assemble the unit without damaging your walls or existing decor.
Stability and Weight Limits for Narrow Designs
Because slim shoe racks have a very narrow footprint and often extend vertically, they naturally possess a high center of gravity. This physical characteristic makes them prone to wobbling or tipping forward, especially when fully loaded with heavy footwear. Understanding how to manage this risk is crucial for maintaining a safe home environment.
Always check the manufacturer’s specified weight limits for both individual shelves and the entire unit. Overloading a slim rack can cause shelves to sag, joints to loosen, or the entire structure to buckle. Place heavier items, such as boots and leather dress shoes, on the bottom shelves to keep the center of gravity as low as possible. Lighter footwear, like slippers and sandals, should be reserved for the upper tiers.
Securing the unit to the wall is highly recommended for any slim shoe rack taller than one meter. Most manufacturers include wall-anchoring hardware, such as safety straps or L-brackets, with their products. Installing these anchors is a simple process that prevents accidental tip-overs, which is particularly important in households with active pets or young children who might attempt to climb or pull on the furniture.
The materials used in the construction of the rack also influence its overall stability. Heavy materials like solid wood or powder-coated steel provide a sturdier base and are less likely to sway than lightweight plastic or thin engineered wood. If you choose a lightweight model, ensure it features adjustable leveling feet to compensate for uneven flooring, which is a common cause of minor wobbles.
Common Sizing Mistakes to Avoid Before Buying
One of the most frequent mistakes buyers make is relying solely on stylized product photos. Online listings often showcase shoe racks styled with pristine, low-profile footwear arranged in perfect, staggered patterns to make the unit appear more spacious than it is. Always base your decision on the written dimensions and your own measurements rather than the visual representation in promotional images.
Another common oversight is ignoring the clearance required for nearby doors and architectural features. A slim shoe rack placed too close to an entrance can prevent the front door from opening fully, or it might block access to light switches and electrical outlets. Take the time to map out the swing arc of all nearby doors to ensure they can move freely without striking the furniture.
Purchasing a fixed-tier rack without considering future needs can also lead to frustration. Your shoe collection is likely to change over time, and seasonal footwear may require different storage heights. Opting for a model with adjustable or removable shelves provides the flexibility to adapt the storage space as your needs evolve, saving you from having to buy a replacement unit later on.
Lastly, always double-check the units of measurement used in product listings. Some manufacturers list dimensions in millimeters, while others use centimeters or inches. Misinterpreting these units can lead to ordering a product that is far too large or too small for your space. Verifying the numbers and converting them to your preferred unit of measurement before finalizing your purchase will prevent the hassle of returning a bulky item.
Frequently Asked Questions (FAQ)
Can a slim shoe rack hold heavy winter boots or high heels?
Standard slim shoe racks are primarily designed for low-profile footwear like sneakers, flats, and sandals. Taller items, such as heavy boots or high heels, often require more vertical clearance than a standard fixed tier provides. To accommodate these styles, look for a slim rack with adjustable or removable shelves, which allows you to customize the height of individual compartments. Additionally, high heels with thin stilettos can be unstable on wire or slatted shelves; placing them on solid, flat shelf inserts or choosing a solid-surface rack will prevent them from tipping over or falling through the gaps.
Is it safe to place a narrow shoe rack behind a door?
Placing a narrow shoe rack behind a door can be a highly effective way to utilize dead space, but it requires careful planning. You must measure the exact clearance between the wall and the door when it is fully opened to ensure the rack does not obstruct the door’s movement. If the door swings open forcefully, it can strike the shoe rack, causing damage to the wall, the door handle, or the shoes themselves. To prevent this, install a heavy-duty door stop to limit the door’s swing, and ensure the shoe rack is securely anchored to the wall so it remains stable even if minor contact occurs.

Community discussion
Share your experience or ask a question. Comments are reviewed before publication.