
Determining the right size for a kitchen island table involves balancing your culinary habits with the physical boundaries of your floor plan. In Singapore’s residential layouts, where space is highly optimized, a successful kitchen island must provide functional surface area without obstructing daily movement. The key to finding this balance lies in understanding standard clearance zones, evaluating your existing layout, and selecting dimensions that complement your household’s workflow.
Before committing to a specific island design, you must assess how the addition will affect your kitchen’s ergonomics. A well-placed island table serves as a versatile hub for food preparation, casual dining, and storage. However, an oversized island can quickly turn a high-traffic kitchen into a cramped, frustrating space. By taking precise measurements and planning for realistic clearance margins, you can integrate this desirable feature seamlessly into your home.
Assessing Your Kitchen Layout and Available Space
Evaluating your overall kitchen shape is the first step in determining if an island table is a viable addition. Open-concept layouts and L-shaped kitchens naturally accommodate islands because they offer wide, flexible floor areas. In contrast, U-shaped or enclosed galley kitchens often present spatial challenges, as the parallel counters already consume a significant portion of the room’s width. The goal is to preserve an efficient work triangle—the path between your sink, refrigerator, and stovetop—ensuring the island does not force you to take unnecessarily long routes during meal preparation.
Products mentioned in this guide



Prices are valid at publication and may change. Please refer to the product page for the latest price.
Fixed structural obstacles require careful identification early in the planning phase. In many Singapore apartments, load-bearing walls, structural columns, plumbing stacks, and gas pipes cannot be relocated due to building regulations. You must also account for the positions of windows and electrical distribution boards. Designing an island table around these permanent fixtures requires a clear understanding of where your utilities run and how much physical space must remain accessible for maintenance.
Door swings and appliance clearances are critical factors that are easily overlooked on a two-dimensional floor plan. You must measure the swing arcs of your refrigerator doors, oven doors, dishwasher trays, and lower cabinet drawers. To prevent collisions and ensure safe operation, the island table must sit far enough away to allow these appliances to open fully while still leaving room for a person to stand in front of them. A tight clearance can make loading a dishwasher or removing hot trays from an oven highly inconvenient and potentially hazardous.
Finally, map out the primary traffic pathways through your kitchen. The kitchen is often a thoroughfare connecting the entryway, dining area, or service yard. An island table should guide foot traffic smoothly around the cooking zone rather than acting as a physical barrier. If family members frequently walk through the kitchen while someone is cooking, the pathways must be wide enough to prevent accidental bumps and disruptions.
Standard Kitchen Island Table Dimensions and Clearances
Walkway and work aisle clearances dictate how comfortable your kitchen will feel during daily use. For a single cook, a minimum clearance of 900 mm between the island and opposing countertops is recommended to allow for easy movement and bending. If your household frequently has multiple people cooking or preparing food simultaneously, aim for a clearance of 1050 mm to 1200 mm. This extra space allows two people to pass each other comfortably without squeezing or turning sideways.

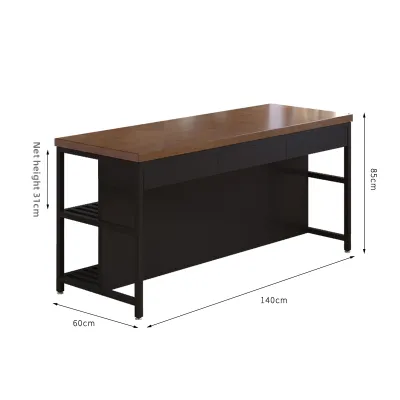
Standard depth and height considerations vary depending on how you plan to use the island table. If the island is purely for food preparation and storage, a standard height of 850 mm to 900 mm is ideal, matching the height of your perimeter countertops. For casual dining, you can choose between counter-height seating (matching the 900 mm prep height) or bar-height seating (typically 1000 mm to 1050 mm). If you plan to include seating, ensure the island top has an overhang depth of at least 300 mm to 400 mm to provide comfortable knee room for those sitting on stools.
Integrating appliances into your island table introduces additional dimension requirements. A basic prep island can be as narrow as 600 mm, but adding a sink or a cooktop requires a deeper footprint. For safety and functionality, a cooktop island needs at least 300 mm of clearance on either side of the appliance and a safe buffer zone behind it to prevent hot oil splatters from reaching people sitting or walking nearby. Always consult the manufacturer’s installation manuals to verify the exact ventilation and utility margins required for built-in appliances.
Adapting Island Sizes for HDB and Condominium Kitchens
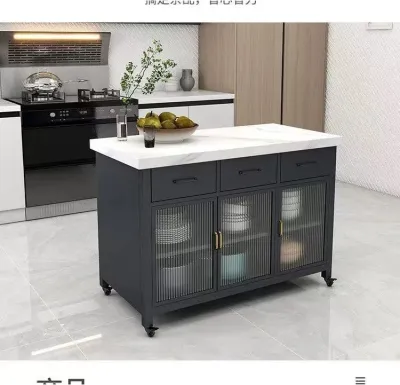
Compact HDB kitchens require creative spatial strategies to make an island table work. When a standard fixed island is too large for the floor plan, a narrow-profile island table with a depth of 450 mm to 500 mm can offer valuable extra prep space without choking the walkway. Alternatively, consider a mobile island table equipped with heavy-duty, lockable castors. This allows you to roll the unit against a wall when hosting guests or clear the center of the room when undertaking heavy cleaning.
In modern condominium layouts, open-concept kitchens are common, making the island table an excellent tool for visual zoning. In these spaces, the island acts as a functional boundary that separates the active cooking zone from the dining or living area. A multi-functional island table can feature a raised tier on the living room side to conceal kitchen clutter from view, while maintaining a standard prep height on the kitchen side. This dual-level design helps maintain a tidy aesthetic in open-plan homes.
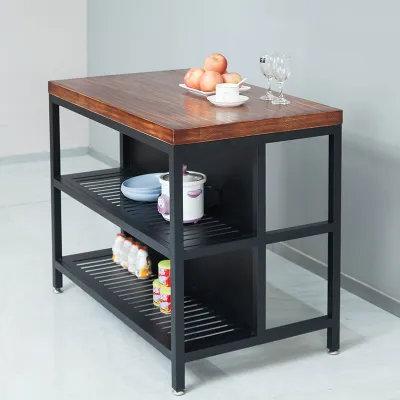
Balancing storage needs with visual weight is essential when selecting an island for smaller spaces. A solid, block-like island with closed cabinetry down to the floor provides maximum storage but can make a small kitchen feel visually heavy and cramped. To maintain an airy, spacious feel, consider an island table with an open metal frame, slatted lower shelving, or a leg-supported design. This allows light to pass through, reducing the visual impact of the furniture while still delivering the tabletop surface you need.
Measuring and Planning Your Custom Island Table
Executing a precise measurement plan is crucial before purchasing a ready-made island table or commissioning a custom build. Begin by measuring the total length and width of your kitchen floor area using a reliable steel tape measure. Be sure to measure from the skirting boards rather than the bare walls, as skirting can reduce your usable floor width by up to 20 mm on each side. Additionally, check the ceiling height and note the positions of any low-hanging beams, light fixtures, or ceiling fans that could interfere with the island or overhead clearance.
Mapping out the proposed island table in your actual kitchen is a highly effective way to test the flow of the space. Use painter’s tape to outline the exact footprint of the island on your kitchen floor, or assemble flat cardboard boxes to mimic the physical volume of the unit. Leave this mockup in place for several days. Walk around it, practice opening your refrigerator and oven doors, and simulate your typical cooking routines to ensure the planned clearances feel comfortable and practical in real life.
Before finalizing your plans, verify the structural support, flooring transitions, and utility routing requirements. If you are planning a heavy stone countertop, such as quartz or granite, ensure your cabinet base is structurally reinforced to bear the weight safely. If your island will feature a sink or electrical outlets, consult a qualified contractor to determine if your floor screed depth allows for the concealment of plumbing pipes and electrical conduits. Finally, measure your home’s entryways, lift doors, and stairwells to confirm that the fully assembled island table or its largest components can be safely delivered into your kitchen.
Frequently Asked Questions (FAQ)
Can I add an island table to a closed galley kitchen?
Closed galley kitchens are generally too narrow to accommodate a permanent central island table while maintaining the necessary 900 mm clearance on both sides. For these layouts, a slim mobile kitchen trolley or a wall-mounted fold-down table is a more practical alternative, providing temporary workspace that can be tucked away when not in use.
What is the minimum width for an island table with seating?
To accommodate seating comfortably, the island table should have a depth of at least 900 mm to allow for a 300 mm knee overhang. Along the length of the island, allocate at least 600 mm of width per person to ensure diners have sufficient elbow room and can sit comfortably without crowding.
Do I need to match the island table height to my existing countertops?
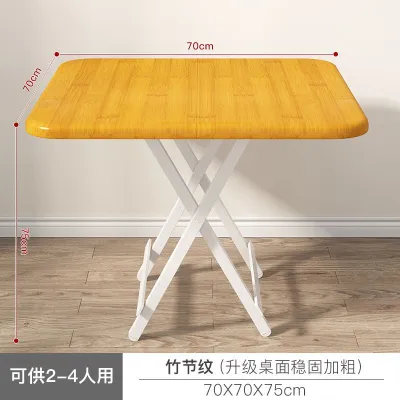
You do not have to match the heights, though doing so creates a cohesive look and a continuous surface for food preparation. If you prefer a multi-functional setup, a split-level island table with a 900 mm high prep section and a 750 mm high attached dining table offers distinct zones for cooking and eating.

Community discussion
Share your experience or ask a question. Comments are reviewed before publication.