
Finding the right wardrobe hanging rack for a built-in wardrobe in an HDB flat requires looking beyond standard external dimensions. While a typical built-in wardrobe has an external depth of 600mm, the actual internal clearance is often smaller due to sliding door tracks, back panels, and structural variations. To select a rack that maximizes storage without causing doors to jam or garments to crumple, you must base your choice on the precise internal dimensions of your specific wardrobe cavity.
How to Measure Your HDB Built-In Wardrobe Interior
To establish the maximum allowable dimensions for your wardrobe hanging rack, start by measuring the internal cavity of your built-in wardrobe. Built-in furniture in Singapore homes often contends with minor structural irregularities, meaning a single measurement is rarely sufficient. Use a reliable metal tape measure to record the internal width, depth, and height at three distinct points: the top, the middle, and the bottom of the compartment. Cabinet panels can bow or tilt slightly over time, and taking multiple measurements ensures you identify the narrowest point, which will dictate the maximum size of your rack.
Next, inspect the interior for physical obstructions that could interfere with the rack or the garments hanging from it. Look out for internal LED lighting fixtures, door hinge mechanisms, protruding drawer fronts, shelf supports, or structural pillars. For example, soft-close hinges on swing doors often protrude several centimeters into the cabinet space when the doors are open. If your wardrobe has internal drawers, ensure the hanging rack is positioned high enough so that hanging clothes do not drape over the drawer fronts, preventing them from opening.
Products mentioned in this guide

Prices are valid at publication and may change. Please refer to the product page for the latest price.
Finally, record the clear opening width of the wardrobe doors. This is the actual physical space available when the doors are fully opened or slid to one side. Even if the internal cabinet is wide, a narrow door opening can make it difficult to maneuver a long, rigid wardrobe hanging rack into place during installation. Knowing this clearance ensures you can physically pass the rack components into the wardrobe cavity without damaging the surrounding laminate or carpentry.
Critical Dimensions for Selecting a Wardrobe Hanging Rack
When evaluating product specifications for a wardrobe hanging rack, matching the rack’s physical dimensions to your measured interior space is crucial to avoid a loose fit or an impossible installation. The first dimension to analyze is the width. The rack length should never match the internal width of your wardrobe exactly. Instead, leave a small tolerance gap of at least 10mm to 20mm on both sides. This gap provides the necessary clearance to insert the rod and comfortably mount the brackets to the side panels. If you are using a wall-to-wall rod, ensure the mounting brackets themselves are factored into the total width calculation.

Depth is the next critical dimension, particularly for ensuring that clothes hangers sit fully inside the wardrobe. Standard clothes hangers require a minimum internal depth of 500mm to hang straight without brushing against the back panel or blocking the front doors. If your built-in wardrobe uses sliding doors, the tracks typically consume 75mm to 100mm of internal depth. Consequently, a wardrobe with a 600mm external depth might only have 500mm of usable internal depth. If your hanging rack is positioned too close to the front, hangers will prevent sliding doors from bypassing each other or stop hinged doors from latching.
Height calculations should be based on the specific garments you plan to hang rather than generic default standards. Measure your longest garments, such as maxi dresses, long coats, or trousers hung by the cuff, from the top of the hanger hook to the bottom hem. A single hanging zone typically requires a vertical clearance of 1600mm to 1800mm for long items, while double hanging zones for shirts and folded trousers require approximately 1000mm of vertical space per rod. Factoring in the thickness of the hanger hook and the mounting bracket drop ensures your clothes will not drag on the wardrobe floor or lower shelves.
Matching Rack Types to Your Available Space
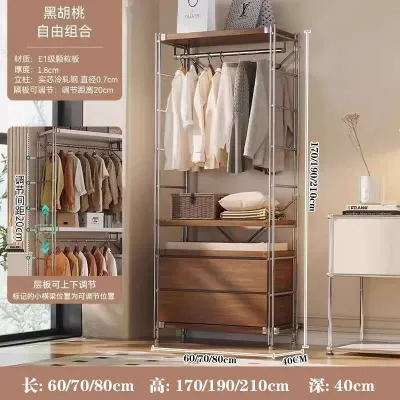
Selecting the right wardrobe hanging rack configuration depends on your wardrobe’s layout, your storage goals, and whether you are permitted to make permanent modifications to the carpentry. Fixed single or double rods are the most common and reliable option for dedicated hanging zones. These rods are permanently screwed into the side panels or the underside of an upper shelf, offering excellent stability and high load capacity. They are ideal if you have a permanent wardrobe layout and want a straightforward, durable solution for heavy items like winter coats or suits.
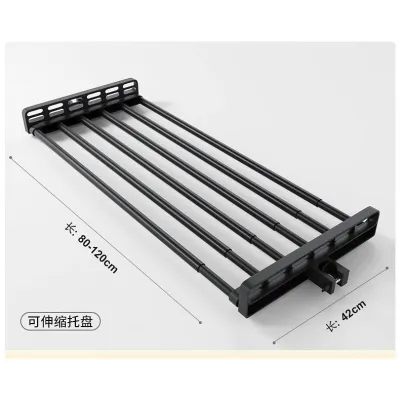
For high-ceilinged built-in wardrobes or deep overhead compartments, pull-down or telescopic racks offer superior spatial efficiency. A pull-down rack features a hydraulic or pneumatic arm mechanism that allows you to pull the entire hanging rod down to an accessible height, then swing it back up into the unused upper reaches of the wardrobe. This maximizes vertical space that would otherwise be unreachable without a step stool. Telescopic or adjustable-width racks are also highly versatile, allowing you to expand or contract the rod to fit exact cabinet widths without the need for precise cutting.
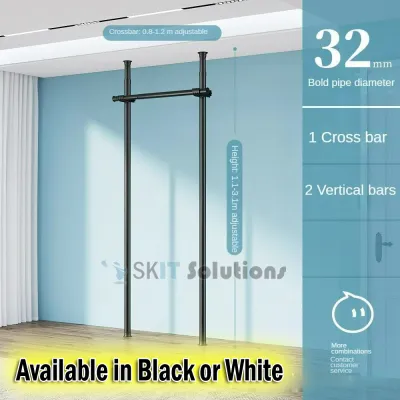
If you are renting your home or prefer not to drill permanent holes into your built-in carpentry, tension or friction-fit rods provide a non-invasive alternative. These racks rely on internal spring mechanisms or threaded ends to create outward pressure against the wardrobe’s side panels, holding the rod in place. While highly convenient and easy to reposition, tension rods generally support less weight than screw-mounted options. They are best suited for lightweight garments, temporary setups, or organizing smaller accessories.
Installation Clearances and Common Sizing Mistakes
To ensure a smooth installation and long-term functionality, you must account for operational clearances and avoid common measurement pitfalls. One of the most frequent mistakes is failing to check door swing or sliding track clearances. For hinged doors, ensure the hanging rack is set back far enough so that the shoulders of hung garments do not press against the door panels, which can cause the doors to pop open or strain the hinges. For sliding doors, verify that the hangers do not protrude into the path of the sliding panels, as constant friction can damage both the doors and your clothing.
Another common error is measuring only the front opening of the wardrobe. Built-in wardrobes, especially those installed against concrete walls in HDB flats, may have slight structural variations where the back of the cabinet is narrower than the front. Always use your narrowest measured width and depth when purchasing a wardrobe hanging rack. If you purchase a rigid metal rod based solely on the front opening measurement, you may find it impossible to fit the rod into the rear mounting position.
Finally, always verify the weight capacity of the hanging rack and the structural integrity of your wardrobe’s side panels before loading it with clothes. Standard melamine or laminate-faced particleboard panels used in many built-in wardrobes can crumble or strip if subjected to excessive weight or if the wrong mounting screws are used. Ensure you use appropriate wood screws that penetrate deep enough into the side panels to secure the brackets without piercing through to the adjacent compartment. If you plan to hang heavy winter wear or a large volume of garments, consider adding middle support brackets or reinforcing the mounting points to prevent the rod from sagging or pulling free from the cabinet walls.
Frequently Asked Questions (FAQ)
Can I use a tension rod inside a built-in HDB wardrobe?
Yes, you can use a tension rod inside a built-in HDB wardrobe, but you must exercise caution regarding the panel material and weight limits. Tension rods rely on outward pressure to stay in place, which can exert significant force on the wardrobe’s side panels. If your built-in wardrobe is constructed from thin melamine or hollow-core panels, excessive tension can cause the panels to bow, crack, or separate from the back wall. To prevent damage, check the manufacturer’s weight limit for the tension rod and avoid over-tightening. It is also helpful to place small rubber pads or adhesive protectors between the rod ends and the wardrobe walls to distribute the pressure and prevent scratches.
How much space should I leave between double hanging rods?
When planning a double hanging rod setup, you should calculate the vertical spacing based on your actual garments rather than relying on generic rules. Measure the length of your typical shirts, jackets, or folded trousers while they are on their hangers, adding about 50mm to 100mm of clearance below the hem of the upper garments so they do not drape over the lower rod. Generally, a double-hang configuration requires a minimum total vertical clearance of 2000mm, allowing roughly 1000mm of space for each level. Remember to account for the thickness of the hangers and the physical drop of the mounting brackets, as these components can reduce the usable hanging height by several centimeters.

Community discussion
Share your experience or ask a question. Comments are reviewed before publication.