
Selecting the right 3M Bumpon depends on matching the furniture’s weight, the shape of its contact points, and your primary goal—whether that is stopping a heavy cabinet from sliding, cushioning a slamming drawer, or leveling a wobbly table. By choosing the correct profile (such as hemispherical, cylindrical, or flat-top) and verifying the dimensions against your furniture’s feet, you can ensure long-lasting protection for both your household items and your floors.
In Singapore’s warm and humid climate, selecting the right adhesive backing and preparing the surface properly is also essential to prevent the bumpers from shifting over time. Whether you are protecting a delicate S$2,000 teak sideboard or silencing noisy kitchen cabinets, understanding how these small polyurethane protectors function will help you make the right choice.
Identify Your Primary Furniture Protection Goal
Before purchasing any adhesive protectors, you must define what you want them to achieve. Different furniture items place different demands on a bumper, and a variant that works perfectly for a lightweight cabinet door might fail when applied to a heavy dining table.
Products mentioned in this guide
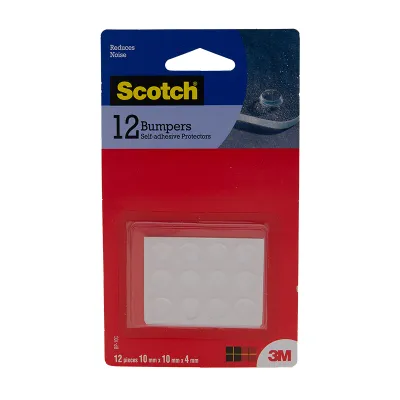
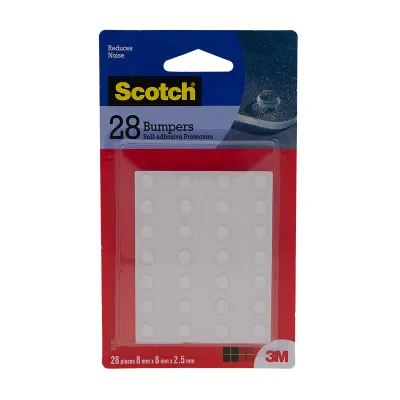
![[SG] Scotch™ Bumpons Circle - 10mm 12/P [EVERGREEN STATIONERY]](https://img.lazcdn.com/g/p/512c50a2e8841f35eb1bd5f00735382e.png_400x400q80.png_.webp)
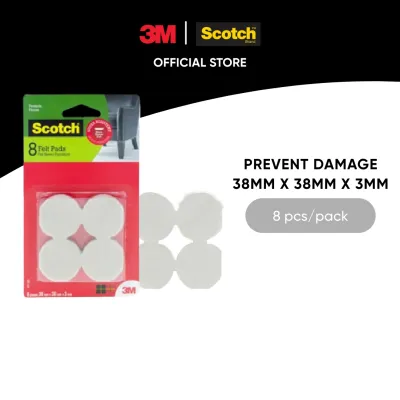
Prices are valid at publication and may change. Please refer to the product page for the latest price.
If your main goal is slip prevention, you need a bumper with high surface friction. Heavy items like desktop organizers, glass tabletops, or small kitchen appliances tend to shift when used. A high-friction polyurethane bumper grips the underlying surface, keeping the item securely in place without the need for mechanical fasteners.
For moving parts like cabinet doors, wardrobe doors, and drawers, the primary goal is impact cushioning and noise reduction. Every time a drawer slams, it sends vibrations through the furniture frame, which can loosen joints over time. A soft, elastomeric bumper absorbs this kinetic energy, dampening the sound and protecting the wood or laminate finishes from chipping.
Leveling is another common requirement, especially on slightly uneven tiled or vinyl floors. If a side table wobbles, placing a slightly thicker bumper on the shorter leg can stabilize the piece. However, you must assess how often the furniture is moved. Frequently dragged items, like dining chairs, are not ideal candidates for adhesive bumpers, as the lateral shear force will eventually peel the adhesive off. For static or semi-static furniture, these bumpers provide an excellent barrier against surface scratching.
Select the Right Shape for Your Furniture Feet
The physical design of your furniture’s contact points dictates the shape of the bumper you should select. Matching the bumper’s profile to the foot of the furniture ensures maximum adhesion and structural support.

Hemispherical shapes feature a rounded dome profile. These are highly effective for point contact and sliding prevention on small or rounded feet. Because the contact area is concentrated at the top of the dome, they offer excellent sound-dampening properties, making them the standard choice for cabinet doors, lid closures, and lightweight decorative items. The rounded shape also allows for slight angles of contact without compromising performance.
Cylindrical or flat-top shapes have a flat upper surface and straight sides. This profile distributes weight much more evenly across the entire surface of the bumper. If you are supporting heavier static loads, such as a heavy printer, a desktop monitor, or a solid wood chest, cylindrical bumpers are highly recommended. The flat top maximizes the contact area with both the furniture and the floor, preventing the bumper from compressing unevenly or sliding out of place under pressure.
For irregular edges, wide frames, or recessed areas inside drawer slides, custom or die-cut shapes (such as square or hexagonal profiles) are highly useful. These shapes can be aligned flush against straight edges, providing a clean, integrated look. They are particularly useful for modern, minimalist furniture where visible round bumpers might disrupt the clean lines of the design.
Calculate the Correct Size and Thickness
Choosing the correct dimensions involves balancing the weight of the furniture with the physical footprint of its legs. A bumper that is too small will fail under heavy loads, while one that is too large will look unsightly and peel off easily.
First, evaluate the weight of the furniture item. Heavier pieces require thicker and wider bumpers to distribute the load effectively. If a bumper is too thin for a heavy sideboard, the weight will over-compress the polyurethane material, stripping away its cushioning ability and potentially allowing the furniture to scratch the floor. Always check the manufacturer’s specifications for the recommended load capacity per bumper to ensure they can handle the weight.
Next, measure the diameter or width of the furniture foot. The bumper’s diameter should be slightly smaller than the foot’s surface area to prevent any visible overhang. If a bumper extends past the edge of the leg, it creates a lip that easily catches on dust, cleaning cloths, or vacuum cleaners. Over time, this constant snagging will weaken the adhesive bond and cause the bumper to peel off.
For wide bases or long rectangular legs, you must decide between using multiple smaller bumpers or a single large one. While a single large bumper might seem convenient, placing multiple smaller bumpers spaced evenly along a wide base often provides superior stability. This configuration prevents the furniture from rocking and ensures that the adhesive load is distributed evenly, reducing the risk of a single point of failure.
Ensure Surface Compatibility and Safe Application
Even the highest-quality adhesive bumper will fail if the application surface is not prepared correctly. Proper installation ensures a long-lasting bond that resists shifting, even under consistent pressure.
Begin by thoroughly cleaning the application surface. Dust, oils, and manufacturing residues will prevent the adhesive from bonding with the furniture material. Wipe the area with a mild solvent, such as isopropyl alcohol, using a clean, lint-free cloth. Allow the surface to dry completely before proceeding. In Singapore’s humid climate, ensuring the surface is entirely free of moisture is critical for achieving a strong initial bond.
When applying the bumper, peel it from its protective liner carefully, taking care not to touch the adhesive backing with your fingers, as skin oils can weaken the glue. Align the bumper over the designated spot and press down firmly. Apply steady, direct pressure for several seconds to activate the pressure-sensitive adhesive. For the best results, avoid moving the furniture or placing its full weight on the bumpers immediately; allow the adhesive to cure according to the manufacturer’s instructions.
Eventually, you may need to replace worn bumpers. To prevent damaging delicate wood veneers, paint, or lacquer finishes, never rip a bumper off forcefully. Instead, use a gentle peeling motion, starting from one edge. If any sticky residue remains on the furniture, do not use harsh abrasive pads. Instead, apply a small amount of a mild household solvent or soapy water to a soft cloth, testing it on an inconspicuous area first, and gently wipe the residue away until the surface is clean.
Frequently Asked Questions (FAQ)
Can 3M Bumpons be used on outdoor furniture?
Standard adhesive bumpers are generally designed for indoor use. Exposure to outdoor elements like direct sunlight (UV rays), heavy rain, and high humidity can degrade the adhesive backing and cause the polyurethane to break down. For outdoor patios or balconies, look for specialized outdoor-rated glides or check the manufacturer’s specifications for weather-resistant variants.
How do I remove old bumpers without leaving sticky residue?
To remove an old bumper safely, gently peel it back from one edge using your fingers or a plastic scraper to avoid scratching the wood. If a sticky residue remains, apply a small amount of a mild household solvent, such as isopropyl alcohol or a dedicated adhesive remover, to a soft cloth. Always test this on a hidden spot first to ensure it does not dull or strip the furniture’s finish, then gently wipe the residue away.

Community discussion
Share your experience or ask a question. Comments are reviewed before publication.