
Worn-out rubber stoppers on furniture legs can lead to scratched floors, unstable seating, and annoying scraping noises. Replacing these deteriorated parts is a straightforward DIY task that restores stability and protects your home’s flooring. By identifying the mounting style of your current stoppers, gathering a few basic hand tools, and following a systematic removal and installation process, you can easily refresh your chairs, tables, or cabinets. This guide walks you through the entire process, from measuring your furniture legs to testing the newly installed stoppers for long-term durability.
Assessing Your Furniture and Choosing the Right Rubber Stoppers
Before purchasing replacements, you must accurately assess the physical characteristics of your furniture legs. Begin by measuring the bottom profile of each leg using a precise measuring tape or caliper. For round legs, measure the outer diameter; for square or rectangular legs, measure the width and depth. If the legs are angled or tapered, note the angle of contact with the floor, as this determines whether you need angled caps or standard flat-bottomed stoppers.
Next, identify how the existing stoppers are attached to the furniture. Rubber stoppers generally fall into four mounting categories: push-in or nail-on types that insert into a pre-drilled hole, adhesive pads that stick directly to the flat bottom, screw-in glides that thread into an insert, or external caps and sleeves that slide over the outside of the leg. Matching the replacement style to the original mounting method ensures a secure fit without requiring extensive modifications to the furniture structure.
Products mentioned in this guide
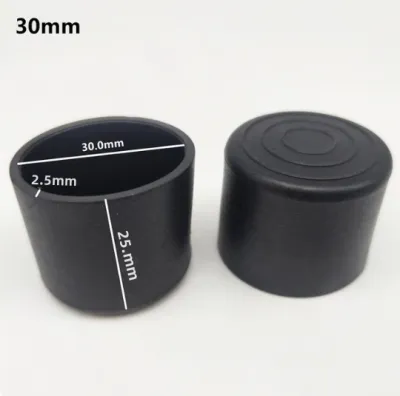
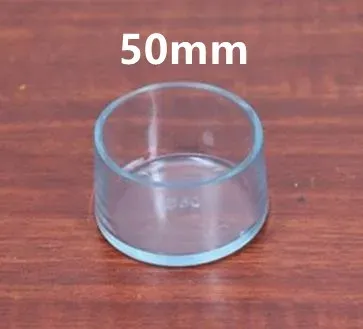
Prices are valid at publication and may change. Please refer to the product page for the latest price.
Finally, consider your specific flooring material to determine the ideal rubber characteristics. Hard surfaces like hardwood, engineered wood, or polished stone require softer, high-friction rubber stoppers that grip the floor to prevent sliding while cushioning the wood against scratches. Conversely, if your furniture sits on carpet or resilient vinyl, firmer rubber or specialized smooth-bottomed caps are preferable to prevent deep indentations and allow for easier movement without snagging the fibers.
Tools and Materials Needed for the Replacement
Having the correct tools on hand prevents damage to the furniture legs and makes the removal of stubborn, aged rubber much easier. For removing old stoppers, gather a pair of sturdy pliers, a flathead screwdriver or a small pry bar, and a heat source such as a hair dryer or heat gun to soften hardened adhesives. An adhesive remover or rubbing alcohol is also highly useful for cleaning away sticky residue left behind by old glue.

For the installation phase, you will need a rubber mallet to gently tap push-in or nail-on stoppers into place without marring the wood or bending the metal pins. Keep a clean microfiber cloth and a mild cleaning solution or soapy water nearby to prep the surfaces. If your furniture uses screw-in stoppers, select a screwdriver that matches the screw head perfectly to avoid stripping the metal.
Safety should always be a priority when working with old furniture hardware. Wear durable work gloves to protect your hands from sharp metal edges, rusted nails, or splintered wood. Safety glasses are also recommended, particularly when prying away brittle, crumbling rubber that can easily shatter and send small debris airborne during removal.
Step-by-Step Guide to Removing Old Rubber Stoppers
Removing push-in or nail-on rubber stoppers requires a careful, incremental approach to avoid splitting the furniture leg. Grip the exposed metal base or the rubber body firmly with your pliers and twist gently back and forth to loosen the grip of the nail or pin. If the nail is rusted or seized inside the wood, slide a flathead screwdriver or pry tool underneath the stopper, using a scrap piece of cardboard as a buffer to protect the wood finish, and gently pry upward until the fastener releases.
For adhesive-backed rubber stoppers, the primary challenge is breaking down the hardened glue bond. Direct a heat gun or hair dryer set on a low-to-medium heat level toward the stopper for several seconds to soften the adhesive. Once the glue becomes pliable, use a plastic scraper or a dull putty knife to peel the rubber away from the leg, then apply an adhesive remover or rubbing alcohol to dissolve any remaining sticky residue.
Screw-in stoppers are generally straightforward to remove but require caution if the hardware is old. Insert your screwdriver into the screw head and turn counter-clockwise; if the screw is stripped or spins freely without backing out, the internal threaded insert may be loose. In such cases, apply gentle upward pressure with a flathead screwdriver under the stopper cap while turning the screw to help the threads catch and back out.
Always monitor the structural integrity of the furniture leg throughout the removal process. If you notice the wood beginning to split, crack, or crumble, or if a metal leg insert is severely corroded and fused to the stopper, stop immediately. Forcing the removal under these conditions can cause irreparable damage, so it is best to consult a professional furniture repair specialist to assess and reinforce the leg before proceeding.
Installing the New Rubber Stoppers Securely
Proper surface preparation is the most critical step to ensure your new rubber stoppers remain securely attached over time. Wipe down the bottom of each furniture leg with a damp microfiber cloth and a mild cleaning solution to remove dust, dirt, and grease. Allow the wood or metal to dry completely, as any remaining moisture can compromise adhesive bonds or cause metal components to rust prematurely.
When installing push-in or nail-on rubber stoppers, align the mounting pin precisely with the existing hole in the furniture leg. Hold the stopper straight and tap it gently with a rubber mallet; avoid using a standard metal hammer, which can crack the rubber or damage the internal support structure. If the original hole has become enlarged and loose, you may need to fill it with wood filler or a small dowel and re-drill a pilot hole before inserting the new stopper.
For adhesive-backed replacements, peel the protective backing from the stopper, taking care not to touch the sticky surface with your fingers. Align the stopper carefully with the center of the leg bottom and press down firmly. Apply steady, heavy pressure for at least thirty seconds to activate the pressure-sensitive adhesive, and allow the bond to cure fully according to the manufacturer’s instructions before placing weight back on the furniture.
To install screw-in rubber stoppers, align the screw with the threaded insert or pilot hole and turn clockwise by hand to ensure the threads align correctly. Once the screw is threaded straight, use a screwdriver to tighten it until the rubber base sits flush against the bottom of the leg. Avoid over-tightening, as excessive force can strip the internal threads of the wood or crack the plastic or rubber housing of the new stopper.
Testing and Maintaining Your Replaced Furniture Stoppers
Once all the new rubber stoppers are installed, place the furniture back on a flat, level surface to conduct a stability test. Gently rock the piece from side to side and corner to corner to check if any legs hover or wobble. If you detect any unevenness, inspect each stopper to ensure it is fully seated, flush against the leg, and installed at the correct depth.
Next, perform a floor protection check by sliding the furniture slightly across the floor. Listen closely for any scraping, grinding, or squeaking sounds, and feel for any unusual resistance or catching. The movement should feel smooth and quiet, confirming that only the soft rubber material is making contact with the floor surface and that no exposed metal screws or nails are protruding.
To maximize the lifespan of your new stoppers, establish a simple routine maintenance schedule. Periodically inspect the bottom of the furniture legs to check for signs of rubber degradation, cracking, or flattening, especially on heavily used items like dining chairs. When cleaning your floors, avoid letting harsh chemical cleaners pool around the rubber stoppers, as strong solvents can accelerate the breakdown of the rubber compound and weaken adhesive bonds.
Frequently Asked Questions (FAQ)
Can I use adhesive stoppers on furniture that originally had nail-on stoppers?
Yes, you can transition to adhesive stoppers, but you must prepare the surface properly to ensure a reliable bond. First, fill the old nail hole with a high-quality wood filler and allow it to dry completely, then sand the bottom of the leg until it is perfectly flat and smooth. This step is essential because adhesive pads require maximum surface contact to stay attached under the weight of the furniture.
Keep in mind that adhesive stoppers generally have lower weight-bearing limits and are more prone to shifting under lateral stress than mechanical fasteners. For heavy furniture like dining tables or frequently moved chairs, mechanical options like screw-in or nail-on stoppers provide superior long-term reliability. If you choose adhesive pads for these items, inspect them regularly for sliding or peeling.
How do I know if the rubber stopper is the right hardness for my floor?
The ideal rubber hardness depends directly on your flooring material and how the furniture is used. For hard, smooth surfaces like hardwood, laminate, or ceramic tile, choose softer, more pliable rubber stoppers. Softer rubber provides excellent grip to prevent sliding, dampens noise effectively, and cushions the floor against scratches, though it may wear down faster under heavy loads.
For soft or delicate flooring like vinyl, linoleum, or carpet, firmer rubber stoppers or hard plastic glides are more suitable. Firm stoppers distribute the weight of the furniture more evenly, preventing deep, permanent indentations in vinyl or carpet fibers. Additionally, firmer materials allow the furniture to slide more easily over carpeted surfaces without catching or tearing the fabric.

Community discussion
Share your experience or ask a question. Comments are reviewed before publication.