
Worn-out furniture leg pads can quickly turn a quiet, comfortable home into a source of frustration, leading to scratched floors, irritating scraping noises, and unstable tables or chairs. Replacing these small accessories is a straightforward, cost-effective DIY task that immediately restores stability and protects your flooring, whether you have delicate parquet, polished marble, or modern luxury vinyl tiles. By identifying the attachment type, removing the old pad safely, preparing the surface, and installing a suitable replacement, you can extend the life of both your furniture and your floors.
Assess Your Furniture and Choose the Right Replacement Pads
Before purchasing replacements, examine how the existing pads are attached to your furniture legs. Common attachment methods include self-adhesive backings, nail-on glides, screw-on discs, and slip-on or tap-on caps. Each method offers distinct levels of durability and is suited to specific furniture materials, such as solid wood, metal tubing, or molded plastic.
Next, measure the bottom of the furniture leg carefully. For round legs, measure the diameter across the widest point; for square or rectangular legs, measure the width and length. Choosing a pad that matches these dimensions prevents overhang, which can collect dust and debris, and ensures the weight of the furniture is distributed evenly across the protective surface.
Products mentioned in this guide
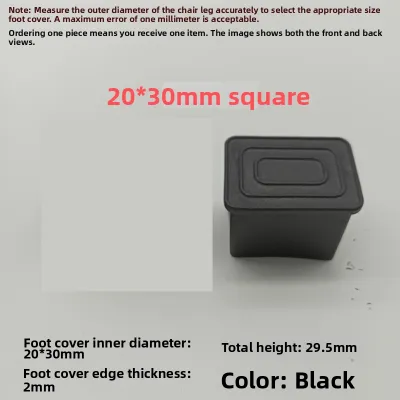
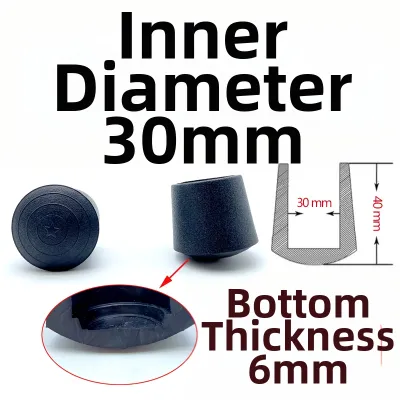
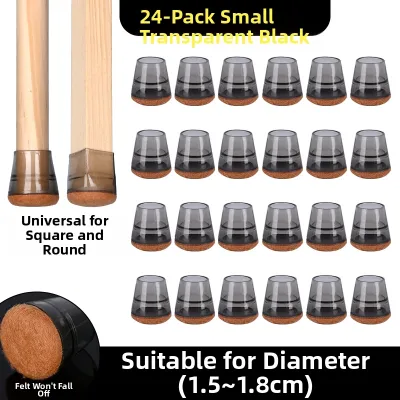
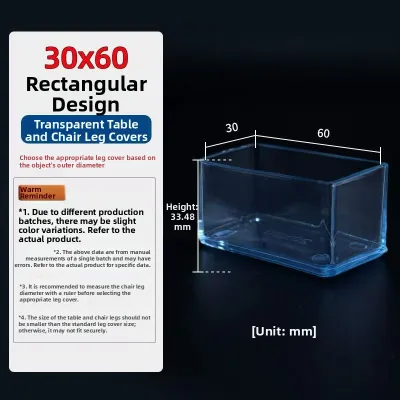
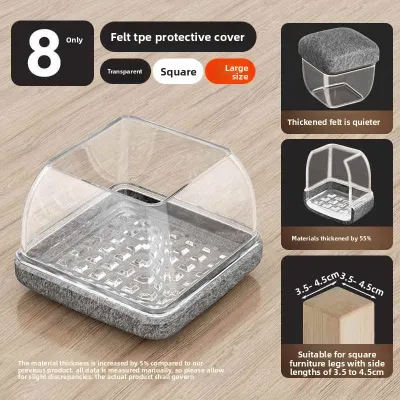
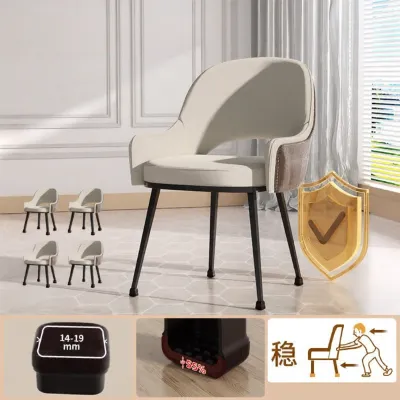
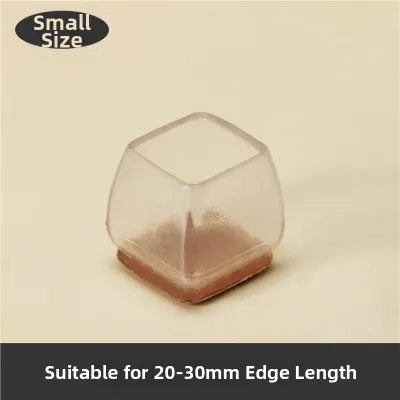
Prices are valid at publication and may change. Please refer to the product page for the latest price.
Consider your flooring material and the weight of the furniture when selecting the replacement pad material. Heavy dining chairs and tables on hard floors like parquet or polished tile benefit from thick, heavy-duty felt pads that allow smooth sliding. For heavy, stationary items like sofas or cabinets, rubber or non-slip elastomer pads are ideal to prevent sliding and shifting. Hard plastic glides are typically reserved for carpeted areas to help heavy items slide without snagging the fibers.
Gather the Necessary Tools and Materials
Having the right tools on hand before you begin prevents unnecessary delays and ensures a clean, professional finish. The specific tools you need depend on how the old pads are attached and how the new ones will be secured.

For removing old pads, gather a flathead screwdriver, a pair of needle-nose pliers, a hammer, and a utility knife. A putty knife can also be helpful for prying off stubborn adhesive pads. For cleaning and surface preparation, keep some rubbing alcohol, clean microfiber cloths, a mild adhesive remover, and a sheet of fine-grit sandpaper or a small metal file nearby.
Finally, ensure you have your new furniture leg pads ready. If you are using mechanical fasteners like screws or nails, check that the package includes the correct size of screws or nails, or verify that your existing hardware is in reusable condition.
Remove the Old Furniture Leg Pads
Removing the old, worn-out pads requires patience to avoid damaging the furniture legs. For self-adhesive felt or rubber pads, start by sliding a utility knife or a thin putty knife between the pad and the bottom of the leg. Slowly slice through the hardened adhesive layer, taking care not to gouge the wood or scratch the metal. Once a portion is lifted, use pliers to grip the pad and peel it away from the leg.
If your furniture uses nail-on or screw-on glides, the removal process requires a different approach. For screw-on pads, use a screwdriver that matches the screw head exactly to avoid stripping the screw. If the screw head is worn down or damaged, grip the outer edge of the pad with pliers and slowly turn the entire pad counterclockwise to back the screw out. For nail-on pads, slide the flat head of a screwdriver or the claw of a hammer under the glide and gently pry upward, using a small block of wood as a fulcrum to protect the side of the furniture leg from pressure marks.
Slip-on or tap-on caps, often found on metal or plastic chairs, can become brittle over time. To remove them without cracking the surrounding leg material, gently wiggle the cap back and forth while pulling downward. If the cap is stuck, a light tap with a rubber mallet in a downward direction can help loosen the friction fit.
Always monitor the condition of the furniture leg during this process. If you notice signs of wood splitting, rot, deep cracks, or severe structural damage, stop immediately. In these cases, continuing to pry or screw into the damaged wood can ruin the leg entirely, and you should consult a professional furniture repair specialist before proceeding.
Clean and Prepare the Leg Surface
A clean, flat, and dry base is essential for the new pads to adhere or attach securely. Any leftover adhesive, rust, dirt, or wood splinters will prevent the new pad from sitting flush, leading to uneven wear and premature failure.
Begin by removing any residual adhesive left behind by old felt pads. Apply a small amount of adhesive remover or rubbing alcohol to a clean cloth and rub the bottom of the leg until the sticky residue softens and can be scraped away with a plastic scraper. If you are working with metal legs, check for rust or corrosion around the bottom edge and wipe it clean.
Once the residue is gone, wipe the entire bottom surface with rubbing alcohol to remove any remaining oils or cleaning agents. Allow the wood or metal to dry completely, as any moisture trapped underneath can weaken new adhesives or cause wood rot over time.
If the bottom of a wooden leg has splinters, burrs, or uneven areas from old nail holes, use fine-grit sandpaper to lightly sand the surface flat. Limit your sanding only to the bottom face of the leg to avoid damaging the finished sides. For metal legs with sharp burrs, a small metal file can be used to smooth out the edges safely.
Install the New Furniture Leg Pads
With the surface prepared, you can now install the new pads. If you are applying self-adhesive pads, peel off the protective backing without touching the sticky surface with your fingers, as skin oils can reduce adhesion. Align the pad carefully with the bottom of the leg and press it down firmly. Apply steady, heavy pressure for at least thirty seconds to activate the pressure-sensitive adhesive. For the best results, allow the adhesive to cure according to the manufacturer’s instructions—often up to 24 hours—before sliding the furniture or putting it back into regular use.
For nail-on or screw-on pads, alignment is critical to prevent the furniture from wobbling. If you are using the existing holes, ensure they are clean and tight enough to hold the new fastener. If you need to make new holes, mark the exact center of the leg and drill a small pilot hole to prevent the wood from splitting. Insert the screw or nail and drive it straight into the leg. Ensure the screw head or nail is countersunk fully into the pad so it cannot make contact with and scratch your floor.
When installing slip-on or tap-on caps, slide the cap over the bottom of the leg. If it is a tight friction fit, place a soft cloth over the pad and tap it gently with a rubber mallet until it is fully seated. Avoid using excessive force, which can deform the pad or crack plastic caps.
Always refer to the manufacturer’s specific guidelines regarding weight limits, setting times, and suitable flooring surfaces. Some heavy-duty pads may require longer curing times or specific installation temperatures to perform reliably.
Test for Stability and Floor Protection
Once all the new pads are installed, carefully stand the furniture upright on a flat, level surface. Check for any wobbling by gently pushing on different sides of the furniture. All legs should make even, solid contact with the floor. If you notice a wobble, double-check that all pads are installed to the same depth and that no pad is misaligned or sitting at an angle.
Next, test the furniture under normal operating conditions. Sit on the chairs or place typical items back onto the table or cabinet. Gently slide the furniture a short distance to observe how it moves. It should glide smoothly and quietly without catching, shifting, or leaving any marks on the floor.
If any pad feels loose, shifts out of place, or makes an unusual noise during this test, address it immediately. Re-seat or replace the loose pad before allowing regular use to prevent accidental damage to your floors or a sudden loss of stability.
Frequently Asked Questions (FAQ)
How often should I replace my furniture leg pads?
The lifespan of furniture leg pads depends on the weight of the furniture, how frequently it is moved, and the pad material. High-use items like dining chairs may require new pads every six to twelve months, while stationary cabinets might only need replacements every few years. Inspect the pads every few months for flattening, tearing, dirt accumulation, or loss of adhesion, and replace them as soon as they show signs of wear.
Can I put new adhesive pads directly over old ones?
No, you should never layer new adhesive pads over old ones. Stacking pads compromises the stability of the furniture, making it prone to wobbling or tipping. Additionally, the old, worn-out pad will not provide a secure foundation, causing the new pad to slide off quickly and potentially leaving exposed adhesive or hardware to scratch your floors.
What should I do if the new screw-on pads do not fit the existing holes?
If the new screws are too loose for the existing holes, you can fill the old holes with a high-quality wood filler or a mixture of wood glue and toothpicks. Once the filler has dried completely, sand it flush and drill a new pilot hole. Alternatively, if the pad design permits, you can use a slightly larger screw that grips the wood securely without splitting the leg.

Community discussion
Share your experience or ask a question. Comments are reviewed before publication.