
Planning a modular shelving system allows you to create a tailored storage solution that adapts to your home’s changing needs while maintaining a cohesive aesthetic. Customizing a Scanteak modular setup involves a systematic approach: first assessing your physical space, then understanding the individual components available, and finally configuring a layout that balances open and closed storage. By taking precise measurements and planning for structural stability, you can design a functional teak wood configuration that fits your lifestyle and maximizes your floor plan.
Assess Your Space and Storage Requirements
Before browsing specific furniture catalogs, you must establish a precise blueprint of the room where the shelving will stand. Begin by measuring the total height, width, and depth of the designated wall space using a reliable metal measuring tape. Do not rely on general room dimensions; instead, measure the exact footprint on the floor and check for any vertical irregularities along the wall. It is crucial to account for architectural features such as skirting boards, which can prevent a unit from sitting flush against the wall, as well as light switches, power outlets, and air conditioning conduits. Additionally, measure the swing radius of nearby doors and windows to ensure the shelving does not obstruct their movement or block natural light.
Next, evaluate how the shelving will interact with the daily traffic flow of your home. In Singapore’s typical residential layouts, maximizing floor space is essential, meaning walkways must remain clear and unobstructed. Ensure there is comfortable clearance—typically at least 60 to 90 centimeters—between the front of the shelving unit and other furniture pieces. If you live in a high-rise apartment, you must also verify the delivery path, checking the dimensions of your building’s lift, corridors, and front doorway to ensure the raw components can be safely transported into your unit.
Products mentioned in this guide
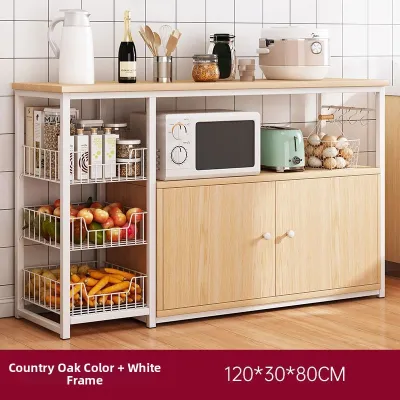
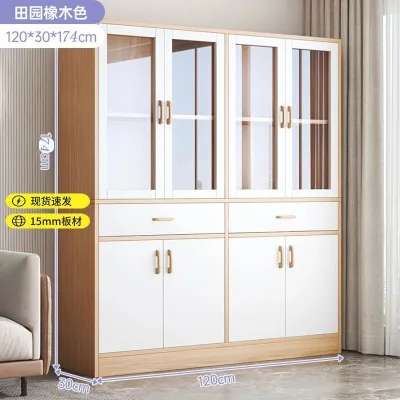
Prices are valid at publication and may change. Please refer to the product page for the latest price.
Once the physical boundaries are clear, categorize the items you intend to store or display. Grouping your belongings by size, weight, and frequency of use will dictate the physical specifications of the modules you need. For instance, heavy books, ceramic decorative pieces, or media equipment require deeper shelves and robust structural support, whereas small collectibles or photo frames can sit on shallower tiers. Documenting these requirements beforehand prevents the common mistake of purchasing shelves that are either too shallow for your storage boxes or too deep for your walkway.
Understand the Scanteak Modular Components
To design an effective custom configuration, you must familiarize yourself with the individual building blocks that make up the modular system. The foundation of any setup relies on vertical uprights or side frames, which dictate the overall height of the unit and provide the slots or pre-drilled holes for shelf placement. Horizontal shelves serve as the primary horizontal surfaces, and these are typically available in varying widths and depths to accommodate different spatial constraints. Base units, which often feature sturdier profiles or integrated plinths, form the bottom layer of the assembly and anchor the entire structure to the floor.

Beyond basic shelving, specialized add-on modules allow you to customize the functionality of the system. Closed cabinet units with sliding or hinged doors can be integrated to conceal clutter, while drawer units offer organized storage for smaller household items. Some configurations may also support desk extensions or drop-down writing flaps, turning a standard shelving unit into a multi-functional home office workstation. When selecting these components, consult the manufacturer’s official specifications to verify the material finishes, adjustable shelf intervals, and the maximum weight capacity designated for each tier.
When planning your purchase, compare the benefits of standard pre-set configurations against a fully bespoke arrangement. Pre-set configurations are pre-designed packages that offer a balanced, ready-to-assemble layout suitable for general storage needs. A bespoke arrangement, on the other hand, allows you to purchase individual uprights, shelves, and cabinets separately, giving you complete control over the height, width, and functional mix of the unit. While pre-sets offer convenience, a bespoke approach is highly recommended if you need to work around specific architectural constraints or have highly specialized storage demands.
Configure and Customize Your Shelving Layout
Configuring your modular layout requires a balance between structural logic and visual harmony. Always start your planning from the ground up, establishing a solid base foundation. The heaviest components, such as deep drawer units or closed wooden cabinets, should always be positioned at the bottom of the configuration. This placement lowers the center of gravity of the entire system, significantly improving stability and reducing the risk of tipping. During this initial phase, identify the specific anchoring points along your wall where the vertical uprights will be secured, ensuring they align with solid structural elements rather than hollow partitions.
Once the base is established, arrange the vertical uprights and space the horizontal shelves to maximize vertical efficiency. Avoid spacing all shelves at equal intervals; instead, customize the gaps to match the heights of the items you categorized earlier. Place taller items, such as large art books or tall vases, on lower or middle shelves where they are easily accessible and visually grounded. Shorter items can be grouped together on closely spaced shelves to prevent wasted vertical space. If your system features adjustable shelf supports, utilize them to create a dynamic, staggered layout that keeps the eye moving across the display.
Integrating closed storage units with open shelving is key to achieving both functional utility and visual balance. A solid wall of open shelving can easily look cluttered if filled with mismatched items, while an entirely closed system can feel heavy and imposing in a small room. By placing closed cabinets at the bottom or in a central block, you create a clean visual anchor while hiding everyday clutter, documents, or electronic cables. The open shelves above can then be dedicated to curated displays, plants, and books, allowing light to pass through and giving the room a more spacious, airy feel.
Finally, design your system with future flexibility in mind. Household needs inevitably change over time, so your shelving should be able to adapt. Leave adjustable gaps or select modular connectors that allow you to raise, lower, or add shelves without dismantling the entire structure. If you plan to expand the system horizontally in the future, ensure you leave adequate wall space on either side of the current setup. Choosing a modular system with standardized connection points ensures that you can seamlessly integrate new components years down the road.
Installation, Safety, and Long-Term Maintenance
Proper installation is critical to ensuring the safety and longevity of your modular shelving system. Before beginning assembly, verify the material of your wall, as this determines the type of anchoring hardware required. In Singapore, residential walls are commonly made of solid concrete, structural brick, or hollow drywall. Solid concrete walls require heavy-duty masonry plugs and robust screws, whereas drywall installations demand specialized toggle bolts or anchor expansion plugs to distribute weight safely. Never rely on simple adhesive strips or lightweight nails; always use dedicated anti-tip anchoring hardware to secure the top of the shelving unit to the wall, which is especially vital in households with active children or pets.
During the physical assembly, strictly follow the manufacturer’s step-by-step instructions and use the correct tools. Avoid using high-torque power drills to tighten structural joints unless specified, as excessive force can strip the pre-drilled holes in the wood or damage the metal connectors. Instead, use hand tools to tighten screws and bolts until they are snug, ensuring all joints are perfectly square. Use a spirit level throughout the assembly process to verify that both the vertical uprights and horizontal shelves are perfectly level; an unlevel shelf can cause items to slide and place uneven stress on the structural frame.
Maintaining your teak modular shelving involves simple, routine care to preserve the wood’s natural beauty and structural integrity. Dust the wooden surfaces regularly with a soft, dry microfiber cloth to prevent abrasive dust particles from settling into the grain. Avoid using harsh chemical cleaners, wax-based polishes, or wet cloths, as excess moisture can affect the wood finish over time. Periodically inspect the unit—ideally every six months—to check the tightness of all structural joints, screws, and wall anchors, tightening any hardware that may have loosened slightly due to natural wood expansion and contraction.
It is important to recognize specific stop conditions that indicate your shelving system requires professional attention or replacement parts. If you notice stripped screw holes, misaligned tracks on sliding doors, or visible warping in the horizontal panels, stop loading those sections immediately. Do not attempt to patch structural damage with makeshift adhesives or non-standard hardware. If the unit becomes unstable, wobbles, or shows signs of pulling away from the wall anchors, unload the shelves safely and contact the manufacturer or a qualified professional installer to assess and repair the system.
Frequently Asked Questions (FAQ)
Can I add more modules to my Scanteak shelving later?
Yes, the modular nature of the system allows you to expand your setup as your storage needs grow. However, before purchasing additional components, you must verify structural load limits and the weight capacity of your existing base units to ensure they can support the added vertical or horizontal load. Additionally, keep in mind that natural wood finishes can vary slightly between production batches, and older wood naturally matures in color when exposed to light. To maintain visual consistency, check with the manufacturer regarding current batch compatibility and expect minor color variations between your original and new components.
Do I need professional help to install a large modular setup?
Deciding between self-assembly and professional installation depends on the scale of your configuration and your comfort with tools. For small, low-profile units, DIY assembly is highly manageable if you have basic tools like a spirit level, screwdriver, and a helper to assist with lifting. However, for large, ceiling-height configurations or setups requiring drilling into solid concrete walls, professional installation is strongly recommended. Professional installers have the specialized masonry drills, heavy-duty anchors, and experience necessary to ensure the unit is perfectly level, structurally sound, and securely anchored to prevent any tipping hazards.

Community discussion
Share your experience or ask a question. Comments are reviewed before publication.