
Mounting a peg board in your HDB flat is an excellent way to maximize vertical space, organize daily essentials, and keep your living areas clutter-free. However, the prospect of drilling into tough concrete walls often deters tenants, design-conscious homeowners, and those worried about violating tenancy agreements. Fortunately, you can secure a functional peg board setup without ever picking up a power drill or leaving permanent scars on your walls. By choosing the right alternative mounting systems and understanding the physical limits of your wall surfaces, you can enjoy a highly customizable storage solution that is both secure and completely reversible.
Achieving a successful, damage-free installation requires a systematic approach that balances weight capacity with surface compatibility. Standard HDB walls present unique challenges, from thick layers of matte emulsion paint to varying levels of humidity. Understanding how these factors interact with adhesives, tension systems, and freestanding structures ensures your organization system remains firmly in place. Whether you want to organize a home office, display keys in the entryway, or arrange lightweight tools, a damage-free peg board is entirely achievable when you follow the correct preparation and installation protocols.
Assess Your Wall Type and Weight Needs
Before purchasing any mounting hardware, you must identify the specific type of wall surface in your HDB flat. Most interior walls in Singapore public housing are made of solid concrete, precast panels, or lightweight concrete blocks, all of which are typically finished with plaster and emulsion paint. Some newer flats or renovated units also feature drywall partitions to separate bedrooms or study areas. Adhesives bond differently to these surfaces; for instance, smooth drywall partitions often provide a more uniform surface for adhesive strips than textured or slightly chalky concrete plaster. Identifying your wall type helps you determine whether chemical adhesives can grip the surface effectively or if you need to rely on mechanical tension.
Products mentioned in this guide
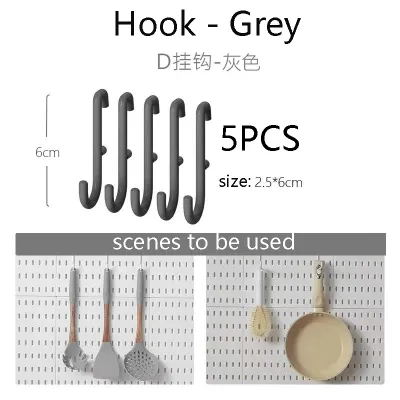
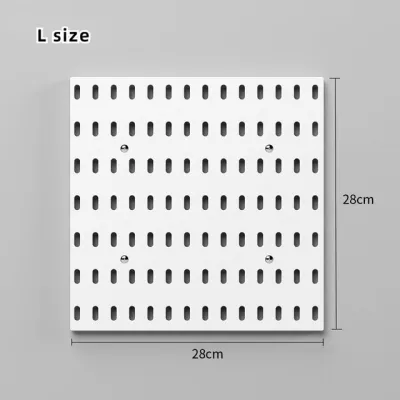
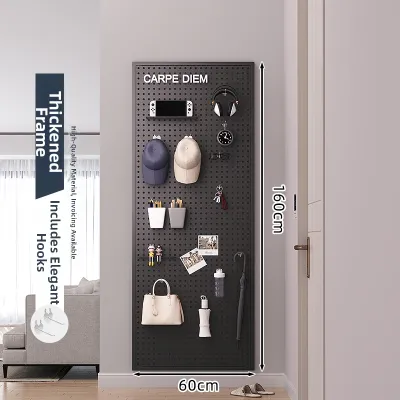
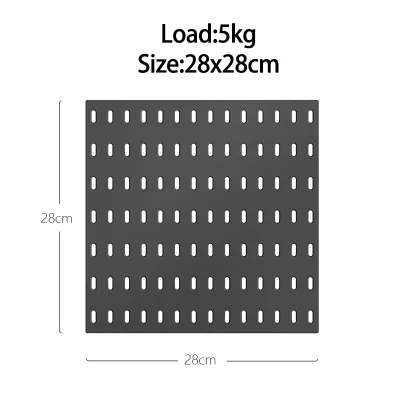
Prices are valid at publication and may change. Please refer to the product page for the latest price.
Next, calculate the total weight of your planned setup to establish your minimum load requirements. This calculation must include the weight of the empty peg board itself, the mounting brackets, all hooks or shelves, and every item you intend to store on it. It is easy to underestimate the cumulative weight of small items like keys, stationery, headphones, and decorative plants. If the total weight exceeds the safe limit of your chosen mounting method, the system will eventually fail, potentially damaging your items and tearing the paint off your wall. Always aim for a mounting system rated for at least double your estimated total load to provide a safe buffer.
Finally, review your tenancy agreement or housing guidelines to understand the exact definitions of acceptable wear-and-tear. If you are renting, your landlord may have strict clauses against drilling, but they might also penalize you for peeled paint caused by aggressive adhesives. Even if you own the flat, preserving the walls makes future redecorating or selling much simpler. Knowing these boundaries helps you decide if an adhesive-based method is worth the risk, or if a completely non-contact solution like a tension pole or freestanding frame is the wiser choice for your specific living situation, potentially saving you from losing a S$500 rental deposit.
Select a Damage-Free Mounting Method
Heavy-duty adhesive strips and mounting hooks are the most common choice for light to medium storage needs. These systems rely on advanced chemical polymers that grip smooth, painted surfaces without penetrating the wall. They are highly effective for small peg boards holding lightweight items like keys, scissors, and craft supplies. However, their success depends entirely on strict adherence to the manufacturer’s weight limits and surface requirements. They perform best on smooth, semi-gloss, or satin painted walls, and are generally unsuitable for highly textured plaster, matte paint finishes, or walls prone to moisture.

For heavier storage needs, a tension pole or floor-to-ceiling mounting system offers an exceptionally secure, drill-free alternative. These systems use vertical metal poles that wedge tightly between your floor and ceiling, held in place by internal spring tension or threaded adjustment screws. Because the downward force is transferred directly to the floor, these systems can support significantly more weight than adhesive strips. They are ideal for holding larger peg boards loaded with heavier items like kitchen pots, tools, or multiple books. Before choosing this method, verify that your ceiling is solid concrete rather than a hollow false ceiling, and ensure your flooring is flat and stable.
If wall adhesion is risky and floor space is available, over-door brackets or freestanding frames provide excellent alternative solutions. Over-door brackets allow you to hang a peg board directly over standard room doors or wardrobe doors, utilizing the door’s structural strength without any wall contact. Freestanding peg board frames, on the other hand, sit directly on your desk, countertop, or floor, supported by wide, stable feet. These options are perfect if your walls are highly textured, freshly painted, or if you live in a high-humidity environment where adhesives are prone to failing over time.
To prevent accidents, you must recognize the clear stop-conditions for each mounting method. Never apply adhesive strips to walls that have been painted within the last month, as the paint needs several weeks to fully cure and harden. Avoid adhesives on walls with visible peeling, cracking, or bubbling paint, as the weight of the peg board will simply pull the loose paint layer away from the plaster. Additionally, if your wall feels cold or damp to the touch, or if it is located in a high-humidity zone like a bathroom or near a cooking stove, steer clear of adhesive methods entirely and opt for mechanical tension or freestanding alternatives.
Step-by-Step Installation Process
Proper surface preparation is the single most critical step when using adhesive-based mounting systems. Begin by wiping down the target wall area with isopropyl alcohol to remove dust, skin oils, and household grease. Avoid using standard household spray cleaners, as they often leave behind a thin, slippery residue that prevents the adhesive from bonding correctly. Allow the alcohol to evaporate completely so the wall is dry and clean. If you are installing a tension pole system, sweep and mop the floor and wipe the ceiling area to ensure the rubber grip pads make clean, slip-free contact with both surfaces.
Once the surface is clean, you can begin applying the adhesive strips or assembling your tension frame. When using adhesive strips, apply them to the mounting brackets first, pressing firmly along the entire length of each strip for at least thirty seconds to activate the pressure-sensitive adhesive. Next, press the brackets firmly against the prepared wall, applying steady pressure. Crucially, you must allow the adhesive to cure without any load. Most manufacturers require a full twenty-four hours for the bond to reach its maximum strength; hanging the peg board or placing items on it too early is the primary cause of adhesive failure. For tension poles, assemble the frame according to the instructions, position it vertically, and tighten the tension mechanism until the poles are completely rigid and do not budge when nudged.
After the curing period or frame assembly is complete, you can mount the peg board itself. Hold the board up to the brackets or tension poles and use a spirit level to ensure it is perfectly horizontal. A crooked peg board not only looks unprofessional but also creates uneven weight distribution, putting unnecessary stress on specific mounting points. Secure the board to the hardware using the provided clips, screws, or zip ties, ensuring every connection point is fully locked. Double-check the stability of the entire setup by gently pressing on different areas of the board before you begin organizing your items.
Safe Loading, Verification, and Maintenance
To maintain the structural integrity of your damage-free peg board, you must load it strategically. Always distribute the weight of your items evenly across the entire surface of the board rather than clustering heavy objects in one corner. Place your heaviest items near the bottom of the board or as close to the main mounting brackets as possible. This positioning minimizes the leverage and outward pulling force exerted on the wall adhesives or tension poles, keeping the center of gravity low and stable. Keep lightweight items, like plastic bins or paper notes, near the top.
Routine visual checks are essential to catch potential failures before they result in a fallen board. Once a month, take a close look at your peg board setup. Check the edges of any adhesive brackets to see if they are starting to peel away from the wall or if the paint behind them is showing signs of stress. For tension pole systems, gently shake the poles to ensure they remain tightly wedged and have not loosened due to temperature changes or floor vibrations. If you observe any shifting, peeling, or sagging, immediately remove all items from the board and reinstall or adjust the mounting system.
When it is time to move out or redecorate, removing your mounting hardware safely is just as important as installing it correctly. To remove heavy-duty adhesive strips without tearing your HDB wall paint, grab the exposed pull-tab and stretch it slowly, keeping your hand flat against the wall. Pull the strip straight down in the direction of the floor, extending it up to three times its original length; this stretching action cleanly releases the adhesive bond. If a strip is stubborn or lacks a pull-tab, use a hairdryer on a low, warm setting to gently heat and soften the adhesive, then slide a piece of dental floss behind the bracket to saw through the foam backing.
Frequently Asked Questions (FAQ)
Can I use standard nails if my landlord allows minor holes?
If your tenancy agreement permits minor wall modifications, using small picture hooks or hardwall hangers with thin steel pins is often a safer option than heavy-duty adhesives. These pins leave tiny, clean holes that are incredibly easy to patch with a small tub of wall spackle and a putty knife when you move out. This approach eliminates the risk of large, unsightly paint patches peeling off, which frequently occurs when removing strong chemical adhesives from older or poorly primed HDB plaster walls.
How do I remove heavy-duty adhesive strips without peeling HDB wall paint?
The key to damage-free removal is patience and pulling at the correct angle. Always pull the adhesive stretch-tab slowly and directly downward, keeping your hand pressed flat against the wall to support the paint layer. If the tab breaks, use a hairdryer on low heat to warm the adhesive backing, which softens the polymer. You can then slide a length of dental floss or thin fishing line behind the mounting bracket, using a gentle sawing motion to cut through the adhesive layer before cleaning up any remaining residue with warm, soapy water.
Is it safe to hang kitchen utensils or wet items on a damage-free peg board?
High humidity, steam, and direct water exposure in HDB kitchens or service yards can rapidly degrade chemical adhesive bonds, causing them to fail without warning. If you plan to hang kitchen utensils, pots, or damp cleaning cloths, avoid adhesive-based mounting methods entirely. Instead, opt for a freestanding desktop peg board, an over-door frame, or a tension pole system that relies on mechanical pressure rather than chemical adhesion to stay secure in humid environments.

Community discussion
Share your experience or ask a question. Comments are reviewed before publication.