
Finding the perfect book organizer for your home requires more than matching an aesthetic to your interior design. To choose the correct size, you must measure the absolute width, height, and depth of your designated floor or wall space, subtract clearances for architectural obstacles, and cross-reference these dimensions with both your book collection and your home’s entry pathways. Taking precise measurements beforehand prevents the frustration of purchasing a unit that blocks doorways, obstructs power outlets, or fails to fit through your building’s lift doors.
A systematic approach to measuring ensures your new storage solution fits seamlessly into your living space. Whether you are furnishing a cozy study or maximizing a living room alcove, understanding how to read your room’s physical layout is the first step toward a successful installation. This guide provides a step-by-step process to help you map out your space, evaluate your storage needs, and select a unit that balances functionality with safety.
Step 1: Measure Your Available Floor and Wall Space
To establish the maximum footprint for your book organizer, you need to measure the exact width and length of the intended spot on both the floor and the wall. Always use a high-quality metal tape measure for this task, as fabric or plastic tapes can stretch over time and yield inaccurate results. Do not assume your walls are perfectly straight or that your floor is completely level. It is common for walls in both older homes and modern developments to have slight curves or slopes that are invisible to the naked eye.
Products mentioned in this guide
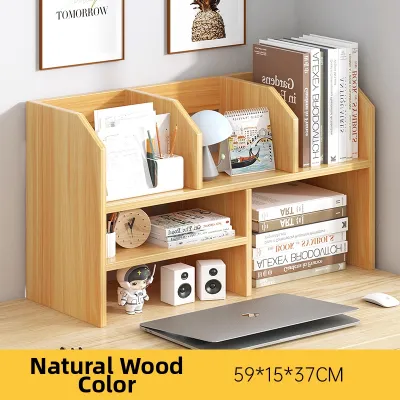
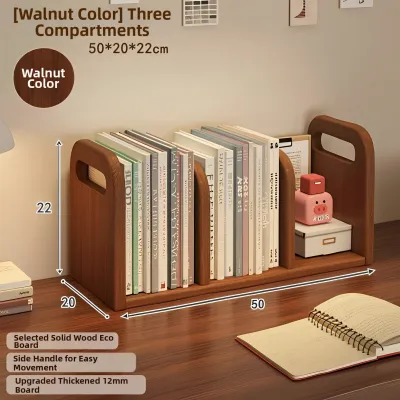

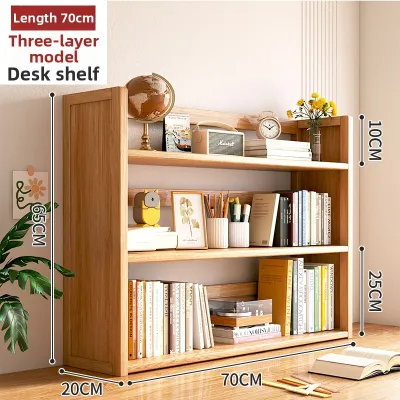
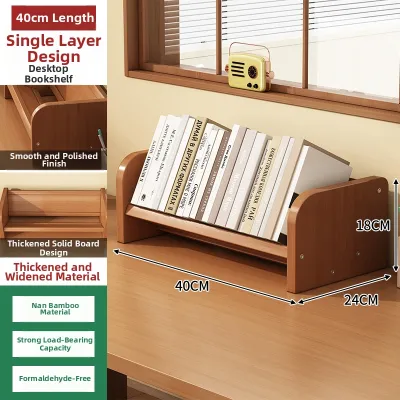
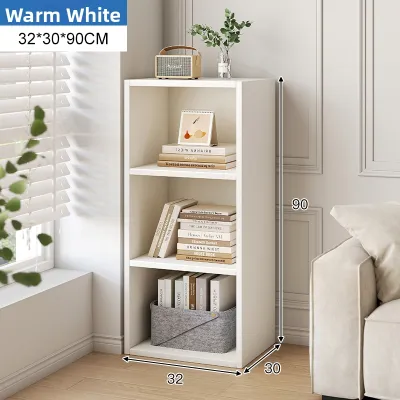
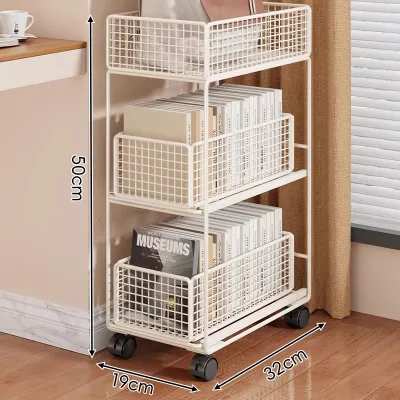
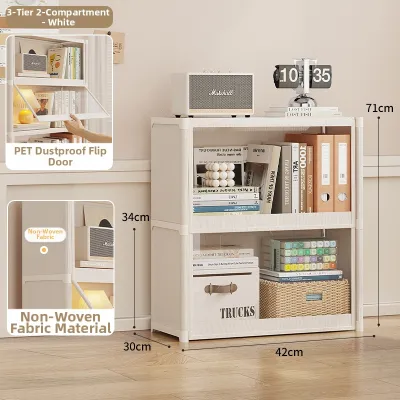
Prices are valid at publication and may change. Please refer to the product page for the latest price.
To capture these imperfections, take three separate width measurements across the designated wall area. Measure once at the floor level, once at waist height, and once near the top of where the unit will stand. If you are placing the organizer in an alcove or a recessed niche, these three measurements are critical. Write down all three numbers and use the smallest measurement as your absolute limit to guarantee the furniture will slide into place without scraping the walls.
In addition to the basic wall dimensions, you must identify and measure around physical obstacles that protrude from the wall or floor. Look for baseboards, skirting boards, electrical outlets, light switches, internet ports, and air conditioning trunking. In many homes, external wiring casings or cooling pipes run along the lower or upper sections of the walls. If a book organizer is placed directly in front of these fixtures, it will not sit flush against the wall, which can compromise its stability and leave an unsightly gap.
If you plan to place the organizer over outlets or switches, measure their exact height from the floor and their distance from the nearest corner. This allows you to check if the backing of the organizer can be modified or if the unit has an open-back design that accommodates these fixtures. For skirting boards, measure their height and depth so you can determine if the furniture’s base needs a cutout or if you must select a unit with recessed rear legs designed to clear the skirting.
Step 2: Check Ceiling Height and Vertical Clearance
Verifying your vertical clearance is essential to ensure your book organizer fits comfortably without looking cramped or blocking overhead fixtures. Start by measuring the distance from your finished floor—whether it is tile, vinyl, parquet, or laminate—to the ceiling. Just like your walls, ceiling heights can vary slightly across a single room, so take measurements at both the left and right sides of the intended installation area.

Once you have the raw ceiling height, subtract the space required for fixtures like pendant lights, ceiling fans, wall-mounted air conditioning units, and decorative crown molding. In tropical climates where ceiling fans and air conditioners are constantly in use, maintaining adequate clearance is both a functional and a safety necessity. A tall bookcase placed too close to an air conditioning unit can block airflow, restrict access for filter cleaning, or expose books to direct moisture and temperature fluctuations.
Another critical factor is the vertical clearance required during the assembly process. Many tall, freestanding book organizers are designed to be assembled flat on the floor and then tilted upright into their final position. When you tilt a tall rectangular unit, its diagonal height is temporarily greater than its actual vertical height. If your ceiling is too low, the top corner of the organizer will scrape or jam against the ceiling as you try to stand it up.
To avoid this issue, check the manufacturer’s assembly instructions for the minimum ceiling height required for tilt-up assembly. If your ceiling height is close to the limit, you may need to choose a slightly shorter unit, assemble the organizer vertically in its final spot, or opt for a modular system that is built in smaller, stackable sections. Taking this precaution saves you from structural damage to both your ceiling and your new furniture.
Step 3: Account for Depth, Pathways, and Delivery Constraints
While width and height determine if a book organizer fits against a wall, depth dictates how the unit interacts with the rest of the room. Measure the available depth from the wall outward, ensuring the furniture will not obstruct natural walking paths or make the room feel cramped.
You must also account for clearance required by doors, windows, and other furniture. Measure the full swing radius of nearby bedroom doors, wardrobe doors, cabinet drawers, and low-level windows to ensure they can open completely without striking the organizer. If space is tight, consider a shallower unit or an open-shelf design that keeps the visual profile light and minimizes physical obstruction.
Beyond the room itself, plan for the delivery and transport phase, especially in high-density housing environments like apartments, condominiums, and Housing & Development Board (HDB) flats. Measure the width and height of your main entrance door, hallway turns, and the passenger lift cabin. If the book organizer is delivered fully assembled or in exceptionally long flat-pack boxes, it must fit inside the lift cabin and clear the door frame. Failing to fit in the elevator may result in manual carrying fees up the stairwell or delivery rejection, so always check the package dimensions before purchasing.
Finally, match the depth of the organizer to the specific items you plan to store. Standard paperbacks typically require a shelf depth of only 15 centimeters, while standard novels and textbooks need about 20 to 25 centimeters. If you have a collection of oversized art books or photo albums, you may need shelves that are 30 centimeters deep or more. Measuring your largest books beforehand ensures they will not overhang the shelf edges, which looks untidy and increases the risk of books being knocked to the floor.
Step 4: Match Your Measurements to Book Organizer Types
Your spatial measurements and room layout will naturally point you toward specific types of book organizers. Matching your physical constraints to the right furniture category ensures structural safety, optimal storage capacity, and visual harmony.
Freestanding and Tall Bookcases
These classic units are best suited for spacious rooms with wide, open walls, high ceilings, and deep floor areas. Because they sit directly on the floor, they can support substantial weight, making them ideal for large, heavy book collections.
- Floor Levelness: Check the levelness of your floor; uneven floors can cause the bookcase to lean forward or wobble, putting stress on the joints.
- Safety Anchoring: Tall freestanding units must be secured to the wall to prevent dangerous tip-over accidents. Check the manufacturer's provided hardware and instructions, and ensure you have the correct anchors for your specific wall material.
Wall-Mounted and Floating Shelves
If floor space is highly restricted, wall-mounted or floating shelves allow you to utilize vertical space above desks, beds, or low-level seating while keeping the ground area clear.
- Wall Type Verification: Verify your wall composition before drilling. Solid concrete walls offer high load-bearing capacity, whereas hollow drywall or partition walls require specialized anchors and must attach directly to wall studs to support weight.
- Load Limits: Check the manufacturer's specified maximum load capacity for both shelves and brackets. Overloading can cause shelves to sag, pull away from the wall, or collapse entirely.
Corner and Narrow Space Organizers
For rooms with awkward layouts, corner shelves and slim tower organizers turn dead space into functional storage by sliding into tight gaps or nestling into corners.
- Corner Angle Check: Measure diagonally to check if your corners form a perfect 90-degree angle; if the corner is warped, a rigid corner unit may not sit flush, leaving visible gaps.
- Clearance for Mechanisms: If using a rotating or sliding corner organizer, ensure there is enough clearance around the unit for the mechanism to operate without hitting adjacent walls, curtains, or furniture.
Step 5: Avoid Common Sizing and Measurement Mistakes
Even experienced home decorators can overlook small details that lead to installation failures or costly returns. Being aware of these common pitfalls helps you get the measurement process right the first time.
One of the most frequent mistakes is forgetting to account for skirting boards. Because skirting boards project outward from the bottom of the wall, they prevent the base of a standard bookcase from touching the wall. If you are fitting an organizer into a tight alcove, failing to subtract the thickness of the skirting boards on both sides can result in a unit that is physically too wide to fit into the space. Always measure the width between the skirting boards, not just the bare walls.
Another oversight is ignoring ventilation and heat dissipation requirements. If your book organizer is positioned near electronic devices, media consoles, internet routers, or heating and cooling vents, it can trap heat and restrict airflow. This can cause electronics to overheat and malfunction. Ensure there is a gap of at least a few centimeters around any electronic equipment integrated into your shelving system.
Additionally, avoid overestimating the weight capacity of a shelf based solely on the material name. While “solid wood” is generally strong, the structural design, shelf span, and bracket placement play a major role in how much weight a shelf can support without bowing. Long, unsupported shelves made of engineered wood or MDF are prone to sagging under the weight of heavy textbooks or hardcovers. Always verify the manufacturer’s official weight ratings per shelf rather than relying on assumptions.
Lastly, never assume that standard doorways will accommodate oversized packaging. Flat-packed furniture often arrives in long, heavy boxes that require wide turning angles in corridors and entryways. Always compare the “package dimensions” against your home’s entry points, elevator doors, and stairwells before finalizing your purchase to avoid delivery complications.
Frequently Asked Questions (FAQ)
How much extra space should I leave around a freestanding book organizer?
While a book organizer can theoretically fit into a space with matching dimensions, it is best to leave a small buffer for visual balance and ease of installation. Leaving a clearance of 1 to 2 centimeters on either side of the unit prevents the furniture from scraping your walls during placement. For tall units, leaving at least 5 centimeters of clearance below the ceiling provides a sense of visual breathing room and allows for easier cleaning and dusting of the top surface.
Do I need to anchor my book organizer to the wall?
Yes, anchoring is a critical safety practice for any book organizer that is tall, top-heavy, or narrow. Freestanding units can easily tip over if a child climbs on the shelves, if heavy books are placed on the upper shelves first, or during minor structural vibrations. Always use the anti-tip safety brackets and wall anchors supplied by the manufacturer. If the supplied hardware does not match your specific wall type (such as solid concrete or hollow drywall), consult a hardware professional to select the appropriate heavy-duty anchors.

Community discussion
Share your experience or ask a question. Comments are reviewed before publication.