
Ordering a custom shelf is an investment in both the functionality and aesthetic of your home. Unlike mass-produced furniture, a bespoke unit is designed to maximize every available millimeter of your space, turning awkward corners or empty alcoves into seamless storage solutions. However, the success of this project hinges entirely on the accuracy of your initial measurements. A single miscalculated centimeter can mean the difference between a flawless, built-in look and a costly piece of timber that physically cannot fit into your home.
To measure your space correctly for a custom shelf, you must systematically record the width, height, and depth at multiple points across the target area, identifying the smallest dimensions to guide the fabrication process. This guide provides a step-by-step methodology to map out your walls, account for architectural obstructions, and ensure your new furniture can be safely delivered and installed.
Why Precise Measurements Matter for Custom Shelving
When you purchase a standard, off-the-shelf bookcase, you accept certain compromises. There are often awkward gaps on either side, wasted vertical space near the ceiling, and visible gaps behind the unit due to skirting boards. A custom shelf, by contrast, is designed to look like a natural extension of your home’s architecture. To achieve this seamless integration, your measurements must be incredibly precise.
Products mentioned in this guide
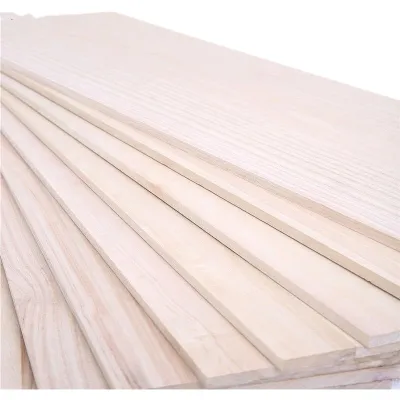
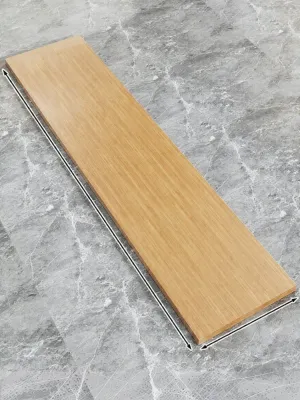
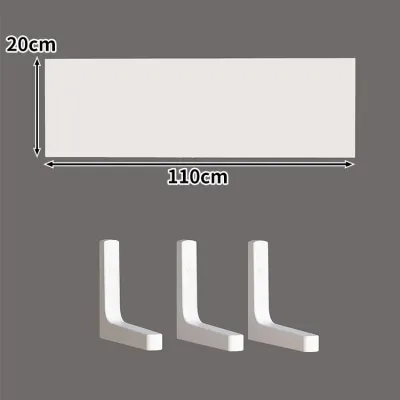
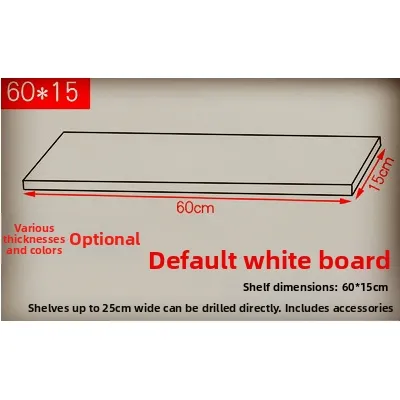
Prices are valid at publication and may change. Please refer to the product page for the latest price.
In typical residential properties, including modern apartments and older flats, walls and floors are rarely perfectly straight or square. Concrete settling, plastering variations, and structural shifts introduce subtle curves, slopes, and bows that are invisible to the naked eye. If you measure the width of an alcove at only one point, you risk ordering a shelf that is too wide for the narrower sections of the wall. Because custom furniture is fabricated to your exact specifications, manufacturers cannot easily alter a finished unit on-site without compromising its structural integrity or finish. Getting the measurements right the first time protects your budget and prevents long project delays.
Essential Tools for Accurate Space Measurement
Before you pull out a scrap piece of paper and a basic ruler, gather the correct tools. Accurate spatial measurement requires professional-grade equipment that minimizes human error and accounts for physical limitations over long distances.

First, secure a heavy-duty steel tape measure of at least 5 meters. Opt for a tape with a wide, rigid blade that remains stiff when extended horizontally, as flimsy tapes will sag and distort your measurements over wide spans. Second, a laser distance measurer is highly recommended for capturing long walls and high ceilings. This tool allows you to take instant, precise measurements single-handedly, reducing the risk of the tape slipping.
You will also need a spirit level (ideally 60 centimeters or longer) to check the alignment of your floors and walls. A short level may fail to register gradual slopes over a wide surface. Finally, keep a roll of low-tack masking tape, a pencil, a sturdy step ladder, and a dedicated notebook or digital tablet handy to sketch the space and record your data immediately.
Step-by-Step Guide to Measuring Wall and Alcove Dimensions
Measuring a room for custom furniture is not a casual task; it requires a systematic, disciplined approach. Whether you are planning a full-height library wall or a compact alcove display, you must treat the target area as a three-dimensional grid.
Never rely on memory or quick mental math. Sketch a clear diagram of the wall or alcove from a front-facing perspective, and draw a separate top-down view representing the depth. Label each line clearly so that when you record your measurements, you know exactly which coordinate they represent.
Capturing Width, Height, and Depth
To account for the natural irregularities of residential walls, you must capture a minimum of three measurements for each primary dimension: width, height, and depth.
To measure the width, take three horizontal readings. Measure once at the very bottom (just above the skirting boards), once across the middle (around chest height), and once at the very top (near the ceiling). Write down all three figures in millimeters.
To measure the height, take three vertical readings. Measure from the floor to the ceiling (or to the top boundary of the shelf) on the far-left side, in the exact center, and on the far-right side.
To measure the depth, identify how far forward the shelf will extend. Measure this distance from the back wall at multiple points, checking both the left and right boundaries as well as the top and bottom.
Once you have collected these nine core data points, apply the golden rule of custom furniture ordering: always use the smallest recorded measurement for the width and height. If your alcove’s width is 1202 mm at the bottom, 1198 mm in the middle, and 1200 mm at the top, your custom shelf must be designed to fit the 1198 mm restriction. Using any larger figure will result in a shelf that jams against the walls during installation.
Checking Wall Plumb and Floor Level
Even if your width and height measurements are consistent, you must verify if the surfaces are truly vertical and horizontal. A wall that tilts forward or backward is ‘out of plumb,’ while a floor that slopes to one side is ‘out of level.’
Place your spirit level vertically against the wall at several points across the installation zone. If the bubble is not centered between the lines, the wall is leaning. A leaning wall means that a perfectly square shelf will leave wedge-shaped gaps along the sides or back. If the tilt is significant, you must inform your custom shelf manufacturer; they may need to provide filler strips or design the side panels with extra material that can be ‘scribed’—shaved down on-site by installers to match the wall’s precise contour.
Next, place the spirit level flat on the floor where the shelf will stand. If the floor slopes, a heavy shelf will lean, putting stress on the joints and causing doors or drawers to misalign. For uneven floors, check if your custom shelf can be built with adjustable leveling feet hidden behind a removable base plinth, allowing the installers to level the unit perfectly on-site.
Identifying and Measuring Around Obstructions
Walls are rarely blank canvases. They are populated by architectural features, electrical fixtures, and utility lines that can obstruct your custom shelf. Failing to account for these elements can render an otherwise perfect shelf completely unusable.
Start by measuring your skirting boards. These wooden or PVC profiles run along the base of the wall and prevent furniture from sitting flush against it. Measure the height of the skirting board and how far it protrudes from the wall. Provide these dimensions to your shelf manufacturer so they can cut a precise notch (recess) into the bottom rear corner of the shelf’s side panels.
Next, locate all electrical outlets, light switches, and fiber optic data ports. If your shelf is designed to cover these areas, you must decide how to access them. You can measure their exact positions—recording the distance from the nearest side wall and the floor to the edges of the outlet plate—so the manufacturer can pre-cut access holes in the back panel. Alternatively, consult a licensed electrician before fabrication to safely relocate the outlets.
In many homes, air conditioning trunking and copper piping run along the upper corners of rooms. Measure the width and depth of this trunking, as well as its path. Your custom shelf design may need to feature a stepped top or a recessed back to accommodate these structural elements without blocking access to the pipes.
Planning for Installation Clearances and Access Routes
A custom shelf that fits your wall perfectly on paper is a failure if it cannot be physically brought into the room or maneuvered into place. You must plan for both physical tolerances and delivery logistics.
First, establish an installation clearance. Standard practice is to subtract a small tolerance from your final, smallest measurements. For a tight alcove fit, leaving a 10 mm to 20 mm gap on the sides and top is recommended. This space allows the installers to slide the cabinet into place without scraping the walls. These small gaps are later covered with matching filler panels for a seamless built-in look.
Second, measure your home’s access routes. If your custom shelf is delivered fully assembled or in large, pre-fabricated panels, it must pass through your building’s common areas.
Measure the height, width, and diagonal depth of the building’s elevator. If you live in a high-rise condominium or apartment flat, a 2.6-meter-tall single-panel unit may not fit inside the lift, forcing the delivery team to carry it up the stairwell—which often incurs hefty surcharges or may be physically impossible due to tight staircase turns.
Additionally, measure the clear opening width of your apartment’s main door, internal hallway turns, and the doorway of the room where the shelf will live.
Finally, consider the assembly clearance. If a tall shelf is assembled flat on the floor and then raised upright, it requires a certain amount of vertical clearance. As the unit is tilted upward, its diagonal height is temporarily greater than its standing height. If your ceiling is 2400 mm, a shelf that is 2380 mm tall cannot be assembled flat and stood up; it must be designed to be assembled vertically or in modular sections.
Common Measuring Mistakes to Avoid
To ensure your custom shelf project proceeds smoothly, avoid these frequent measuring errors that often lead to costly remakes.
A major pitfall is measuring only once. No matter how confident you are in your first set of numbers, always perform a second independent measurement to verify them.
Another mistake is assuming opposite walls are parallel. Never measure the width at the front of an alcove and assume the back of the alcove is identical; alcoves frequently taper toward the back.
Do not measure your existing furniture to determine the size of your new custom shelf. Old bookcases may have been sized to fit a different room or standard manufacturing limitations; measure the actual physical wall space to maximize your storage potential.
Finally, avoid mixing units of measurement. Do not record some dimensions in centimeters and others in inches or millimeters. Stick to a single unit—preferably millimeters—to match the technical drawing standards of professional custom cabinet makers.
Frequently Asked Questions (FAQ)
Here are answers to some of the most common questions regarding the preparation and measurement process for custom shelving.
Should I measure the space before or after painting the walls?
You should always take your final, definitive measurements after all major plastering, screeding, and wall priming are complete. While a single coat of paint may seem microscopic, multiple layers of thick paint, textured finishes, or wallpaper can easily reduce your wall-to-wall width by 3 to 5 millimeters. If you must submit measurements before the final paint coat is applied, ensure you factor this extra thickness into your installation clearance to prevent a tight fit from becoming an impossible one.
How do I measure for a floating custom shelf?
Measuring for a floating custom shelf shifts the focus from boundary walls to structural support systems. You must locate the internal framing of your wall using a high-quality stud finder to identify where metal or timber studs are positioned, or verify if the wall is solid concrete or masonry. Measure the distance between these structural anchor points, as your shelf’s internal bracket must align with them to support the weight of the shelf and its contents. Additionally, use a wall scanner to check for hidden electrical conduits or water pipes along your intended mounting line to ensure a safe installation.

Community discussion
Share your experience or ask a question. Comments are reviewed before publication.