
Finding the perfect narrow shoe rack is a balancing act between the physical limits of your home and the size of your footwear collection. In space-conscious environments like Singapore, where HDB flats and modern condominiums prioritize efficient layouts, an oversized or poorly measured shoe rack can quickly turn an entryway into a cramped bottleneck. To choose the right capacity, you must accurately calculate your available floor area, account for architectural obstacles, and audit your shoe collection’s physical dimensions.
By taking precise measurements and matching them to the right furniture design, you can keep your home organized without sacrificing valuable floor space. This guide outlines exactly how to assess your entryway, calculate your true storage needs, and select a narrow shoe rack that fits both your space and your lifestyle.
Measure Your Entryway and Hallway Space Accurately
Before browsing online marketplaces or visiting local furniture showrooms, you must establish the exact physical boundaries of your intended installation spot. Use a metal measuring tape rather than a soft sewing tape to ensure accuracy. Measure the maximum available width, depth, and height of the space, writing down the absolute limits of the footprint. If you plan to order a pre-assembled unit, also measure your lift doors, main gate, and front doorway to guarantee the delivery team can safely transport the furniture into your home.
Products mentioned in this guide
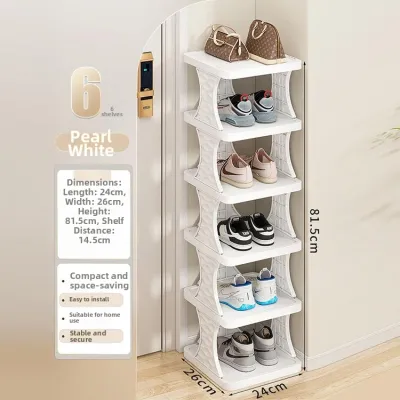
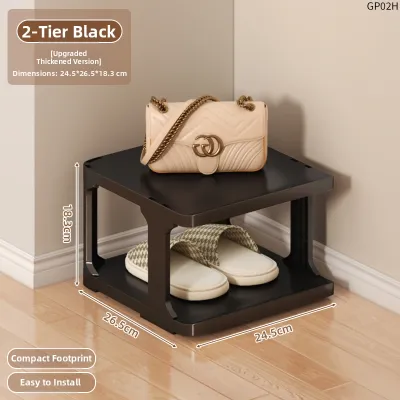
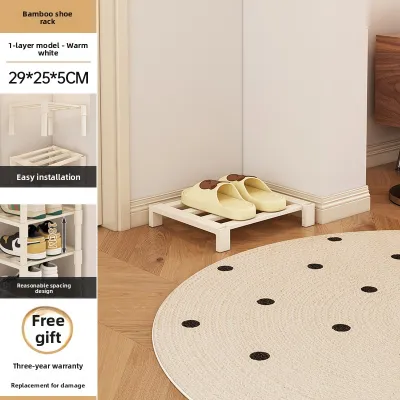
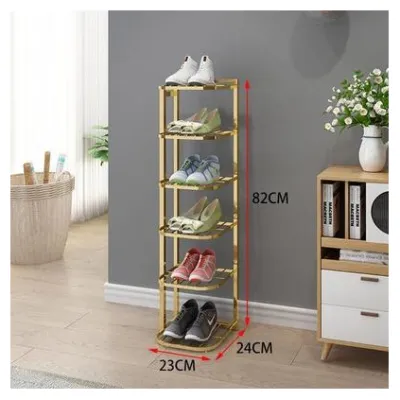
Prices are valid at publication and may change. Please refer to the product page for the latest price.
One of the most common installation oversights is ignoring the skirting boards running along the base of your walls. These wooden or tiled borders typically project 1.5 to 2.5 centimeters from the wall, preventing flat-backed furniture from sitting completely flush. If you do not account for this gap, your shoe rack will be pushed forward into the walkway, or worse, it may lean forward at an unstable angle. Always measure your available depth from the front face of the skirting board rather than the bare wall.
Next, evaluate the swing paths of all nearby doors to prevent frustrating daily collisions. Fully open your main entrance door, security gate, and any adjacent closet or bedroom doors to see where they swing. Mark the arcs on the floor and ensure your proposed shoe rack sits entirely outside these zones. Do not forget to check the clearance of your digital lock handle or door lever, as these can easily strike a tall or wide cabinet when the door is opened.
Finally, assess the remaining walkway width to maintain a safe and comfortable passage. In Singapore, fire safety guidelines require a minimum clear escape path of 1.2 meters in common HDB corridors, and maintaining a clear pathway inside your foyer is equally important for daily comfort. Ensure that even with the shoe rack in place, family members can walk past comfortably, carry groceries inside, or navigate the space with a stroller or wheelchair without bumping into the furniture.
Audit Your Shoe Collection to Calculate True Capacity Needs
To find a rack that keeps your entryway clutter-free, you must determine your actual storage requirements by auditing your current footwear. Empty your existing storage and count every pair of shoes, categorizing them by regular wearers and seasonal or occasional use. Add a 10% to 20% buffer to this baseline number to accommodate future purchases, growing children, or footwear worn by visiting guests.

Different shoe types require vastly different amounts of vertical and horizontal space. Flat sandals, slippers, and canvas plimsolls require minimal vertical clearance, typically fitting easily into shelves spaced 8 to 10 centimeters apart. Conversely, high-top sneakers, running shoes, high heels, and work boots need a tier height of 15 to 30 centimeters to stand upright without being crushed. If your household wears a diverse mix of footwear, prioritize racks with adjustable or removable shelves so you can customize the interior height.
Once you have categorized your shoes, calculate the number of tiers your new rack will require. A standard narrow shoe rack with a width of 50 to 70 centimeters can typically accommodate two to three pairs of adult shoes per tier. Divide your total target capacity by this per-tier capacity to find the minimum number of shelves you need. For example, if you need to store 15 pairs of shoes and choose a rack that holds 3 pairs per tier, you will need a unit with at least 5 tiers.
Additionally, check the physical length of the largest shoes in your household, particularly if anyone wears a UK size 10 or larger. Large sneakers and boots can easily measure 30 centimeters or more in length. If you purchase a flat-shelved narrow shoe rack with a depth of only 20 centimeters, these larger shoes will overhang the edges, which looks untidy and can block narrow walkways. Ensuring the shelf depth matches your largest shoe length is critical for a clean look.
Match Your Dimensions to the Right Narrow Shoe Rack Design
Once you have your physical space measurements and shoe capacity requirements, you can select a design that optimizes both. Different mechanical configurations solve specific spatial challenges, ranging from ultra-shallow corridors to vertical wall zones.
Tilt-Out and Pull-Out Slim Cabinets
Tilt-out or flip-down shoe cabinets are specifically engineered for exceptionally narrow corridors where traditional flat shelves are too deep. These units store shoes vertically or at an angle inside hinged compartments that flip outward when opened, allowing the cabinet depth to remain incredibly slim—often between 15 and 24 centimeters. This design keeps footwear completely hidden from view, creating a streamlined, minimalist aesthetic in your foyer.
However, this compact footprint comes with specific capacity trade-offs. The angled internal compartments are highly constrained by height and thickness, meaning bulky basketball sneakers, platform heels, or ankle boots may prevent the drawer from closing properly. Before purchasing a tilt-out model, always verify the manufacturer’s specified maximum shoe size and internal compartment depth to ensure your footwear collection is compatible with the mechanism.
Vertical and Stackable Narrow Shelving
If you have ample vertical wall space but very limited floor width, tall vertical shoe towers or stackable shelving units are an excellent choice. By expanding upward rather than outward, a vertical rack can hold 10 or more pairs of shoes while occupying a floor footprint no larger than a single pair of boots. These open or semi-open structures also make it easy to grab your daily footwear on the way out the door.
When choosing a tall vertical rack, you must verify your ceiling height and pay close attention to the unit’s center of gravity. As you stack shoes higher, the unit naturally becomes more top-heavy, increasing the risk of instability. If you opt for modular, stackable shelves, carefully read the manufacturer’s assembly instructions to ensure the interlocking connectors, dowels, or brackets are securely fastened to prevent the tiers from sliding apart.
Over-the-Door and Wall-Mounted Solutions
For entryways with absolutely zero available floor space, over-the-door racks and wall-mounted floating shelves offer a practical alternative. Over-the-door organizers hang directly from your main door or utility closet door using thin metal hooks. To ensure this setup works, measure the gap between the top of your door and its frame; you will typically need at least 2 to 3 millimeters of clearance for the door to close smoothly without scraping.
Wall-mounted floating shoe shelves lift your footwear completely off the floor, making it easy to sweep and mop underneath. However, successful installation depends heavily on your wall construction. In Singapore, structural walls and household shelter walls are made of solid reinforced concrete, which requires a masonry drill and heavy-duty wall plugs to mount securely. Partition walls, on the other hand, are often drywall or plasterboard, requiring specialized toggle bolts to prevent the shelf from tearing out under the weight of your shoes. Always respect the manufacturer’s strict weight limits, as these floating designs are best reserved for lightweight daily footwear.
Avoid Common Sizing and Capacity Mistakes
To ensure your narrow shoe rack remains safe, functional, and durable, avoid these common purchasing and installation errors:
- Overlooking the Skirting Board Gap: Failing to account for the skirting board causes the top of a tall, narrow cabinet to lean away from the wall. This gap compromises the stability of the unit and prevents wall-anchoring hardware from securing flat against the studs or concrete.
- Overloading the Weight Capacity: Narrow shoe racks often feature lightweight frames made of engineered wood, plastic, or thin metal tubes. Exceeding the manufacturer's stated weight limit will cause shelves to bow, joints to loosen, and can ultimately lead to a structural collapse or a dangerous tip-over incident.
- Choosing Rigid, Fixed-Tier Heights: Buying a rack with non-adjustable shelves when your household wears a mix of boots, heels, and flat sandals leads to highly inefficient space utilization. You will end up with empty vertical space above your flats, while your taller shoes are forced to bend or lie awkwardly on their sides.
- Ignoring Ventilation in Humid Climates: Singapore's high relative humidity, which regularly exceeds 80%, can quickly turn enclosed, unventiled shoe cabinets into breeding grounds for mold, mildew, and unpleasant odors. If you choose an enclosed cabinet, ensure it features slatted doors, rear ventilation grates, or breathable mesh panels. For added protection, place moisture-absorbing canisters or charcoal bags inside the compartments and clean them regularly.
Frequently Asked Questions (FAQ)
How many pairs of shoes can a typical narrow shoe rack hold?
A typical narrow shoe rack holds between 10 and 30 pairs of shoes, depending heavily on the unit’s height, design, and shelf width. A standard low-profile narrow rack with 3 to 4 tiers usually accommodates 6 to 12 pairs of standard adult shoes. Tall vertical towers or multi-compartment tilt-out cabinets can maximize vertical space to hold 20 to 30 pairs. Keep in mind that bulky footwear, such as wide-sole running shoes or boots, takes up more horizontal space and will reduce the overall capacity compared to lightweight flats or sandals.
Do I need to anchor a narrow shoe rack to the wall?
Yes, you should always anchor a tall, narrow shoe rack to the wall. Because these units have a shallow depth and a high center of gravity, they pose a significant tipping hazard, especially when heavily loaded or when multiple tilt-out drawers are opened simultaneously. This risk increases dramatically in households with young children or active pets who might pull or climb on the furniture. Always follow the manufacturer’s safety instructions and use the included anti-tip hardware, ensuring you select the correct anchors for your specific wall type, whether solid concrete or drywall.

Community discussion
Share your experience or ask a question. Comments are reviewed before publication.