
To choose the right shoe rack divider size and capacity, you must measure the exact internal width, depth, and height of your cabinet shelves, subtract the cumulative thickness of the dividers, and compare these dimensions to the physical footprint of your footwear. Taking shortcuts during this process often leads to misaligned dividers, doors that fail to close, or cramped sections that scuff your shoes.
In space-conscious homes, such as Singapore’s HDB flats and condominiums, maximizing entryway storage is essential. Utilizing shoe rack dividers is a highly effective way to organize footwear, prevent clutter, and double the usable capacity of your existing cabinet. However, because shoe sizes, cabinet designs, and divider mounting styles vary significantly, a systematic measurement approach is required to ensure a seamless fit.
How to Accurately Measure Your Shoe Rack Shelves
Before purchasing any organizing accessories, you must capture the precise internal dimensions of your shoe cabinet. External measurements are often misleading because they include the thickness of outer panels, decorative trim, and baseboards. Open your cabinet doors fully and use a rigid metal measuring tape to record the internal width from the inside face of the left panel to the inside face of the right panel.
Products mentioned in this guide
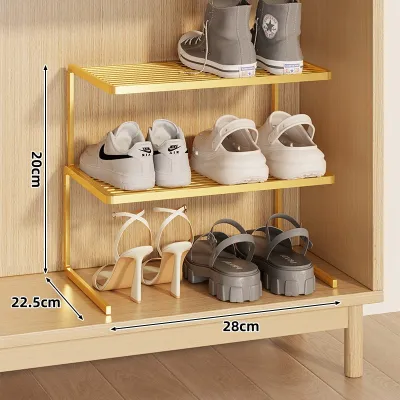
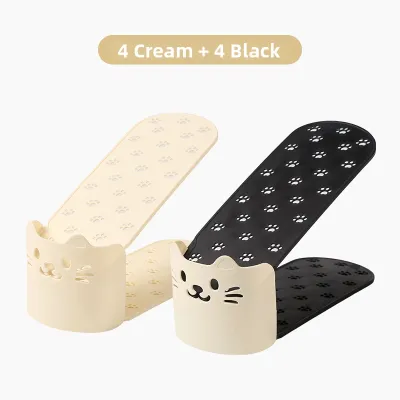
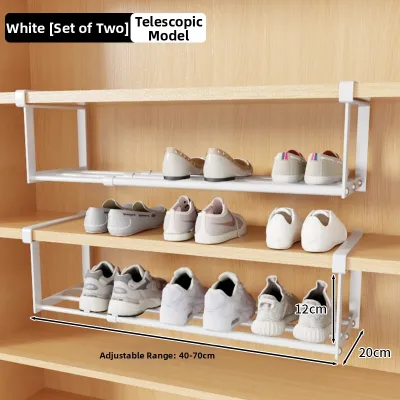
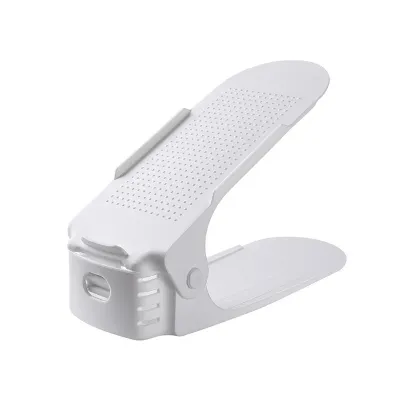
Prices are valid at publication and may change. Please refer to the product page for the latest price.
Next, measure the internal depth from the back panel to the front edge of the shelf. If your cabinet has doors, measure only up to the point where the closed door sits, rather than the absolute edge of the shelf. This prevents the dividers or protruding shoes from blocking the doors when you try to shut them.
Vertical clearance is equally critical. Measure the height between the top surface of the shelf and the underside of the shelf directly above it. Do not assume that this spacing is uniform across all tiers. Many manufacturers design shoe cabinets with a taller bottom shelf to accommodate boots or high heels, while the middle shelves are spaced more closely for flats and sandals.
Finally, inspect the interior for physical obstructions. Take note of protruding door hinges, magnetic catches, shelf support pegs, or center structural partitions. These components reduce the actual usable space and can prevent a rigid divider from sliding into its intended position. Subtract the width of any protruding hardware from your total measurements to find the true clearance.
Matching Divider Specifications to Your Shelf Measurements
Once you have recorded your shelf dimensions, you can evaluate different shoe rack divider specifications to find a compatible match. Start by comparing the height of the divider against your shelf’s vertical clearance. The divider should be short enough to allow you to lift shoes in and out easily without scraping your knuckles or the shelf above, yet tall enough to keep shoes upright and separated.

Aligning the divider depth with your shelf depth is crucial for safety and aesthetics. A divider that is too deep will overhang the shelf, which can prevent cabinet doors from closing or create a tripping hazard in open entryway racks. Ideally, the divider should be slightly shorter than the shelf depth, leaving a small gap at the back for air circulation, which is particularly important in humid climates to prevent mold growth on leather footwear.
Different base attachment mechanisms affect how much usable space remains on your shelf. Freestanding dividers with wide, flat bases offer excellent stability but occupy a small amount of horizontal shelf space. Adhesive-backed dividers provide a permanent, slim-profile solution but require a completely clean, non-porous surface to bond effectively. If you choose slot-in or clip-on dividers, verify that the clip opening matches the exact thickness of your shelf boards, which typically range from 15mm to 18mm in standard wooden cabinetry.
If you are considering adjustable or tension-based dividers, check the manufacturer’s specifications for their minimum and maximum expansion limits. To maintain structural integrity and prevent the divider from slipping, your shelf dimensions should fall comfortably within the middle of the specified range rather than at the absolute minimum or maximum limits.
Planning Section Widths for Your Shoe Collection
To determine how many dividers you need and how to space them, you must analyze the physical footprint of your footwear collection. Gather the widest and longest pairs of shoes in your household, such as bulky running sneakers, leather dress shoes, or wide-fit boots. Place them side-by-side on a flat surface and measure their combined width at the widest point, which is usually across the toe box or the sole.
When planning your layout, allocate a small lateral clearance buffer of approximately 1.5 to 2 centimeters between each pair of shoes. This extra space ensures you can retrieve a pair easily without pulling adjacent shoes out of alignment or causing scuff marks on delicate materials like suede or polished leather.
To calculate the number of sections you can create, take the total usable internal shelf width and subtract the cumulative thickness of the dividers you plan to install. For example, if you use four acrylic dividers that are each 5mm thick, you must subtract 20mm from your total width. Divide the remaining horizontal space by the width of your shoe pairs (including the lateral clearance buffer) to determine how many organized slots will fit across the shelf.
Keep in mind that different types of footwear require different spacing. You can group slim sandals, slides, and canvas plimsolls closer together, allowing you to fit more pairs per shelf. Conversely, structured leather shoes and high-top sneakers require wider sections to prevent the uppers from being crushed or creased by the dividers.
Common Measuring Mistakes That Cause Poor Fits
One of the most frequent errors is measuring only a single shelf and assuming all other tiers in the cabinet share identical dimensions. Custom carpentry and flat-pack furniture often feature subtle variations in shelf depth or height to accommodate structural joints or door hinges. Measuring every single tier individually before ordering your dividers prevents installation failures.
Another common oversight is ignoring the cumulative thickness of multiple dividers. While a single plastic divider might seem negligibly thin, installing several of them across a wide cabinet can easily consume enough space to make the final shoe slot too narrow for a standard shoe, leaving you with unusable dead space.
Weight distribution and shelf bowing can also alter your measurements over time. Heavy shoe collections can cause wooden, laminate, or thin plastic shelves to sag slightly in the middle. This bowing reduces the vertical clearance at the center of the shelf, meaning a rigid divider that fits perfectly near the supported side panels might jam, warp, or fail to slide in when placed toward the center.
Finally, do not overlook the swing radius of nearby cabinet doors or pull-out drawers. Concealed European-style hinges often swing inward slightly before opening outward, which can temporarily block the front edge of the shelf. If a divider is placed too close to the hinge side of the cabinet, it may collide with the hinge mechanism or prevent the door from opening to its full angle.
Frequently Asked Questions (FAQ)
Will dividers work on wire or slanted shoe rack shelves?
Freestanding dividers generally struggle on wire shelves because the thin wire grids do not provide a continuous, flat surface, which causes the divider bases to tilt or fall through the gaps. To use dividers on wire racks, look for specialized designs featuring integrated bottom clips that snap directly onto the wire gauge, or secure the base of a standard divider using small, discreet zip ties.
Slanted shelves present a different challenge because gravity constantly pulls both the shoes and the dividers forward. Standard freestanding dividers will slide down the incline unless they are anchored. For slanted shelves, choose dividers that clip firmly to the front or back edge of the shelf, or use adhesive-backed options that can resist the downward gravitational pull and keep your footwear organized.
How do I measure if my shoe rack has a front lip or raised edge?
If your shoe rack features a front lip or a raised retaining edge, you must adjust your depth measurements by measuring from the back panel to the inside face of the front lip, rather than to the outer edge of the shelf. This ensures the divider base can sit completely flat on the shelf surface without resting on the lip at an angle.
Additionally, a raised front edge reduces the vertical entry clearance. Even if the internal shelf height is sufficient, you must be able to tilt and insert the divider past the front lip during installation. To ensure compatibility, measure the clearance from the top of the front lip to the bottom of the shelf above, and verify that your divider can be maneuvered into the cabinet without hitting the upper shelf.

Community discussion
Share your experience or ask a question. Comments are reviewed before publication.