
Finding the right storage for a cramped entryway or a narrow corridor requires balancing physical space with daily functionality. In space-constrained homes, such as modern apartments and HDB flats, the entryway is often a high-traffic bottleneck where shoes pile up quickly. A slim shoe rack offers an elegant solution to reclaim floor space, but finding one that fits seamlessly requires a systematic approach to measuring and selection. To make the right choice, you must evaluate the exact physical limits of your wall space, understand how different rack designs utilize depth, and ensure the unit can safely house your footwear without creating a physical hazard or blocking essential pathways.
Measure Your Space and Clearance Requirements
To find a shoe rack that fits an ultra-narrow zone, you must start with precise, three-dimensional measurements of the target area. Use a metal measuring tape rather than a soft fabric one to ensure accuracy down to the millimeter. Begin by measuring the maximum available height, width, and depth of the wall space where you plan to position the rack. Do not assume your walls are perfectly square; measure the depth at both the floor level and waist height, as plastering and wall finishes can introduce slight variances.
When measuring the depth, always account for the thickness of your skirting boards. Many slim shoe racks are designed to sit flush against the wall, but a standard skirting board can push the top of the rack 1 to 2 cm away from the wall, creating an unstable gap or causing the unit to protrude further into the walkway than expected. If your space has a door frame or architrave nearby, measure the distance from the corner of the wall to the edge of the frame to ensure the rack will not overlap or block the trim.
Products mentioned in this guide
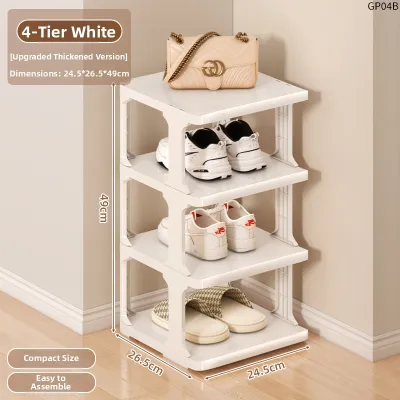
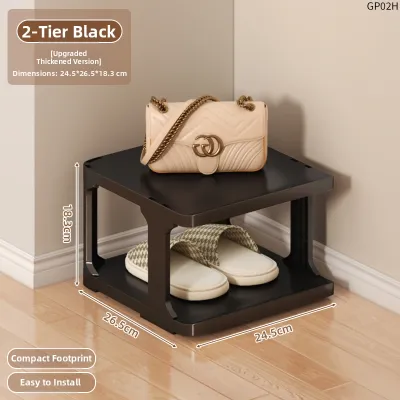
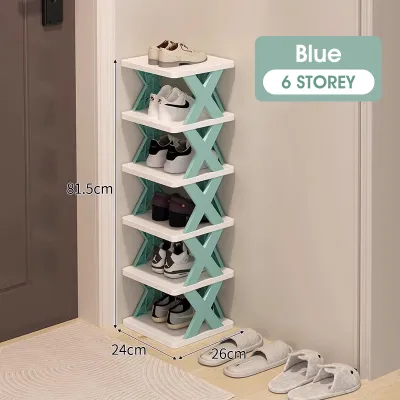
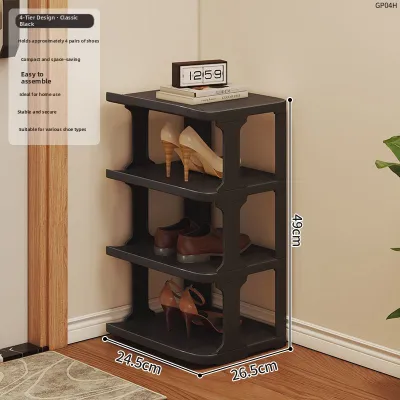

Prices are valid at publication and may change. Please refer to the product page for the latest price.
Next, scan the area for hidden physical obstacles that could restrict the usable depth or height. Look for wall-mounted light switches, electrical outlets, fiber terminal points, intercom units, or distribution board (DB) doors. A slim shoe rack that blocks a light switch or prevents you from opening your DB box in an emergency will quickly become a major inconvenience. Additionally, check for low-hanging items such as door handles, hinges, doorstops, or wall-mounted mail organizers that might collide with the rack when doors are opened or closed.
Finally, determine the minimum walkway clearance required for comfortable daily movement. In a narrow hallway, every centimeter counts. You must ensure that even with the shoe rack in place, family members can walk past comfortably without having to turn sideways. If the rack is placed near the main entrance, ensure there is sufficient clearance to carry groceries, move laundry baskets, or maneuver strollers and mobility aids past the unit without scraping against its edges.
Match Rack Dimensions to Your Available Footprint
Once you have your spatial measurements, you can begin comparing them against the external dimensions of potential shoe racks. It is a common mistake to look only at the advertised shelf depth of a product. You must evaluate the overall external dimensions, which include the thickness of the structural frame, the side panels, and any decorative top overhangs. A rack advertised as having a shallow shelf depth might actually have a significantly larger overall external depth once you account for the rear backing and front panel clearance.

The structural design of the rack plays a massive role in how much physical footprint it occupies. Standard open shelving units require shoes to sit flat, which means the shelf depth must match the length of your largest shoes—typically between 30 cm and 35 cm for adult sizes. If your available depth is less than 25 cm, standard open shelves will likely protrude too far into your walkway.
For ultra-narrow spaces, vertical tilt-out (or tipping bucket) designs are highly effective. These units store shoes vertically or at an angle inside hinged compartments that swing outward when opened. This mechanism allows the cabinet to maintain an incredibly shallow profile, often ranging from 15 cm to 24 cm in depth. When closed, the shoes are hidden completely flat against the wall, preserving precious floor space in tight corridors. However, keep in mind that when a tilt-out drawer is fully open, it temporarily extends the footprint of the rack, so you must ensure there is enough clearance in front of the unit for the drawer to swing down completely.
Evaluate Capacity and Shoe Compatibility
A slim profile often comes with trade-offs in storage capacity and shoe compatibility. Before purchasing, you must verify that the internal dimensions of the rack can physically accommodate your household’s specific footwear collection. Start by checking the vertical clearance between the shelves or inside the tilt-out compartments. Standard slim racks are optimized for flat shoes, such as sneakers, sandals, and flats. If you regularly wear high heels, ankle boots, or thick-soled platform shoes, they may not fit within a shallow compartment without being bent or squashed.
To calculate the realistic capacity of a rack, do not rely solely on the manufacturer’s estimated pair capacity, which is often based on small, narrow shoes. Instead, measure the width of your typical shoes. A standard pair of adult sneakers or dress shoes requires approximately 20 cm to 25 cm of horizontal shelf width. Divide the usable internal width of the rack’s shelves by this measurement to determine how many pairs can actually sit side-by-side. For example, a shelf with an internal width of 60 cm will comfortably fit two pairs of adult shoes and perhaps one single shoe, rather than three full pairs.
To maximize versatility, look for slim shoe racks that feature adjustable or removable internal dividers. Some tilt-out models allow you to adjust the angle of the internal shelf or remove a divider entirely to accommodate taller footwear like boots or high-top sneakers. Having this flexibility ensures that your storage system can adapt to seasonal changes or updates to your wardrobe without requiring a completely new piece of furniture.
Verify Stability and Safety for Narrow Profiles
Because slim shoe racks have an exceptionally shallow footprint and are often quite tall, they inherently have a high center of gravity. This makes them highly susceptible to tipping forward, especially when multiple heavy pairs of shoes are placed on the upper shelves or when a tilt-out drawer is pulled open quickly. Ensuring the structural stability of the unit is critical to preventing accidents, particularly in high-traffic entryways.
When evaluating a rack, check its base design. Some models feature a slightly wider base or extended front legs to improve stability, while others are designed to sit flush against the wall with a cutout at the back to accommodate skirting boards. Regardless of the base design, any slim shoe rack taller than 80 cm should be securely anchored to the wall. Verify that the product includes an anti-tip wall anchoring kit, and check what type of fasteners are required for your specific wall material. In Singapore, most apartment walls are constructed from solid concrete or precast panels, which require a masonry drill bit, plastic wall plugs, and sturdy screws to achieve a secure hold. If you are renting and cannot drill into the walls, you may need to look for freestanding models with wider, weighted bases, though these will inevitably occupy slightly more floor space.
Additionally, inspect the material finishes and edge treatments of the rack. High-traffic entryways are prone to moisture from wet umbrellas, damp shoes, and humid weather. Look for materials with moisture-resistant finishes, such as powder-coated steel, treated bamboo, or engineered wood with a high-quality melamine or laminate finish. Unsealed wood or low-grade particle board can easily absorb moisture, leading to warping, swelling, and mold growth over time. Smooth, rounded edges are also preferable to sharp corners, reducing the risk of painful bumps as family members navigate tight walkways.
Common Measuring and Placement Mistakes to Avoid
To avoid the hassle of returning a bulky item, keep several common planning oversights in mind before making your final decision. One of the most frequent mistakes is forgetting to account for the physical space required to use the shoe rack. While the rack itself might fit perfectly into a narrow nook, you must also have enough room to bend down, squat, or stand comfortably while retrieving or putting away your shoes. If the space is so tight that you must squeeze against the opposite wall just to open a drawer, the setup will quickly become frustrating to use.
Another common error is overlooking the swing path of nearby doors. If you plan to place the shoe rack behind an inward-opening door, you must measure the exact clearance when the door is fully open. If the door strikes the shoe rack before opening wide enough for comfortable entry, it will restrict access to the room and potentially damage both the door and the rack. Always check the position of existing doorstops, as they may need to be relocated or replaced with low-profile versions to prevent the door handle from smashing into the side of the cabinet.
Lastly, do not ignore the location of wall outlets and ventilation grilles. Placing a heavy shoe rack directly in front of an active electrical outlet or a fiber interface point blocks access to essential utilities and can bend power cords at dangerous angles. If you must place the rack over an outlet, ensure the unit has an open back or a specific cutout that allows cables to pass through safely without pushing the furniture away from the wall.
Frequently Asked Questions (FAQ)
Can a slim shoe rack fit behind a door that opens inward?
Yes, a slim shoe rack can fit behind an inward-opening door, provided you have a minimum clearance gap of 15 cm to 20 cm between the wall and the face of the door when it is fully opened. To verify this, open the door completely until it meets its natural stopping point or the wall, and measure the perpendicular distance from the wall to the door’s surface. You must also measure the depth of the door handle; if the handle protrudes significantly, it may strike the rack when the door is swung open, requiring you to install a floor-mounted doorstop to limit the door’s travel and protect the cabinet.
How much walkway width should I leave in a narrow hallway?
For a safe and comfortable hallway, you should aim to maintain a clear walkway width of at least 90 cm. While local building guidelines often specify minimum clear passage widths for safety and accessibility, a width of 75 cm to 80 cm can work in exceptionally tight residential spaces if necessary. To test if your remaining walkway will feel comfortable, place a temporary cardboard box of the same dimensions as the prospective shoe rack in the hallway. Practice walking past it while carrying grocery bags, holding a child’s hand, or moving laundry baskets to ensure you can navigate the space naturally without feeling restricted.

Community discussion
Share your experience or ask a question. Comments are reviewed before publication.