
Transforming a bay window into a functional storage zone is an excellent way to maximize underutilized space, but the unique geometry of these architectural features makes off-the-shelf furniture integration a challenge. Planning a successful DIY modular shelf layout requires capturing the exact angles of your window joints, measuring the width and depth of each wall segment at multiple heights, and selecting components that can adapt to non-standard shapes. Because bay windows are rarely perfectly square, your design must rely on the smallest recorded dimensions and a carefully plotted floor plan to ensure the final assembly fits without forcing.
By taking the time to measure your space systematically and select compatible modular units, you can create a custom-looking storage solution that enhances your room’s aesthetics. Whether you want to build a cozy reading nook, a display for indoor plants, or a streamlined home office station, the key to success lies in thorough preparation.
Essential Tools for Accurate Bay Window Measurements
Before pulling out a tape measure, gathering the correct tools is essential for securing accurate dimensions. Standard measuring tapes can sag over long distances, and visual estimates almost always lead to costly installation errors when dealing with angled walls.
Products mentioned in this guide
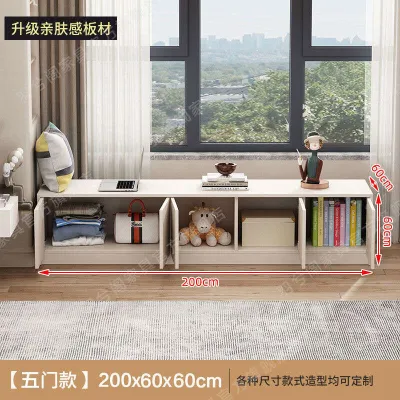
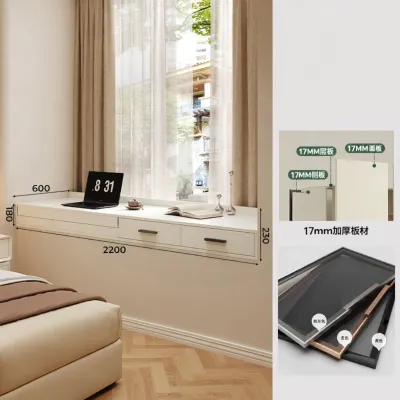
![[CozyNest ]Solid Wood Bay Window Cabinet Storage Cabinet Balcony Organizer Cabinet Home Bookshelf Custom Tall Floor-to-Ceiling Window Sill Cabinet](https://img.lazcdn.com/g/p/41515883f6975badfcf80f32de3683fd.jpg_webp_400x400q80.jpg_.webp)
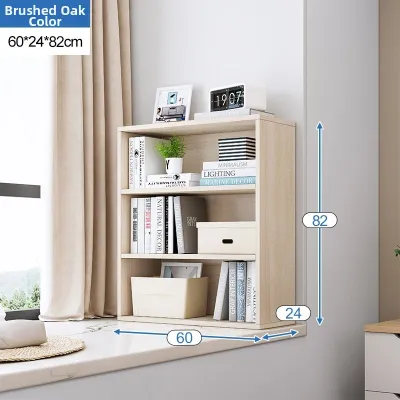
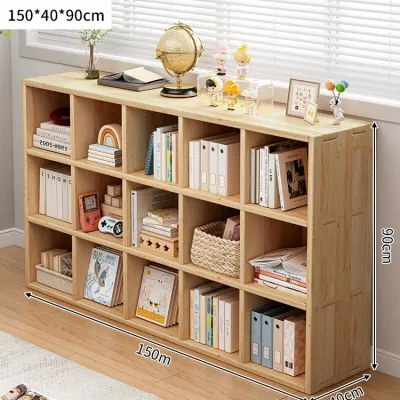

Prices are valid at publication and may change. Please refer to the product page for the latest price.
A high-quality steel tape measure with a locking mechanism is your primary tool for capturing width and depth. The rigid steel blade prevents bending, allowing you to measure straight lines across open spans without assistance. For checking vertical heights from the window sill to the ceiling, a laser measure is highly recommended, as it provides instant, pinpoint accuracy without requiring you to climb a ladder.
To capture the precise angles where your bay window walls meet, a digital angle finder or protractor is indispensable. Standard bay windows typically feature 135-degree angles, but structural settling and uneven plaster can alter these numbers significantly. A digital angle finder removes the guesswork by reading the exact degrees of each corner joint, allowing you to plan your shelf connectors with confidence.
Finally, keep a pad of graph paper, a sharp pencil, an eraser, and a sturdy clipboard on hand. Drawing a rough sketch of your bay window from both a top-down and front-facing perspective gives you a clear place to record your numbers as you work. This physical reference prevents confusion later when you are ordering modular components online or drafting your final layout.
Step-by-Step Guide to Measuring Your Bay Window
Measuring a bay window requires a structured approach that accounts for the natural inconsistencies of residential construction. Walls are rarely perfectly plumb, and window sills can slope slightly over time, meaning a single measurement is never enough to guarantee a perfect fit.

Capturing Width, Depth, and Height
Begin by measuring the width of each individual wall segment of your bay window. For a classic three-sided bay window, you will have a central back wall and two angled side walls. Measure the width of each of these three sections at three distinct levels: near the window sill, in the middle of the window frame, and near the top where your highest shelf will sit. Recording these three points allows you to identify any bowing or tapering in the walls.
Next, measure the depth of the window sill or the floor space within the bay. Run your steel tape measure from the front edge of the sill straight back to the window frame or rear wall. Repeat this depth check at multiple points along the width of each segment, as plaster thickness and window frame installations can vary by several millimeters.
To determine your vertical limits, measure the height from the floor or the top of the window sill to the ceiling, or to your desired top shelf level. Take this measurement at both ends of the bay window and in the center. Once you have collected all these numbers, apply the golden rule of DIY shelving: always record and design around the smallest measurements. This ensures your modular shelving unit can slide into place without scraping the walls or getting wedged during assembly.
Mapping the Angles and Curves
If your bay window features angled joints rather than standard 90-degree corners, you must map these angles precisely to select the right corner connectors. Place your digital angle finder flat against the window sill or wall, extending the arms until they sit flush against both intersecting surfaces. Read the digital display and write the exact angle directly onto your graph paper sketch at the corresponding joint.
For curved or bow windows, capturing the layout requires a different technique known as polygon approximation. Instead of trying to measure a continuous curve, divide the arc into a series of short, straight segments. Use a flexible tape measure to map the total length of the curve, then take depth measurements from a straight baseline (drawn between the two outer corners of the bay) to the deepest point of the curve at regular intervals.
Mark each of these coordinate points on your graph paper to recreate the curve as a series of connected straight lines. This geometric map allows you to visualize how straight modular shelves can be positioned along the curve. It also helps you determine the size of the gaps that will remain behind the shelves, allowing you to plan decorative filler panels or cord-management routes if necessary.
Planning Your Modular Shelf Layout for Angled Spaces
With your precise measurements recorded, you can transition from data collection to creative design. Planning a modular shelf layout for a bay window requires balancing storage capacity with the architectural flow of the room.
Selecting Compatible Modular Components
When choosing a modular shelving system, look for brands that offer specialized hardware designed for non-standard layouts. Systems with adjustable corner connectors, swivel brackets, or flexible hinges are ideal because they allow you to link individual shelf units at custom angles. This creates a cohesive, built-in appearance that follows the exact contour of your bay window.
Alternatively, you can use independent, freestanding modular cubes or column units. By staggering these individual towers side-by-side along the angles of the bay, you can follow the wall’s shape without needing complex corner hardware. Avoid purchasing rigid, single-piece long shelves or wide rectangular units, as these cannot bend around corners and will leave large, awkward triangular gaps behind them.
To help narrow down your component choices, look for these specific features in your modular system:
- Adjustable corner joints: Swivel brackets that connect frames at non-90-degree angles.
- Independent tower units: Freestanding columns that can be rotated to match the wall's direction.
- Shallow-depth shelves: Units that minimize the triangular gap behind the shelf in tight corners.
Because bay window shelves are exposed to direct sunlight, material selection is critical. In sunny, humid climates like Singapore, prolonged UV exposure can warp unsealed timber, fade cheap laminates, and degrade certain plastics. Before purchasing, check the manufacturer’s care instructions to verify that the shelving material is UV-resistant and that any finishes or coatings are rated for high-sunlight areas. If you plan to place potted plants on the shelves, ensure the surface finish is water-resistant and easy to wipe clean.
Drafting the Configuration
Before ordering any components, draft your layout to scale on your graph paper. Use a simple scale, such as one grid square representing ten centimeters. Draw the top-down outline of your bay window using your recorded widths and angles, then sketch the footprints of your chosen modular shelf units within this boundary.
For a more hands-on planning method, cut out paper templates representing the exact dimensions of the shelf modules. Lay these paper templates out on the actual window sill or floor of your bay window. This physical walkthrough allows you to see exactly how much space the shelves will occupy, how they interact with the angles, and whether they leave comfortable clearance for daily movement.
As you draft your configuration, pay close attention to environmental and functional factors. Ensure your planned shelf heights do not block natural light from entering the room or obstruct your view. Additionally, verify that the shelves will not cover air conditioning vents, wall sockets, or interfere with the operation of your window handles and locks.
Common Measurement and Planning Mistakes to Avoid
Even experienced DIY enthusiasts can run into issues if they overlook the unique structural quirks of bay windows. Being aware of common pitfalls beforehand can save you time, money, and frustration.
One of the most frequent mistakes is assuming that your walls, floors, and window sills are perfectly level and square. In reality, structural settling can cause sills to slope and walls to lean. Always use a spirit level to check the flatness of your installation surfaces; if your sill slopes, you will need to plan for adjustable leveling feet on your modular shelves to keep them stable and upright.
Another common oversight is forgetting to account for protruding architectural details. Baseboards, window trim, decorative plaster moldings, and window sills can reduce your usable width and depth by several centimeters. Always measure the clearance at the narrowest point between these trims, rather than measuring wall-to-wall.
Additionally, do not ignore the physical operation of your windows. Casement windows that swing inward, sliding tracks, and protruding crank handles require physical clearance to operate. If your shelves are too deep or sit too close to the window frames, you may find yourself unable to open your windows for ventilation.
Finally, remember to leave adequate space for your window treatments. Curtains, roller blinds, Roman shades, and shutters all require physical space to operate smoothly. If your modular shelves extend too close to the window glass, they can pinch your curtains or block your blinds from lowering completely, forcing you to modify your expensive window coverings.
Final Verification Before Purchasing Components
Before you click buy on your selected modular shelving system, perform a final run-through of your plans. This verification step acts as a safety net, catching any minor calculation errors before they turn into permanent installation problems.
Take your printed layout or sketch back to the bay window and re-measure the tightest spots one last time. Compare the total outer dimensions of your planned shelf configuration against the absolute smallest width and depth measurements you recorded. If your layout is within five millimeters of the maximum available space, consider reducing the shelf sizes slightly to allow for a comfortable installation tolerance.
Review your shopping cart to ensure you have included all the necessary assembly and installation hardware. Modular systems often sell shelves, upright posts, corner connectors, and wall-anchoring brackets separately. For safety and stability, especially in homes with active households, modular shelves should be securely anchored to the wall; verify that your kit includes appropriate wall anchors for your specific wall type, such as masonry plugs for concrete walls. Always verify the packaged dimensions of your chosen modular kit to ensure they can fit through your home’s doorway or lift lobby during delivery.
Lastly, double-check the return and exchange policies of the retailer. Even with meticulous planning, DIY projects occasionally require minor adjustments, such as swapping out a corner bracket or exchanging a shelf panel for a shorter size. Knowing you have a flexible return window provides peace of mind as you begin your bay window transformation.
Frequently Asked Questions (FAQ)
Can I use standard straight shelves on a curved bay window?
While you can use standard straight shelves on a curved or bow bay window, doing so will create noticeable, wedge-shaped gaps between the back of the flat shelves and the curved wall. This can look unfinished and allows small items to fall behind the unit. To achieve a cleaner look with modular components, use a series of short, narrow straight shelves arranged in a segmented arc, or opt for freestanding modular cubes staggered to follow the curve. If you want a completely seamless, flush fit against a true curve, custom-cut curved shelf panels are generally required.
How much clearance should I leave around the window frames?
You should leave a clearance of at least two to five centimeters between your modular shelves and the window frames. This gap ensures that you can easily operate window handles, locks, and hinges without scraping your knuckles or blocking the window’s movement. Additionally, this clearance provides the necessary space for curtains, blinds, or roller shades to hang and operate freely. Maintaining a small gap also promotes healthy airflow around the window glass, which helps prevent moisture condensation from building up and potentially damaging your shelving materials.

Community discussion
Share your experience or ask a question. Comments are reviewed before publication.