
Quick Answer: Sizing Your Stackable Shoe Storage
Matching your shoe collection to the right stackable shoe box setup requires a systematic three-step approach: auditing your footwear, measuring your physical space, and verifying the manufacturer’s structural limits. The key to a successful setup lies in understanding that external box dimensions do not equal internal usable capacity. By calculating the exact height, width, and depth your largest shoes require, you can select a modular system that maximizes your storage footprint without risking a structural collapse.
Step 1: Audit Your Shoe Collection and Categorize by Volume
Before purchasing any storage containers, you must know exactly what you are storing. Begin by gathering every pair of shoes in your household and sorting them by their physical profile. Group low-profile shoes like flats, sandals, and loafers together, as these require the least vertical clearance. Create separate categories for bulky sneakers, high heels, and ankle or knee-high boots, which demand significantly more vertical and horizontal space.

Each shoe profile dictates the minimum internal dimensions of your individual boxes. For instance, high-top sneakers and heels often need to stand upright or be laid on their sides, which dramatically changes the required internal height and width. Measuring the physical footprint of your largest pair of shoes—typically measured from the heel to the toe and across the widest part of the sole—ensures you do not buy boxes that are too short or too narrow.
Products mentioned in this guide
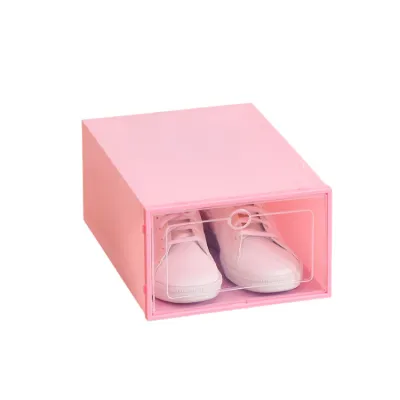
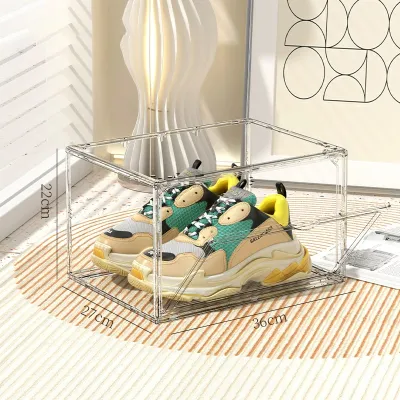
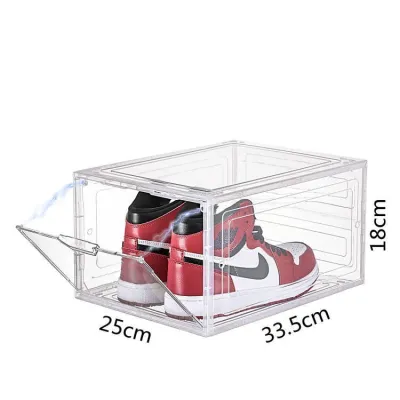
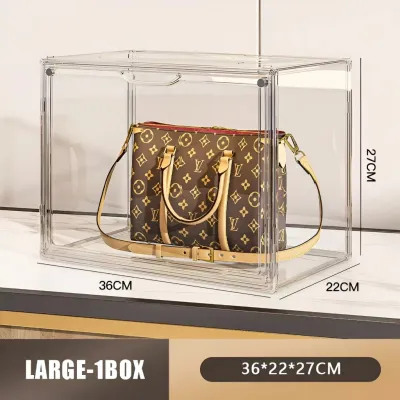
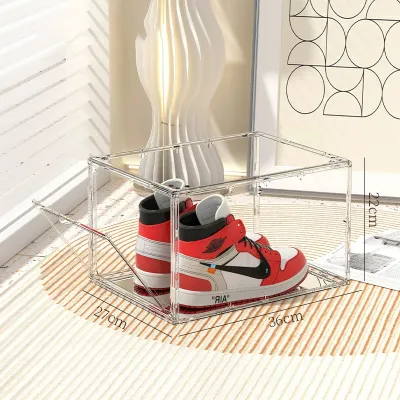
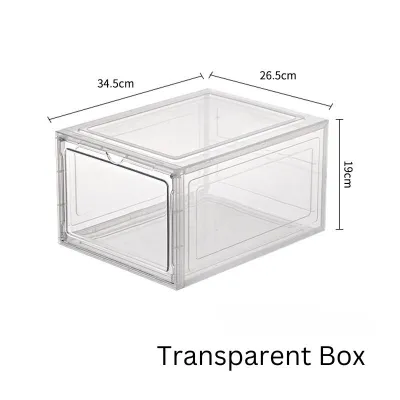
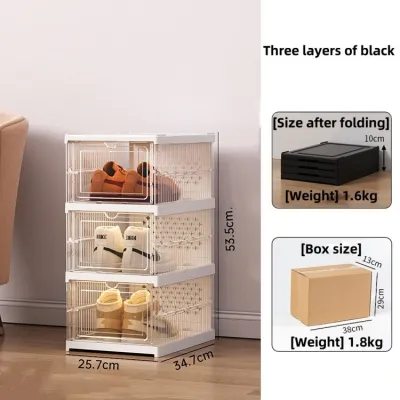
Prices are valid at publication and may change. Please refer to the product page for the latest price.
Additionally, always plan for future acquisitions by incorporating a buffer percentage into your final count. A common recommendation is to add a ten to fifteen percent buffer to your current collection size. This prevents your storage system from becoming instantly obsolete the next time you purchase a new pair of shoes, allowing your modular setup to grow alongside your collection.
Step 2: Measure Your Available Space and Access Routes
Once you have quantified your collection, you must evaluate where the stackable system will live. Measure the precise width, depth, and maximum safe height of your designated storage area, whether it is a walk-in closet, an entryway foyer, or a dedicated storage niche. In compact apartments, where entryway space is often shared or narrow, knowing these exact dimensions prevents your storage from obstructing daily foot traffic.
Do not limit your measurements to the final storage destination alone. You must also verify the access routes that delivery packages or bulk boxes must travel to reach your home. Measure the clearance of your building’s lift doors, stairwells, and your apartment’s main entryway. Large bulk orders of pre-assembled or flat-packed stackable boxes can be surprisingly voluminous, and ensuring they can pass through these choke points is essential for a smooth delivery.
Furthermore, remember to leave adequate clearance around the stacked boxes. Proper ventilation is crucial, especially in humid climates, to prevent moisture buildup and mold growth inside the boxes. You must also account for the physical space required to swing open cabinet doors, slide out drawers, or comfortably retrieve shoes from the lowest and highest tiers of your stack.
Step 3: Match Collection Size to Box Dimensions and Quantities
Translating your shoe audit and space measurements into a purchasing plan requires careful calculation. Start by matching your categorized shoe counts to the physical dimensions of the boxes you intend to buy. If you have twenty pairs of low-profile flats and ten pairs of high-top sneakers, you will need to determine if a single box size can accommodate both, or if you should purchase a mix of small and large boxes.
When browsing product listings, pay close attention to the distinction between external and internal dimensions. Manufacturers often highlight external dimensions to help you plan your floor space, but the internal usable space is always smaller due to the thickness of the plastic, reinforced corners, and interlocking joints. Relying solely on external measurements can lead to a frustrating scenario where your shoes are just a few millimeters too long to allow the box door to close.
You must also weigh the trade-offs between uniform box sizes and mixed-size configurations. A uniform setup uses identical boxes for every pair of shoes, creating a highly cohesive, visually clean aesthetic that is incredibly easy to stack and rearrange. However, this can result in wasted vertical space if small sandals are stored in boxes tall enough for high-tops. Conversely, mixing box sizes optimizes space efficiency by tailoring the box to the shoe, but it requires more planning to ensure the different sizes can still interlock safely.
Step 4: Verify Stackability Limits and Structural Safety
Stackable shoe boxes offer incredible modularity, but they are subject to physical limits that dictate how high you can safely build your columns. Always consult the manufacturer’s specifications to identify the maximum recommended stacking layers and the weight capacity per individual box. Exceeding these limits can cause the boxes at the bottom of the stack to warp, buckle, or collapse under the cumulative weight.
To ensure structural integrity, look for specific design features when selecting your boxes. High-quality stackable systems feature secure interlocking lids, recessed grooves, reinforced corner pillars, and anti-slip bases that prevent individual units from sliding out of alignment. These physical connections are vital for maintaining a straight, stable column that can withstand accidental bumps or daily door-opening vibrations.
When assembling your stack, always apply the principles of gravity and balance. Place your heaviest footwear, such as heavy work boots, platform heels, and thick-soled sneakers, in the boxes at the very bottom of the stack. Reserve the upper tiers for lightweight items like sandals, slippers, and canvas flats. This distribution of weight lowers the center of gravity of the entire column, significantly reducing the risk of tipping.
Common Capacity Planning Mistakes to Avoid
One of the most frequent mistakes buyers make is assuming that “standard” or “one-size-fits-all” shoe boxes will accommodate their entire collection. High-top sneakers, basketball shoes, and high heels often exceed standard dimensions, forcing you to store them sideways or bend the collars, which can permanently damage the footwear’s structure. Always measure your tallest and widest shoes individually rather than relying on generic size charts.
Another overlooked detail is the space required for the box’s opening mechanism. Front-drop doors, magnetic flaps, and drawer-style pull-outs all require physical clearance in front of the stack to operate properly. If your stack is placed in a narrow corridor or behind a closet door, a front-drop door might not have enough room to swing open fully, making it incredibly difficult to insert or retrieve your shoes.
Finally, consider the long-term accessibility of your storage layout. While a towering stack of twenty boxes maximizes vertical space, retrieving a pair of shoes from the middle or bottom of a tall column can become a daily chore if the boxes do not slide or open easily. Ensure that your most frequently worn pairs are positioned at waist-to-eye level, leaving seasonal or rarely worn footwear for the very top and bottom tiers.
Frequently Asked Questions (FAQ)
Can I mix different brands of stackable shoe boxes in one column?
Interlocking mechanisms, alignment tabs, and lid shapes are almost always proprietary and unique to each manufacturer or specific product line. Attempting to stack boxes from different brands in a single column usually results in an unstable structure, as the connection points will not align or lock securely. For optimal stability and safety, it is highly recommended to stick to a single modular system from one brand for each vertical column.
How do I calculate the total weight capacity for a tall shoe box stack?
To determine if your stack is safe, remember that the bottommost box bears the cumulative weight of every box and pair of shoes stacked above it. To calculate this load, weigh a single box containing a typical pair of your shoes, multiply that weight by the total number of tiers minus one, and compare the result to the manufacturer’s rated load limit for a single unit. If the cumulative weight exceeds the bottom box’s capacity, you must split the stack into shorter, side-by-side columns.

Community discussion
Share your experience or ask a question. Comments are reviewed before publication.