
To successfully mount a modular wall shelf in a Singapore home, you must first identify whether your wall is made of solid concrete, hollow drywall, or covered in ceramic tiles. Each material requires a specific drilling technique, a matching drill bit, and the correct wall anchor to support the weight of your shelving unit and its contents. By matching your installation steps to the structural properties of your wall, you can achieve a stable, level, and secure storage setup that maximizes your living space without causing structural damage.
Using the wrong hardware or drilling method can lead to loose brackets, sagging shelves, or severe wall damage that can cost upwards of S$200 to patch and repaint professionally. Taking the time to assess your wall type, gather the correct tools, and follow precise mounting steps ensures your modular shelving remains safe and functional for years to come.
Identify Your Wall Type and Shelf Load Requirements
Housing Development Board (HDB) flats and private condominiums in Singapore typically feature a mix of wall types. Structural walls, household shelters, and external walls are almost always solid concrete or precast concrete panels. Internal partition walls, especially in newer developments or renovated rooms, are often hollow drywall consisting of plasterboard mounted on metal studs.
Products mentioned in this guide
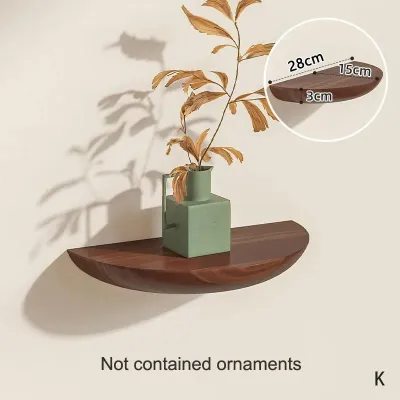
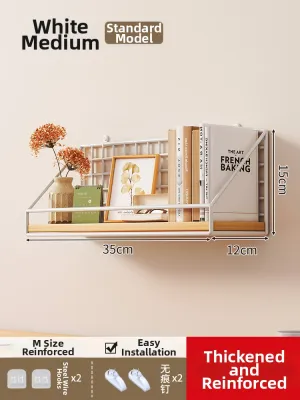
![SG Store[Local seller fast delivery SG ]Wall Shelf Punch-Free Bedroom Bedside Dormitory Storage Fantastic Wall Hanging Bedroom Desk Shelf Storage Rack QCE5 EV6 3356714706](https://img.lazcdn.com/g/p/997bc454184cf380f099d106ded19518.jpg_webp_400x400q80.jpg_.webp)
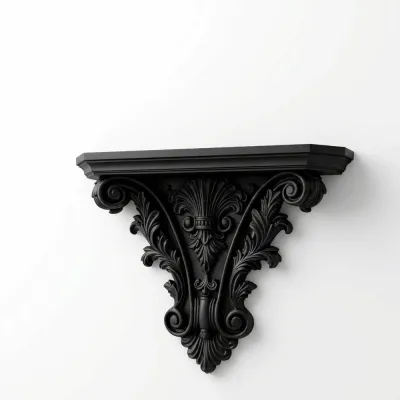
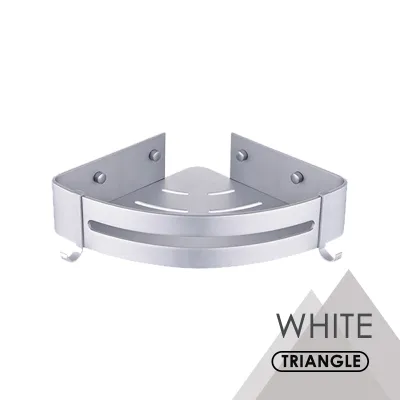
Prices are valid at publication and may change. Please refer to the product page for the latest price.
To determine your wall type, tap the surface gently with your knuckle. A solid, dull thud indicates concrete or solid brick, while a hollow, echoing sound indicates drywall. You can also use an electronic stud finder to locate the metal or wooden studs behind drywall, or check your home’s original floor plan, which usually highlights structural concrete walls with thick, dark lines.
For tiled walls, which are common in kitchens and bathrooms, the tile itself is a surface layer mounted over either concrete or drywall. You must determine the backing material behind the tile before drilling, as this dictates the type of anchor you will need to secure the shelf bracket.
Before mounting any wall shelf, calculate the total load it must support. This includes the weight of the modular shelving brackets, the shelves themselves, and the maximum anticipated weight of the items you plan to store, such as books, plants, or decorative pieces. Check the manufacturer’s specifications for the shelf’s maximum load capacity, but remember that this rating is only valid if the shelf is mounted using the correct anchors on a compatible wall type.
If you are renting your home, check your tenancy agreement regarding drilling and mounting. For both HDB flats and private condominiums, consult your building management or renovation guidelines if you plan to mount exceptionally heavy modular systems, as there may be specific structural limits or restrictions on drilling into certain walls, such as household shelter walls.
Gather the Essential Tools and Wall Anchors
Never use the generic plastic plugs included in the shelf packaging unless they are explicitly rated for your specific wall type. For concrete walls, use heavy-duty plastic wall plugs or metal expansion anchors for heavy loads. For drywall, use threaded self-drilling drywall anchors for light loads, or toggle bolts (butterfly anchors) for heavier modular systems.

Selecting the right drill bit is critical to prevent surface damage and ensure a clean hole. Use a carbide-tipped masonry drill bit for concrete walls. For drywall, a standard wood or metal drill bit is sufficient to create a clean pilot hole. For tiled surfaces, you must use a specialized glass and tile drill bit or a diamond-tipped bit to prevent the tile from cracking.
Always review the modular shelf manufacturer’s installation manual before starting. Note the recommended screw gauge and length. The screw must be long enough to pass through the shelf bracket, penetrate the full depth of the wall anchor, and expand the anchor fully inside the wall cavity or concrete.
In addition to the drill and anchors, gather a spirit level, a measuring tape, a pencil, and a screwdriver. A spirit level is essential for ensuring your modular brackets align perfectly, preventing items from sliding off your shelves once installed.
Step-by-Step Installation for Concrete Walls
Begin by holding the first modular bracket against the concrete wall at your desired height. Place a spirit level on top of the bracket to ensure it is perfectly straight. Use a pencil to mark the exact center of each screw hole onto the wall surface.
Fit your hammer drill with a carbide-tipped masonry bit that matches the diameter of your concrete wall plugs. Set the drill to hammer mode, which combines rotation with a rapid pulsing action to break through tough concrete. Hold the drill perfectly perpendicular to the wall, apply firm pressure, and drill to a depth slightly deeper than the length of the wall plug.
Concrete drilling generates a significant amount of fine grey dust. To keep your home clean, have a helper hold a vacuum cleaner nozzle directly beneath the drill bit, or tape a folded sticky note to the wall just below the mark to catch the falling debris. Once the hole is drilled, blow out any remaining dust from inside the hole using a hand pump or a straw to ensure the anchor can grip the concrete properly.
Push the plastic wall plug into the drilled hole. It should fit snugly; if it resists, do not force it with a heavy hammer, as this can bend or deform the plug. Instead, verify the hole depth and clearance. Tap it gently with a mallet until it sits flush with the concrete surface.
Align the shelf bracket over the holes, insert the screws, and tighten them using a manual screwdriver or a drill set to a low torque limit. Avoid over-tightening, which can strip the plastic threads inside the wall plug and compromise the hold.
Step-by-Step Installation for Drywall and Plasterboard
Drywall cannot support heavy modular shelves on its own. Whenever possible, you should mount the shelf brackets directly into the vertical metal or wooden studs behind the plasterboard. Use an electronic stud finder to locate the edges and center of each stud, and mark these positions clearly.
If your modular shelf layout does not align with the stud spacing, you must use specialized hollow-wall anchors. For medium loads, use toggle bolts. These anchors feature spring-loaded metal wings that fold flat to pass through a pre-drilled hole and then spring open behind the drywall, distributing the weight across a wider surface area.
Switch your drill to rotary-only mode and disable the hammer function, which will shatter drywall. Use a standard drill bit to make a clean pilot hole at your marked locations. Avoid applying excessive forward pressure, which can tear the paper backing of the plasterboard and weaken the surrounding wall structure.
If using toggle bolts, thread the bolt through the shelf bracket first, then screw on the spring-loaded toggle wings. Compress the wings and push them completely through the pre-drilled hole until you hear or feel them snap open behind the drywall. Pull the bracket outward slightly to create tension on the wings, then tighten the bolt until the bracket is clamped securely against the wall surface.
If using threaded self-drilling drywall anchors for lighter shelves, screw the anchor directly into the drywall using a manual screwdriver until it is flush with the surface. Then, align your bracket and drive the mounting screw into the center of the anchor.
Mounting on Tiled Surfaces Without Cracking
Drilling into ceramic or porcelain tiles requires patience, as the glazed surface is extremely slick and fragile. Place a piece of heavy-duty masking tape over the target area, then mark your drill hole on top of the tape. The textured surface of the tape prevents the drill bit from wandering and scratching the surrounding tile.
Use a glass and tile drill bit or a diamond-tipped hole saw. Set your drill to rotary-only mode; never use hammer mode on a tile surface, as the vibration will instantly crack or shatter the glaze. Apply light, steady pressure and run the drill at a slow speed. Keep a damp sponge nearby to periodically cool the drill bit and the tile surface to prevent overheating.
Once the drill bit has successfully penetrated the entire thickness of the tile and reached the underlying concrete or drywall, stop drilling. Switch your drill bit to a standard masonry bit (if the backing is concrete) or a standard bit (if the backing is drywall). Ensure the new bit is slightly smaller than the tile hole so it does not rub against the fragile edges of the tile as you drill deeper.
Push the wall anchor through the tile so it sits flush with the backing wall, not the tile surface itself. Before inserting the screw and mounting the bracket, apply a small bead of silicone sealant around the opening of the hole. This prevents water and humidity—common in Singapore bathrooms and kitchens—from seeping behind the tiles and causing mold growth or structural degradation.
Final Checks and Safe Weight Loading
Once all brackets are mounted and the modular shelves are assembled, perform a physical stability check. Gently wiggle each bracket to ensure there is no play, wobble, or movement against the wall. Inspect the surrounding wall surface for any hairline cracks, flaking paint, or bulging drywall, which could indicate structural strain.
When placing items on your new wall shelf, distribute the weight evenly across the entire surface. Place heavier items, such as large books or heavy storage boxes, directly over or close to the bracket support points. Avoid overloading the front edge or the center span of the shelves, as this can cause the shelving material to sag or pull the brackets away from the wall over time.
Periodically inspect your modular shelving system, especially during the first few weeks of use. Check that the brackets remain flush against the wall and that the screws have not loosened. If you notice any sagging, tilting, or separation between the bracket and the wall, immediately unload the shelves and re-evaluate the installation or the load weight.
Frequently Asked Questions (FAQ)
Can I install heavy modular shelves using adhesive strips instead of drilling?
No, heavy modular shelves should not be installed using adhesive strips. While adhesive strips are convenient for lightweight items like picture frames or small keys, they are not designed to support the continuous downward and outward leverage exerted by a loaded wall shelf. The high humidity levels in Singapore can also degrade adhesive backings over time, leading to sudden failure. For any modular shelf intended to hold books, plants, or household items, mechanical fastening with screws and appropriate wall anchors is the only safe and reliable method.
What should I do if I hit a rebar or pipe while drilling into concrete?
If your drill suddenly stops advancing, makes a high-pitched metallic grinding sound, or encounters sudden resistance, stop drilling immediately. This indicates you have likely hit a steel reinforcing bar (rebar) or a utility pipe embedded within the concrete wall. Forcing the drill can damage your drill bit, weaken the building’s structural reinforcement, or puncture a water pipe or electrical conduit. Remove the drill bit, patch the incomplete hole with a suitable concrete filler, and shift your shelf bracket position horizontally or vertically by at least 50 millimeters to clear the obstruction before attempting to drill again.

Community discussion
Share your experience or ask a question. Comments are reviewed before publication.