
Building a modular solid wood shelf system offers a highly customizable, durable, and adaptable storage solution that can evolve alongside your living space. Unlike fixed furniture, a modular design allows you to reconfigure, expand, or relocate individual units as your storage needs change. By establishing a structured grid, selecting compatible solid wood components, and using robust joining hardware, you can construct a stable shelving unit tailored to your home. The process requires careful planning of dimensions, precise assembly, and proper anchoring to ensure long-term safety and structural integrity.
To achieve a successful build, you must approach the project systematically, starting with accurate measurements and a clear understanding of your load requirements. This guide outlines the essential steps to plan, select, assemble, configure, and maintain a modular solid wood shelf system, ensuring a reliable and functional addition to your home.
Planning Your Modular Shelf Layout and Dimensions
Before purchasing any materials, you must thoroughly assess the physical space where you plan to install your modular shelving system. Begin by measuring the available floor width and wall height using a reliable tape measure. It is crucial to account for architectural features that might obstruct the shelving unit, such as baseboards, crown moldings, window frames, and electrical outlets. If your design relies on a flush fit against the wall, measure the thickness of your baseboards to determine if the upright supports need to be notched or if the entire unit must stand slightly forward. Additionally, locate all wall outlets and switches to ensure they remain accessible or that the shelf backing does not block them.
Products mentioned in this guide
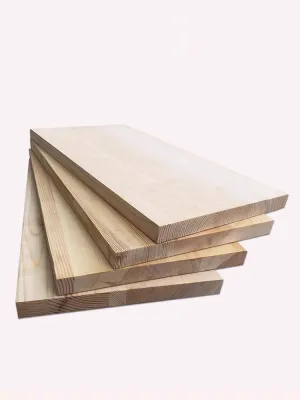
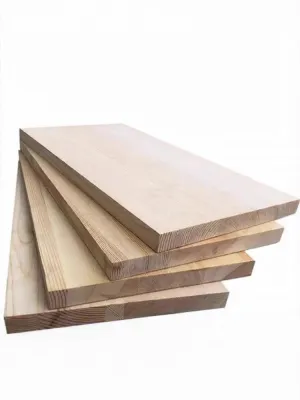
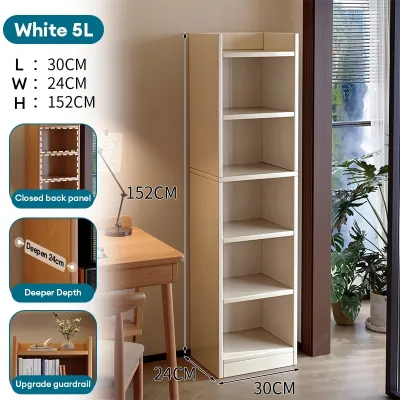

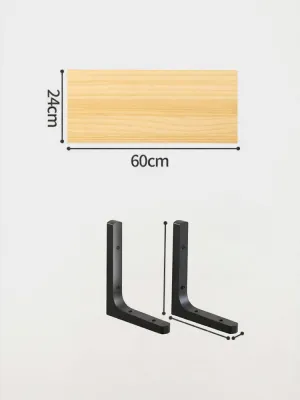
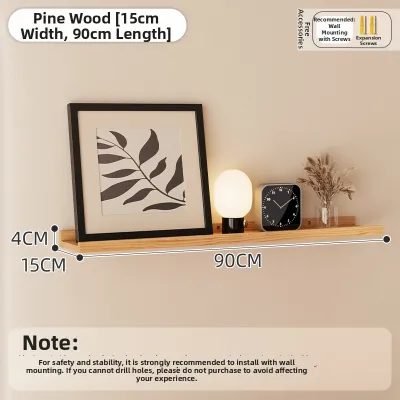
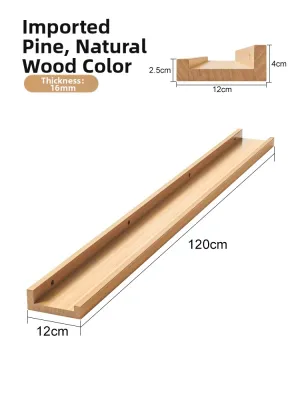
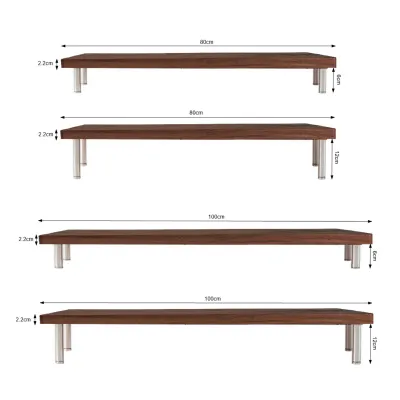
Prices are valid at publication and may change. Please refer to the product page for the latest price.
Another critical planning step involves checking the access path to the room. Measure the clearances of doorways, hallways, stairwells, and lift cabins through which you must transport the materials or pre-assembled modules. If you plan to build large, pre-assembled modular boxes or frames in a workshop or garage, verify that these units can easily navigate tight corners and low ceilings to reach their final destination. If access is restricted, design your system around smaller, individual modules that you can easily carry into the room and connect on-site.
Determining your load requirements is essential for guiding your choices regarding board thickness and shelf span. Consider what items you intend to store on the shelves. Heavy items, such as large books, ceramic cookware, or storage bins filled with dense materials, require thicker boards and shorter spans to prevent sagging. Conversely, lighter decorative items or small electronics allow for longer spans and thinner profiles. Use these storage goals to establish a structural grid. A modular grid typically consists of standard repeating dimensions—such as square modules of 30, 40, or 50 centimeters—which simplifies planning, ensures compatibility between components, and allows for straightforward future expansion or reconfiguration. Sketch your grid on graph paper or use digital design software to visualize how the modules will stack and interlock.
Selecting Solid Wood Components and Hardware
Selecting the right solid wood components requires balancing aesthetic preferences with structural requirements. When evaluating solid wood boards, pay close attention to their thickness and depth relative to your planned shelf spans. Common thicknesses for shelving include 18mm, 24mm, or thicker panels, depending on the wood species and the weight they must support. Hardwoods generally offer greater resistance to bending under load compared to softwoods of the same thickness, but you must verify the specific load limits and span recommendations provided by your wood supplier. Avoid long, unsupported spans; a standard guideline is to keep spans under 80 to 90 centimeters for typical household loads, or even shorter if you plan to store heavy items.

The choice of modular joining hardware is critical for determining how easily your system can be disassembled, reconfigured, or expanded. If you want a semi-permanent system that can be completely taken apart for moving, look for specialized modular connectors, cam locks, or heavy-duty bracket systems designed for repeated assembly. Dowels and wood glue create exceptionally strong, permanent joints, but they eliminate the possibility of non-destructive disassembly. For a modular system, mechanical fasteners such as threaded inserts paired with connector bolts offer a robust, reusable solution. These inserts are threaded into pre-drilled holes in the wood, allowing you to bolt and unbolt components multiple times without stripping the wood fibers.
Always verify weight capacities and load limits directly from the hardware and wood manufacturer labels or technical specifications. Do not rely on general material assumptions, as the actual load capacity depends heavily on the specific grade of wood, the design of the connector, and the quality of the installation. When purchasing brackets, rails, or interlocking pins, check the manufacturer’s packaging for rated weight limits per connector and ensure your design distributes the weight evenly across these points.
Finally, select a compatible finish or sealant that suits the specific wood type and your indoor environment. Solid wood is sensitive to changes in humidity and temperature, which can cause warping, swelling, or shrinking. Applying a high-quality wood sealer, varnish, oil, or wax helps protect the wood from moisture absorption and spills. Ensure the finish you choose is compatible with the wood species—some oily hardwoods may require specific primers or solvent-based finishes—and follow the manufacturer’s application instructions regarding ventilation, drying times, and the number of coats required.
Step-by-Step Assembly and Joining Methods
The assembly process must be executed systematically to ensure all components align perfectly and the structure remains stable. Begin by preparing your workspace, ensuring you have a flat, clean surface to work on to prevent scratching the wood panels. Before assembling any joints, pre-drill pilot holes for all screws and fasteners. Pre-drilling is a critical step when working with solid wood, as inserting screws directly into unprepared wood can easily cause the grain to split along the screw path, compromising the structural integrity of the joint. Use a drill bit that matches the inner shank diameter of your screws, and use a drill stop or tape on the bit to ensure you do not drill too deeply. After drilling, sand the edges of the holes and the board corners lightly to remove any burrs or splinters.
Once the preparation is complete, begin aligning the modular connectors according to the manufacturer’s instructions. Secure the vertical uprights and horizontal shelves systematically, working from the bottom modules upward. If you are using threaded inserts, screw them carefully into the pre-drilled pilot holes, ensuring they enter straight and sit flush with or slightly below the wood surface. When connecting the panels, hand-tighten the bolts initially to allow for minor adjustments as you align the remaining pieces of the module.
Throughout the assembly process, constantly use a spirit level and a machinist’s square to verify that the modular grid remains plumb and true. Even a minor misalignment of one or two millimeters in a base module can compound as you stack additional units, leading to a crooked structure that is difficult to connect and structurally unstable. Place the square in the corners of each module to check for a precise 90-degree angle, and adjust the joints before tightening the fasteners fully. Once you confirm the module is square, tighten all hardware securely, but avoid over-tightening, which can strip the threads or crush the wood fibers.
During assembly, be alert to specific stop conditions that indicate a problem requiring immediate attention. If you encounter misaligned pre-drilled holes, do not force the fasteners, as this can stress the wood and cause warping or splitting. Instead, stop and check if a component is oriented incorrectly or if you have used the wrong piece. If a screw or insert becomes stripped, do not attempt to glue it in place as a quick fix; instead, consult the manufacturer’s troubleshooting guide or replace the damaged hardware. If a component appears warped or damaged out of the box, contact the supplier for a replacement rather than attempting to force it into the assembly.
Configuring and Adjusting Your Modular Layout
Once your individual modules are assembled, you can begin configuring them in your living space. When stacking and interlocking multiple modules, always use the designated connection points, pins, or brackets provided by the manufacturer. These interlocking mechanisms are designed to distribute vertical and lateral forces evenly across the structure. Never simply stack heavy solid wood modules on top of one another without securing them, as vibrations, uneven floors, or accidental bumps can cause the units to slide or tip over. Ensure that each level is securely locked into the one below it before proceeding to the next level.
For safety, you must anchor tall or top-heavy modular units to the wall using appropriate safety fasteners. Any shelving unit that exceeds a height-to-depth ratio recommended by safety standards—typically when the height is more than three to four times the depth—presents a serious tipping hazard. Identify the type of wall material you have (such as concrete, brick, drywall, or plaster) and select the corresponding wall anchors and screws. For drywall, locate the wooden studs behind the wall and secure the anchoring brackets directly into the studs for maximum holding power. If studs are not aligned with your shelving unit, use heavy-duty toggle bolts or specialized drywall anchors rated for the weight of the loaded shelf.
As you arrange your items, take advantage of adjustable internal shelf heights or modular inserts to customize the storage space. Place the heaviest items, such as large books or storage crates, on the lowest shelves to keep the center of gravity as low as possible. This distribution significantly improves the overall stability of the system. If your modular system includes adjustable shelf pins, ensure they are fully seated in their holes before placing any weight on the shelf.
Additionally, ensure there is adequate ventilation and clearance around the shelving unit, especially if it is placed against an exterior wall. Solid wood needs to breathe to prevent moisture buildup, which can lead to mold growth, warping, or finish degradation. Leave a small gap of at least one to two centimeters between the back of the shelves and the wall to allow air to circulate freely. This is particularly important in humid climates or older homes where walls may retain moisture.
Maintenance and Safety Checks for Solid Wood Shelves
To preserve the beauty and structural integrity of your modular solid wood shelf system, you must perform routine maintenance and safety inspections. Solid wood is a natural, hygroscopic material, meaning it continuously absorbs and releases moisture in response to changes in relative humidity. This natural process causes the wood to expand and contract slightly throughout the year. Over time, this movement can loosen mechanical fasteners. Periodically check all joint hardware, connector bolts, and wall anchors—ideally every six months—and gently tighten any that have become loose.
When cleaning the wood surfaces, avoid harsh chemical cleaners, abrasive pads, or excessive water, which can damage the protective finish and penetrate the wood grain. Instead, dust the shelves regularly with a soft, dry microfiber cloth. For deeper cleaning, use a slightly damp cloth with a mild, pH-neutral soap solution, immediately followed by a dry cloth to remove any residual moisture. Apply maintenance products, such as wood oils, waxes, or polishes, strictly according to the manufacturer’s care instructions and only when the wood finish begins to look dry or dull.
During your routine inspections, carefully examine the shelves for visible signs of structural distress. Look for sagging or bowing in the middle of shelf spans, warping of the upright panels, or gaps opening up at the joints. If you notice a shelf is beginning to sag, it indicates that the load exceeds the capacity of that specific span and thickness. Immediately reduce the weight on that shelf, redistribute the items to lower levels, or add an intermediate support bracket.
Recognize when structural damage requires professional repair or component replacement rather than a simple DIY adjustment. If you discover deep cracks along the wood grain, sheared metal connectors, or stripped mounting holes that can no longer hold fasteners securely, do not attempt to patch them with temporary adhesives. In such cases, contact the manufacturer or a qualified professional to source replacement parts or to assess whether the structural integrity of the entire system has been compromised.
Frequently Asked Questions (FAQ)
Do I need to anchor a modular solid wood shelf to the wall?
Yes, anchoring is highly recommended and often mandatory for safety, especially for tall, narrow, or top-heavy modular configurations. Any unit that could potentially tip over due to uneven loading, climbing, or accidental bumps must be secured to the wall. Always check the manufacturer’s safety instructions for the specific anchoring hardware required for your wall type, whether it is concrete, brick, or drywall.
How do I prevent solid wood shelves from sagging under heavy loads?
To prevent sagging, you must match the shelf span and board thickness to the weight of the items you plan to store. Keep spans shorter for heavier loads, typically under 80 centimeters, and use thicker solid wood boards (such as 24mm or more). If you must use longer spans, install center support brackets or vertical dividers, and always consult your wood supplier’s span limits and load specifications for your specific wood species.

Community discussion
Share your experience or ask a question. Comments are reviewed before publication.