
Customizing an island cabinet is one of the most impactful ways to transform your kitchen into a highly functional, organized, and visually cohesive space. To achieve a successful design, you must carefully balance physical space constraints, functional storage requirements, and material durability. By measuring precise clearances, planning internal fittings to match your daily habits, selecting moisture-resistant materials suitable for your local climate, and preparing a detailed technical checklist for your cabinet maker, you can create a custom island that serves as the perfect culinary and social hub.
Assess Your Kitchen Space and Island Dimensions
Before selecting any cabinet styles or internal fittings, you must establish the physical boundaries of your kitchen to determine the maximum allowable footprint for your island cabinet. The most critical factor in island design is maintaining adequate walkway clearance around all sides of the structure. As a general rule, you should aim for a minimum walkway width of 900mm to 1200mm. This spacing ensures that multiple people can move through the kitchen simultaneously without colliding, and it provides comfortable clearance for daily tasks like carrying hot pots or unloading groceries.
In addition to general traffic flow, you must account for the clearance required by various appliance doors, cabinet doors, and drawers. Open your oven, dishwasher, and refrigerator completely, and measure the distance from the edge of the open door to the proposed boundary of your island cabinet. A common design mistake is failing to realize that an open dishwasher door can completely block a walkway or collide with an open island drawer. Ensure there is at least 1000mm of clearance in front of major appliances so you can stand comfortably in front of them while they are fully open.
Products mentioned in this guide


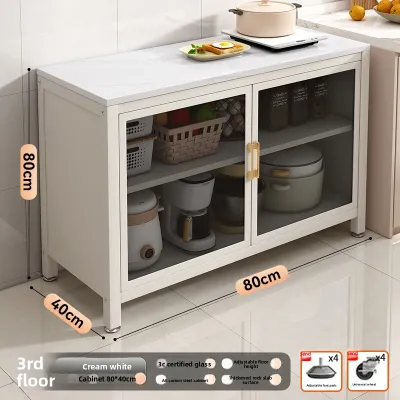
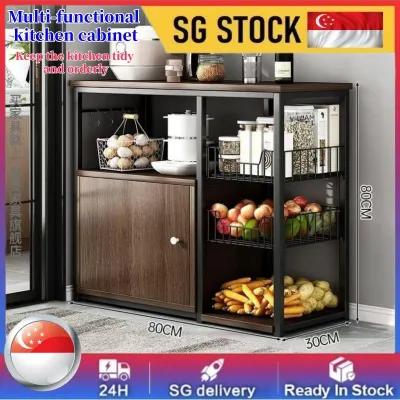



Prices are valid at publication and may change. Please refer to the product page for the latest price.
Vertical space and overhead constraints also play a significant role in determining your island’s final specifications. Measure your ceiling height to ensure that any planned pendant lighting, overhead pot racks, or ceiling-mounted range hoods have sufficient clearance. If you plan to install a cooktop on the island, check the manufacturer’s specifications for the minimum distance required between the cooking surface and the ventilation hood. This step is crucial for maintaining proper airflow and preventing heat or moisture damage to your ceiling.
Finally, consider the physical logistics of delivering and installing the island cabinet in your home. In Singapore, where many residents live in high-rise apartments, you must verify the dimensions of your building’s service lift, stairwells, and entry doorways. A massive, single-piece island carcass or a continuous stone countertop slab may not fit through standard doorways or lift doors. Discussing these physical constraints with your cabinet maker early in the planning stage allows them to design the island in modular sections that can be easily transported and assembled on-site.
Define Your Storage and Functional Requirements
To maximize the utility of your custom island cabinet, you must clearly define how you intend to use the space on a daily basis. Begin by categorizing your primary storage needs based on the items you use most frequently. If your main kitchen cabinets are crowded, the island can be customized to house bulky cookware, such as cast-iron skillets, stockpots, and slow cookers. Alternatively, you can configure the island as a dedicated baking zone, a dry pantry storage area, or a safe home for delicate daily dishware and glassware.

Integrating appliances directly into the island cabinet is an excellent way to free up counter space elsewhere in the kitchen, but it requires careful planning. If you plan to install a dishwasher, a wine cooler, a microwave drawer, or an under-counter freezer, you must obtain the exact appliance dimensions and ventilation requirements beforehand. Appliances generate heat and require adequate rear or side clearance to function efficiently. You will also need to coordinate with your contractor to ensure that electrical conduits and plumbing lines are routed correctly to the island’s location before the cabinets are installed.
Beyond storage and appliances, consider how the island will support multi-functional activities like food preparation, casual dining, or working from home. If you want the island to double as a breakfast bar, you must design the countertop with an appropriate overhang to accommodate seating. A standard seating overhang ranges from 300mm to 450mm, depending on the height of your bar stools. When planning a significant countertop overhang, you must also ensure the island’s base cabinet is heavy and stable enough, or properly anchored to the floor, to prevent any risk of tipping when weight is applied to the edge.
Select Materials, Finishes, and Countertop Options
Selecting the right materials and finishes is essential for ensuring your island cabinet withstands the daily rigors of a busy kitchen environment. The countertop is the most heavily used surface of the island, making material selection critical. Engineered quartz and sintered stone are popular choices due to their resistance to staining and scratching, but you should always verify the manufacturer’s specific care instructions regarding heat resistance. Solid surface materials offer seamless joints but may require more care to avoid scratches from sharp utensils.
For the cabinet structure and doors, prioritize materials that can withstand high humidity and occasional spills. In Singapore’s tropical climate, standard particleboard can swell and degrade if exposed to moisture over time. Instead, look for high-quality plywood cores with moisture-resistant backing or high-pressure laminates. These materials provide excellent structural stability and are easy to wipe clean. When choosing finishes, matte surfaces are excellent for hiding fingerprints, while high-gloss finishes can help reflect light and make a compact kitchen feel more spacious.
To create a cohesive design, coordinate the island’s hardware, edge profiles, and base details with the rest of your kitchen cabinetry. You can choose to match the island perfectly to your perimeter cabinets, or design it as a statement piece with a contrasting color or material. Ensure that all hinges, drawer runners, and handles are rated for kitchen use and treated to resist corrosion. Additionally, pay close attention to the base panel details; installing a durable toe-kick material that resists water damage from floor mopping will prolong the lifespan of your custom cabinetry.
Configure Internal Fittings and Organization Systems
The true value of a custom island cabinet lies in its internal organization, which should be tailored to your specific storage habits. Traditional deep lower cabinets with standard doors often become cluttered because items stored at the back are difficult to see and reach. To solve this, configure your island with deep, full-extension drawers instead of standard shelves. Full-extension drawers pull out completely, allowing you to view and access every item from above without having to bend down and search through dark corners.
Incorporate specialized internal fittings to keep your kitchen organized and clutter-free. Pull-out shelves, adjustable dividers, and custom inserts for utensils, knives, and spices can dramatically improve your kitchen’s efficiency. You can also dedicate a section of the island to a pull-out waste sorting system, keeping trash and recycling bins neatly concealed but easily accessible during food preparation. For deep drawers housing heavy pots and pans, ensure you specify heavy-duty drawer runners that can smoothly support the weight without sagging.
Concealed functional features can also be integrated into the cabinet design to enhance usability. Pop-up power outlets, USB charging stations, and hidden appliance garages allow you to use small appliances directly on the island without leaving cords draped across the countertop. When planning these features, work closely with your cabinet maker to design dedicated internal channels for electrical wiring. This ensures that all cables are safely routed away from moving drawer mechanisms and protected from potential moisture exposure near the sink or prep areas.
Communicate Specifications to Your Cabinet Maker
Once you have finalized your layout, material choices, and internal storage configuration, you must compile this information into a clear, detailed brief for your cabinet maker. Provide them with a comprehensive technical checklist that includes the exact dimensions of your kitchen space, the model numbers and specification sheets of all integrated appliances, and the precise locations of required cutouts for sinks, hobs, or power outlets. Providing appliance specification sheets directly to the fabricator minimizes the risk of measurement errors during production.
Before the manufacturing process begins, request detailed technical drawings or 3D renderings from your cabinet maker or contractor. Review these drawings carefully to verify all proportions, clearance zones, and the placement of internal fittings. Pay close attention to the swing directions of cabinet doors and the clearance of pull-out drawers. This is your final opportunity to make adjustments to the design before materials are cut, so take the time to physically mark out the proposed island dimensions on your kitchen floor using masking tape to visualize the spatial flow.
Finally, coordinate the delivery and installation logistics with your contractor and cabinet maker. Confirm site access constraints, such as lift weight limits, stairwell clearances, and any specific estate management rules regarding renovation noise and delivery hours. Ensure that the installation team has clear access to the kitchen and that all preliminary plumbing and electrical rough-ins are completed and verified before the island cabinet arrives on-site. Proper coordination ensures a smooth, efficient installation process and a high-quality final result.
Frequently Asked Questions (FAQ)
Do I need to reinforce the floor for a heavy stone countertop?
Yes, you must evaluate the weight of your chosen countertop material and the structural capacity of your floor before installation. Natural stone slabs, such as granite or marble, and thick engineered quartz countertops add significant concentrated weight to a localized area of your kitchen floor. If you are installing a large island with a heavy stone top in an older property or a home with timber floor joists, you should have a qualified structural engineer or professional contractor assess the subfloor condition and load-bearing capacity. Additionally, ensure that your custom cabinet carcass is constructed with reinforced vertical supports and a solid base to distribute the heavy load evenly across the floor surface.
Can I add plumbing or electrical outlets to an existing island space?
Adding plumbing or electrical outlets to an island is highly feasible, but it requires professional installation and careful planning of utility routing. Because an island is detached from your perimeter walls, water supply lines, drainage pipes, and electrical conduits must be routed through the floor. In homes with concrete floors, this process typically involves hacking the concrete screed to lay the pipes and conduits, which must then be sealed and waterproofed properly. Always hire a licensed plumber and a certified electrician to perform this work to ensure compliance with local building codes, proper drainage venting, and safe electrical circuit routing away from water sources.

Community discussion
Share your experience or ask a question. Comments are reviewed before publication.