
Customizing a freestanding kitchen stand cabinet offers a practical, flexible way to expand your storage and workspace without committing to a costly, permanent kitchen renovation. Unlike built-in joinery, a freestanding unit can be configured to your exact functional requirements and easily repositioned or moved to a new home in the future. Achieving a seamless fit requires a systematic approach that balances physical space constraints, ergonomic requirements, and material durability.
To successfully customize your cabinet, you must carefully evaluate your kitchen’s layout, map out your daily workflow, and select materials that can withstand the demanding kitchen environment. This guide outlines the essential steps to measure, configure, and secure a freestanding kitchen stand cabinet that maximizes utility while maintaining a safe and efficient workspace.
Step 1: Measure Your Kitchen Space and Clearance Requirements
Accurate physical measurements form the foundation of any successful furniture customization project. Begin by measuring the designated floor area where the kitchen stand cabinet will stand, using a metal measuring tape for precision. Do not rely solely on wall-to-wall measurements; instead, measure at multiple heights and account for protruding baseboards, floor trim, wall tiles, and any unevenness in the plaster or concrete.
Products mentioned in this guide
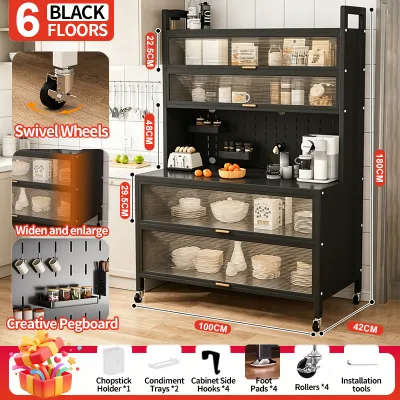
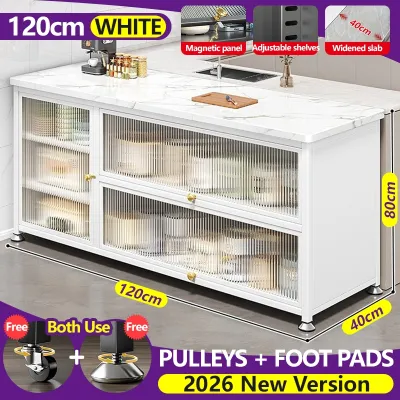
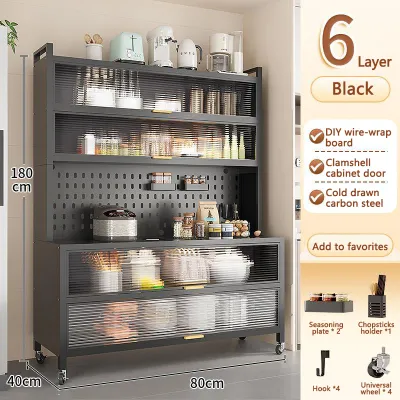


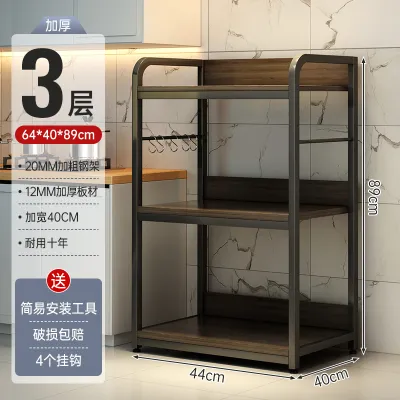
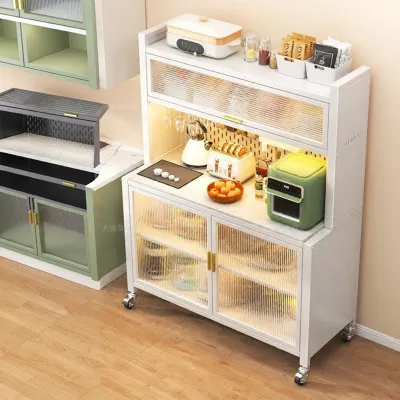
Prices are valid at publication and may change. Please refer to the product page for the latest price.
Identify the locations of all wall outlets, light switches, plumbing valves, and gas connections within the immediate vicinity. A freestanding cabinet must never block access to utility shut-offs or cover active power points unless the unit’s back panel is specifically designed with pre-cut access ports. If you plan to place small appliances on the cabinet countertop, ensure the unit is positioned close enough to an outlet to avoid stretching power cords across walkways.
Factor in the operational clearance required for the cabinet doors and drawers. Open doors and fully extended drawers must not collide with adjacent appliances, walls, or other furniture pieces. Leave sufficient clearance for your own movement, ensuring you can stand comfortably in front of an open drawer without feeling cramped or blocking the main kitchen pathway.
Logistical access is another critical consideration, particularly in high-rise residential environments. Measure the height, width, and diagonal clearance of all doorways, corridors, stairwells, and lift doors through which the cabinet must pass during delivery. If your apartment building has tight elevator cabins or narrow entryways, you may need to choose a flat-pack customizable unit that can be assembled directly inside the kitchen rather than a pre-assembled piece.
Finally, verify the manufacturer-recommended clearance gaps for ventilation. If your kitchen stand cabinet will house appliances such as microwave ovens, toaster ovens, or small refrigerators, these devices require dedicated space around them to dissipate heat safely. Check the appliance user manuals for specific side, rear, and top clearance requirements to prevent heat buildup and potential fire hazards.
Step 2: Define Your Storage Needs and Internal Configuration
An efficient kitchen cabinet layout is determined by what you store and how you access it during daily meal preparation. Begin by taking a comprehensive inventory of the items you plan to house in the cabinet, categorizing them by size, weight, and frequency of use. This inventory will guide you in choosing the optimal combination of drawers, shelves, and specialized compartments.

For the lower section of the cabinet, prioritize deep drawers over standard cupboards with fixed shelves. Drawers pull out fully, allowing you to view and access heavy pots, pans, and mixing bowls from above without having to bend down and search through dark corners. Smooth-gliding drawer slides with soft-close mechanisms prevent heavy cookware from shifting violently when the drawer is opened or closed.
Incorporate adjustable shelving in the middle and upper sections of the cabinet to maximize vertical space. Look for customizable units that feature pre-drilled peg holes spaced closely together along the interior side panels. This modular design allows you to adjust the shelf heights to accommodate tall cereal boxes, small spice jars, or stackable dinnerware, eliminating wasted vertical space.
If you intend to use the cabinet countertop as an active workspace, plan the surface area based on your specific tasks. A dedicated coffee station, for example, requires space for the machine, a knock box, and mug storage, along with integrated cable management. For food preparation, ensure the countertop is completely clear of permanent fixtures and sits at an ergonomically comfortable height for chopping and mixing.
Consider integrating specialized internal accessories to keep smaller items organized. Pull-out wire baskets are excellent for storing dry goods, onions, or potatoes, as they allow air to circulate freely. Vertical tray dividers can be installed in narrow compartments to keep baking sheets, cutting boards, and serving platters upright and easily accessible.
Step 3: Select Dimensions, Materials, and Surface Finishes
Selecting the right dimensions and materials ensures your kitchen stand cabinet is both comfortable to use and durable enough to withstand daily wear. Standard kitchen counter heights typically range from 85 to 92 centimeters, which aligns with natural elbow height for most tasks. Choose a cabinet depth that allows you to reach the back of the countertop easily without straining your back or shoulders.
Because kitchens are high-humidity environments prone to spills, steam, and grease, the choice of base materials is critical. Check product specifications and labels to verify the moisture resistance of the cabinet frame. High-density fiberboard (HDF) or multi-layer plywood treated with moisture-resistant resins offers better dimensional stability in humid climates than standard, untreated particleboard.
Examine the surface finishes carefully to ensure they meet your maintenance preferences. High-pressure laminates (HPL) and melamine coatings provide a durable, non-porous barrier that resists water penetration and is easy to clean with a damp cloth. Avoid delicate veneers or unsealed wood surfaces in areas close to the sink or stove, as constant exposure to moisture can cause the wood to warp, swell, or split.
For the cabinet countertop, select a material specification that matches your intended usage. If you plan to place hot appliances directly on the surface, look for materials with verified heat resistance, such as engineered quartz or solid surface acrylics. If the countertop will be used for food prep, prioritize scratch-resistant and non-porous materials that do not harbor bacteria and can be sanitized easily with standard household cleaners.
Step 4: Plan for Stability, Assembly, and Safety
Ensuring the structural integrity and stability of your freestanding kitchen stand cabinet is paramount to preventing accidents and ensuring long-term durability. Before assembly begins, assess the levelness of your kitchen floor using a spirit level. Uneven floors can cause a tall cabinet to lean, putting uneven stress on the joints and causing doors and drawers to misalign or bind.
To compensate for uneven flooring, utilize the adjustable leveling feet provided by the manufacturer. If the cabinet does not include adjustable feet, use high-density plastic or hardwood shims placed securely under the base to level the unit. Never use soft materials like cardboard or folded paper, which can compress over time under the weight of the cabinet and its contents.
Tall or top-heavy freestanding cabinets pose a significant tipping hazard, especially when multiple drawers are extended simultaneously or when heavy items are stored on upper shelves. Always secure the cabinet to the wall using the anti-tip anchoring hardware supplied by the manufacturer. Verify your wall type—such as concrete, brick, or drywall—and purchase the appropriate heavy-duty wall plugs and screws to ensure a secure hold.
Before drilling into any wall to install anchors, use a reliable stud finder or wall scanner to locate concealed electrical wiring, water pipes, or gas lines. If you are renting your home or cannot drill into the walls, look for low-profile, wide-base cabinet designs that feature a lower center of gravity, and place the heaviest items exclusively in the bottom drawers to maximize stability.
Know when to pause the installation and consult a qualified professional. If your customization plan requires modifying the cabinet frame to fit around structural pillars, extending electrical outlets through the back panel, or integrating plumbing lines for an under-sink cabinet, hiring a licensed contractor or electrician ensures the work is completed safely and in compliance with local building regulations.
Step 5: Final Verification and Maintenance Setup
Once the kitchen stand cabinet is fully assembled and positioned, conduct a thorough post-installation inspection before loading it with your kitchen items. Open and close every door and drawer multiple times to check for smooth operation. If a door hangs unevenly or rubs against the frame, use a screwdriver to adjust the tension screws on the hinges until the door is perfectly aligned.
Verify the maximum load capacity for each shelf, drawer, and countertop surface by consulting the manufacturer’s assembly manual. Overloading shelves can cause them to sag permanently or slip from their support pegs, while overloading drawers can damage the ball-bearing slides. Distribute weight evenly across each surface, placing the heaviest items at the bottom of the cabinet to maintain a low center of gravity.
Establish a regular cleaning and maintenance routine to preserve the appearance and structural integrity of the cabinet materials. Wipe down all surfaces weekly using a soft microfiber cloth dampened with warm water and a mild, non-abrasive dish soap. Avoid using harsh chemical cleaners, scouring pads, or bleach, which can dull or scratch the protective surface finish.
Perform a quick moisture check every few months, particularly around the base of the cabinet and near any water sources. Wipe away any standing water or condensation immediately to prevent moisture from seeping into the joints. Periodically check the tightness of the wall anchors and hinge screws, tightening any hardware that has loosened due to the vibrations of daily use.
Frequently Asked Questions (FAQ)
Can I modify the internal configuration of a pre-assembled kitchen stand cabinet later?
Yes, you can modify the internal configuration of a pre-assembled cabinet, provided the original structure supports modular adjustments. Before purchasing, check the product specifications for pre-drilled peg holes along the interior side panels, which allow you to easily reposition shelves without drilling. If you wish to add aftermarket pull-out baskets, drawer runners, or spice racks, measure the interior width, depth, and height of the cabinet opening carefully to ensure compatibility. Always review the manufacturer’s warranty terms before making any permanent structural alterations, as drilling new holes or removing fixed partitions may void the warranty and compromise the cabinet’s structural integrity.
How do I ensure the cabinet does not block kitchen ventilation or pathways?
To maintain safe traffic flow and comfortable movement, ensure that the cabinet footprint leaves a clear walkway of at least 90 to 100 centimeters between the unit and opposing countertops, walls, or appliances. This clearance allows two people to pass each other and provides ample space to stand while opening cabinet doors or fully extending drawers. Additionally, cross-reference the cabinet’s position with the ventilation zones of nearby appliances, such as refrigerators, ovens, and cooktops. Never place a freestanding cabinet directly in front of wall vents, exhaust fans, or natural airflow pathways, as restricted ventilation can cause appliances to overheat, reducing their operational lifespan and creating safety hazards.

Community discussion
Share your experience or ask a question. Comments are reviewed before publication.