
Choosing the right wooden rack size requires balancing your physical room dimensions, delivery access routes, and the specific items you plan to store. A rack that is too deep can obstruct walkways, while one that is too shallow or lacks sufficient shelf height will fail to hold your belongings. By taking precise measurements of your floor footprint, vertical clearance, and the items themselves, you can select a wooden rack that fits seamlessly into your home layout while remaining stable and functional.
Finding the perfect fit is not just about matching the aesthetic of your home; it is about ensuring the piece integrates into your daily routine. A well-sized wooden rack enhances organization, while a poorly measured one can make a room feel cramped or leave you with unusable storage space. Taking a systematic approach to measurement and planning will save you time, money, and the hassle of returns.
Measure Your Available Space Accurately
Before browsing online marketplaces or visiting furniture showrooms, you must establish the exact physical boundaries of the intended installation area. Relying on visual estimates or standard room dimensions often leads to purchasing errors, as even a discrepancy of a few millimeters can prevent a wooden rack from fitting into a designated alcove or corner.
Products mentioned in this guide
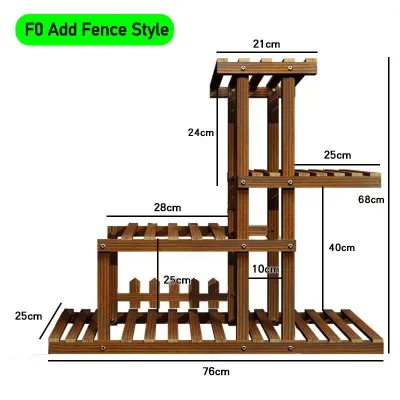
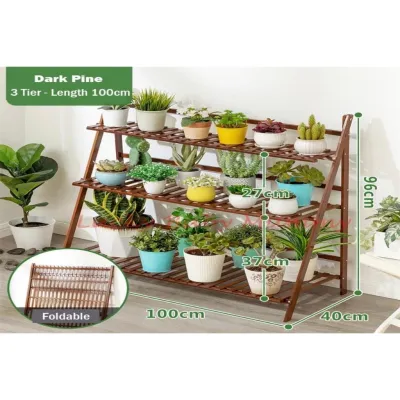
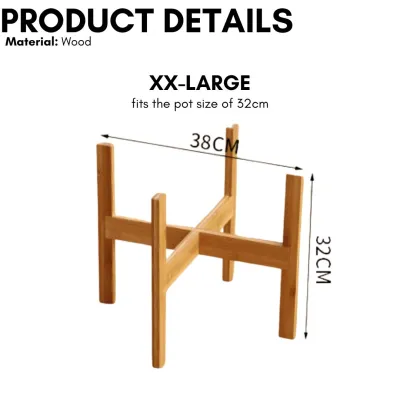

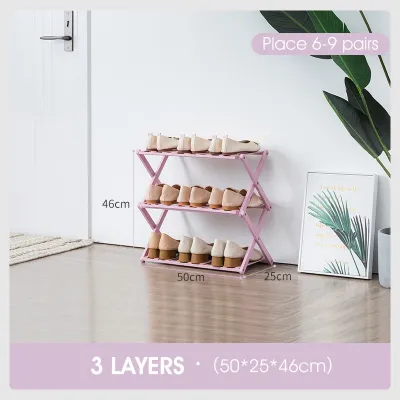
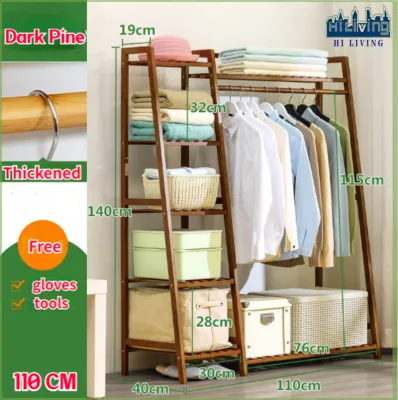
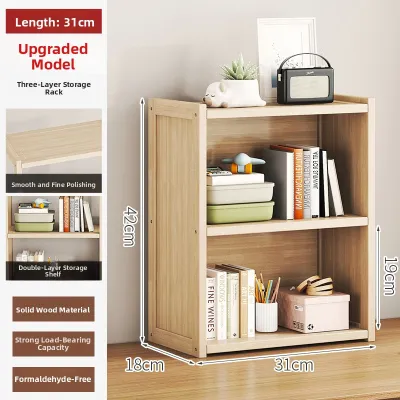

Prices are valid at publication and may change. Please refer to the product page for the latest price.
Begin by using a physical metal tape measure to determine the maximum width and depth of the floor footprint where the rack will stand. Measure the width at three different heights—near the floor, at midpoint, and near the top—as walls are rarely perfectly plumb. Use the smallest of these three measurements as your absolute maximum width limit to ensure the rack does not get wedged during installation.
Next, measure the vertical clearance from the floor to the ceiling, or to the lowest hanging obstacle such as a wall-mounted air conditioning unit, beam, or light fixture. If you plan to place items on the very top shelf of the rack, leave at least 20cm of open space above the unit to allow for comfortable access and cleaning.
Do not forget to account for architectural features that project from the walls. Skirting boards, electrical outlets, light switches, and window trim can all restrict how close the wooden rack can sit against the wall. If a power outlet is located behind the rack, you must either choose a unit with an open back or factor in an extra 5cm of depth clearance to accommodate plugged-in cords.
Plan for Delivery, Assembly, and Daily Clearance
A wooden rack might fit perfectly in your living room, but it must first be able to get there. Many homeowners overlook the journey the furniture must take from the delivery truck to its final position. Measure the width and height of all entryways, including apartment lift doors, narrow corridors, stairwell turns, and your front door frame, to ensure the packaged or pre-assembled unit can pass through safely.

If you are purchasing a flat-packed wooden rack that requires home assembly, you must calculate the diagonal height clearance needed to stand the unit upright. When you assemble a tall rack flat on the floor and then tilt it up, the diagonal measurement of the side panel is longer than the actual height of the rack. If this diagonal measurement is larger than your ceiling height, you will not be able to stand the rack up in that room, meaning you must assemble it upright from the start, which requires extra hands and tools.
Daily clearance around the wooden rack is equally vital for maintaining a comfortable flow of traffic. Ensure there is at least 60cm to 90cm of open floor space in front of the rack so you can stand, bend, and reach items on the lower shelves without blocking walkways.
If the wooden rack is positioned near doors, wardrobes, or windows, double-check that these features can open fully without striking the frame. A rack placed too close to a bedroom door or a wardrobe drawer can restrict movement and cause accidental scratches to the wood finish over time.
Match Rack Dimensions to Your Storage Items
The dimensions of your wooden rack should be dictated by the specific items you intend to store or display. To determine the ideal shelf depth, gather your deepest items—such as large art books, storage baskets, photo albums, or electronic devices—and measure their depth from front to back. Standard novels typically require a shelf depth of 20cm, while binders, vinyl records, and storage boxes generally need 30cm to 35cm of depth.
Vertical spacing between shelves is another critical factor. Measure the height of your tallest items to ensure they will fit comfortably without scraping the shelf above. If you have a diverse collection of items, look for a wooden rack with adjustable shelving systems, which allow you to reposition the shelves in small increments to accommodate changing storage needs over time.
For fixed-shelf designs, verify the height of each individual compartment before purchasing. A common mistake is buying a rack with uniform shelf heights, only to find that your tallest books must be stored horizontally, which wastes space and looks cluttered.
Additionally, pay close attention to the manufacturer’s specified weight capacity per shelf, especially if you plan to store heavy items like textbooks, ceramic pots, or dense decorative pieces. Solid wood racks made from timber like oak, teak, or rubberwood offer excellent structural integrity, but long shelves (exceeding 80cm) without center supports can still sag over time under heavy loads. If you have heavy collections, opt for shorter shelf spans or units with reinforced central supports.
Adapt Proportions for Different Room Layouts
The visual scale of a wooden rack can dramatically alter the perception of space in a room. In smaller rooms, narrow hallways, or tight alcoves, tall and narrow wooden racks are highly effective. By drawing the eye upward, these units utilize vertical space efficiently, providing ample storage while leaving the surrounding floor area clear.
For open-plan living areas, dining rooms, or spaces beneath windows, low-profile or half-height wooden racks are often the better choice. A rack that stands between 80cm and 100cm tall keeps sightlines open, allowing natural light to penetrate deeper into the room and maintaining an airy, spacious feel. The top surface of a low rack also doubles as a practical sideboard or display area for lamps, plants, and artwork.
When selecting a wooden rack, consider how its visual weight and wood tone coordinate with your existing furniture. A massive, dark-stained hardwood rack can overwhelm a small, light-filled room, making it feel cramped and dark. In contrast, lighter wood tones like natural oak, ash, or pine help maintain a bright and open atmosphere.
If you are placing a wooden rack behind a sofa, ensure the height of the rack is slightly lower than or equal to the back of the sofa. This keeps the transition smooth and prevents the rack from looking like an awkward barrier in the middle of the room.
Verify Stability and Installation Requirements
A stable foundation is essential for any storage unit, particularly tall or heavy wooden racks. Before finalizing your purchase, inspect the levelness of your floor using a spirit level. Even a minor slope can cause a tall rack to lean forward or wobble, compromising its safety; if your floors are uneven, look for racks with adjustable leveling feet or plan to use discreet furniture shims.
Any wooden rack that stands taller than 120cm, or any unit placed in a household with children or active pets, must be securely anchored to the wall to eliminate the risk of tipping. Review the product specifications to confirm if wall-anchoring hardware is included, and ensure you have the correct wall plugs for your specific wall material, whether it is concrete, brick, or drywall.
Consider the assembly environment and tools required for installation. Large, multi-tier wooden racks often require a flat, clean workspace that is at least twice the size of the unit itself to prevent scratching the wood panels during assembly.
Before starting, gather the necessary tools, such as a rubber mallet, a screwdriver, and a spirit level. If the rack is heavy or complex, having a second person to assist with lifting and aligning the panels will make the process safer and prevent damage to the wooden joints.
Avoid Common Wooden Rack Sizing Mistakes
One of the most frequent errors in space planning is forgetting to subtract the thickness of the skirting board from your usable floor depth. If your skirting board is 1.5cm thick, a wooden rack with a flat back cannot sit flush against the wall, leaving a gap at the top or causing the unit to lean forward if it is top-heavy. To avoid this, look for racks with a skirting board cutout at the base, or factor the skirting thickness into your depth calculations.
Another common pitfall is assuming that standard storage boxes or bins will fit into the rack based solely on the rack’s external dimensions. Always check the internal clearance dimensions of the shelves, as the thickness of the outer frame, upright supports, and shelf brackets will reduce the actual usable width and height.
Finally, if your chosen wooden rack features integrated cabinet doors, sliding panels, or pull-out drawers, remember to calculate the extra clearance needed for these components to open fully. A drawer that cannot slide out because it hits a nearby coffee table or door frame renders that portion of your wooden rack useless, defeating the purpose of your storage planning.

Community discussion
Share your experience or ask a question. Comments are reviewed before publication.