
In Singapore’s warm and humid climate, proper wardrobe organization is essential not only for maximizing space but also for maintaining air circulation to prevent mold and mildew on your footwear. Choosing the right shoe stacker size requires balancing three critical dimensions: your wardrobe’s physical shelf limits, the vertical stacking profile of your specific shoe types, and the footprint of the organizer itself. In compact apartments where built-in wardrobes must utilize every square centimeter, a mismatched organizer can prevent sliding doors from closing or crush delicate materials. By systematically measuring your space and grouping your collection, you can double your shelf capacity while keeping your shoes accessible and in pristine condition.
Measure Your Closet Shelves for Maximum Clearance
To establish the absolute spatial boundaries of your wardrobe, start by taking precise physical measurements of your shelf interiors. Use a metal measuring tape for accuracy and record every dimension in centimeters, as most home organization products in Singapore are specified in metric units. First, measure the vertical clearance between each shelf. This is the distance from the top surface of the lower shelf to the bottom surface of the shelf directly above it. If you use shelf liners, protective plastic mats, or dehumidifying sheets, place them down first before measuring, as even a few millimeters of thickness will reduce your available vertical clearance.
Next, measure the usable shelf depth from the back wall of the wardrobe to the front edge of the shelf. This step is particularly critical for built-in wardrobes with sliding doors, which are common in local apartments. For sliding doors, measure only to the inner track of the door system rather than the outer frame. For hinged doors, measure to the point where the door panel sits when completely closed. Failing to account for this clearance means your shoes or the stackers themselves may block the doors from shutting properly, leading to scratched wood, damaged door mechanisms, or scuffed footwear.
Products mentioned in this guide
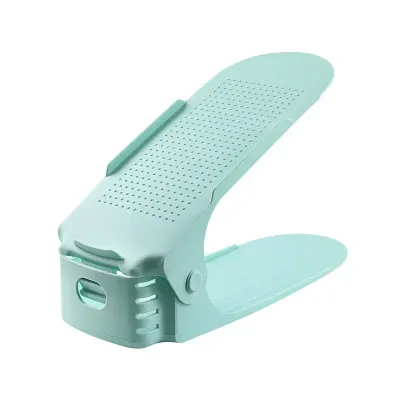
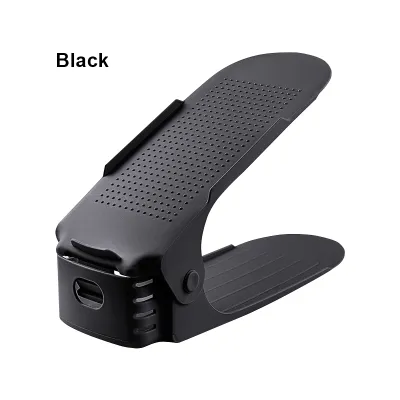
![[SG Stock] Adjustable Shoes Rack Shoe Stacker Shoe Slots Shoe Storage Rack Anti Slip Footwear Holder Space Saving Shoe Box Shoe Organiser](https://img.lazcdn.com/g/p/fc7a332836062dc07720aa078b592af6.jpg_400x400q80.jpg_.webp)
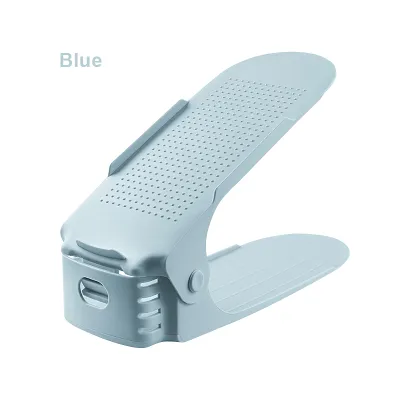
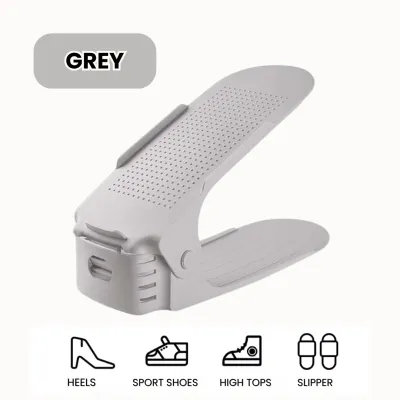
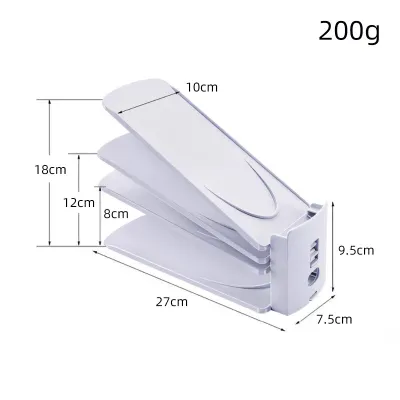
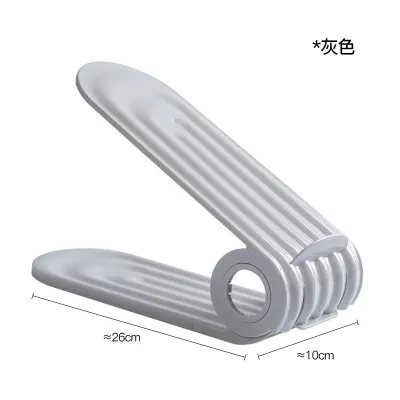
Prices are valid at publication and may change. Please refer to the product page for the latest price.
Finally, inspect the shelf area for hidden physical obstructions that could restrict your layout. Built-in wardrobes often feature door hinges, drawer pulls, vertical partition supports, or integrated LED lighting tracks that protrude into the usable storage space. Measure the width of the shelf at its narrowest point, subtracting the space occupied by these components. Keeping these dimensions on hand allows you to verify whether a particular shoe stacker will fit cleanly without forcing you to modify your existing cabinetry.
Categorize Your Shoe Collection by Height and Length
Your footwear collection is highly diverse, and your storage solution must reflect that variety. Before purchasing any organizers, gather your shoes and group them by style and silhouette. Create separate categories for flat sandals, casual sneakers, formal dress shoes, high heels, and ankle boots. Each category has distinct spatial requirements that dictate the height and depth of the organizer you will need.

To find your minimum required dimensions, measure the tallest and longest shoe within each category. For length, measure from the tip of the toe box to the furthest edge of the heel. For height, measure from the bottom of the sole to the highest point of the collar or heel counter. High heels require extra attention; measure the vertical distance from the floor to the top of the heel opening to ensure the upper tier of a stacker does not force the shoe against the upper shelf.
You must also account for “stacking height,” which is the combined vertical space required when one shoe is placed on top of the other within the stacker. Because the heel of the lower shoe nests beneath the sole of the upper shoe, the total height is often slightly less than doubling a single shoe’s height, but it still varies based on sole thickness and heel structure. Compare this combined profile against your shelf clearance.
Finally, count the total number of pairs in each category that you intend to store. This count determines how many individual stackers or multi-tier units you need to purchase. It also helps you plan the physical layout of your shelves, ensuring you do not buy more organizers than your wardrobe can physically accommodate.
Match Shoe Stacker Specifications to Your Measurements
With your closet dimensions and shoe profiles recorded, you can now cross-reference these numbers with the manufacturer’s product specifications. When evaluating a shoe stacker, check its listed width, base depth, and height range. The base depth of the stacker must be equal to or less than your usable shelf depth to prevent the unit from overhang, which can cause instability or interfere with wardrobe doors.
Always factor in a small buffer zone for daily usability. A good rule of thumb is to allow at least two centimeters of vertical clearance above the top shoe and two centimeters of horizontal clearance in front of the stacker. This gap allows you to easily slide your hand in to retrieve a shoe without scraping your knuckles or scuffing the leather against the shelf above.
Adjustable vs. Fixed-Height Designs
Adjustable shoe stackers feature a pivoting or locking top tier that can be set to different angles or heights. This design is highly versatile, making it suitable for mixed collections where you might store a flat sandal on one shelf and a high-top sneaker on another. By adjusting the angle of the top tier, you can minimize the vertical space used by low-profile shoes while expanding it for taller pairs. When choosing an adjustable model, verify the manufacturer’s minimum and maximum height settings to ensure the fully extended unit still fits within your shelf clearance.
Fixed-height stackers, on the other hand, have a rigid, non-adjustable frame. These units are typically more compact and robust because they lack moving parts or adjustment tabs. They are excellent for uniform shoe collections, such as a shelf dedicated entirely to flat loafers or running shoes, where you do not need to vary the vertical spacing. Because they are often slimmer, they maximize horizontal shelf space, though they offer no flexibility if your footwear style changes in the future.
Single-Tier vs. Multi-Tier Configurations
Standard single-tier stackers hold exactly one pair of shoes—one on the base and one on the upper platform. These are the most common choice for standard wardrobe shelves with a height clearance of 20 to 30 centimeters. They are highly stable, easy to reposition, and allow you to utilize the existing shelving of your built-in wardrobe without restructuring the interior.
Multi-tier stackers, which hold three or more shoes vertically, are designed for tall shelves, walk-in closet floors, or deep cabinet bases. While they offer excellent vertical density, they require careful stability checks. A taller unit has a higher center of gravity, meaning it can tip forward if placed on a shallow or uneven shelf. If you select a multi-tier organizer, ensure the base footprint is wide and deep enough to support the weight of multiple shoes, and check that the top shoe does not protrude into your wardrobe’s active walkway.
Plan Your Shelf Layout and Avoid Common Sizing Mistakes
An organized wardrobe relies on a logical layout that balances aesthetics with physical stability. For a clean, visual look, align your shoe stackers in uniform rows, keeping identical models together on the same shelf level. If your shelf depth is shallow, you can stagger the stackers—placing one forward and the next slightly back—to prevent the heels or toes from pressing against the wardrobe doors while still utilizing the full width of the shelf.
Avoid the common mistake of purchasing stackers that are too deep for your wardrobe. When a stacker is flush with the shelf edge, the protruding heel of the bottom shoe or the toe of the top shoe can stick out an extra two to three centimeters, preventing sliding doors from gliding smoothly. Another frequent error is ignoring the thickness of the stacker’s own plastic or metal frame when calculating vertical clearance; always add the frame thickness to your shoe’s height measurements.
Weight distribution is critical for maintaining the structural integrity of your wardrobe shelves. Place heavier footwear, such as leather boots, heavy sneakers, and multi-tier stackers, on the lowest shelves or the wardrobe floor. This keeps the center of gravity low and prevents lightweight wooden shelves from bowing over time. Reserve the higher, lighter shelves for sandals, slippers, and single-tier stackers.
If you are uncertain about the exact fit or how your shoes will sit on a specific organizer, avoid buying a bulk pack immediately. Purchase a single test unit first. Set it up in your wardrobe, place your tallest and longest shoes on it, and test the door clearance and ease of retrieval. Once you verify that the dimensions work perfectly in your specific closet layout, you can confidently purchase the remaining units needed to complete your organization system.
Frequently Asked Questions (FAQ)
Can shoe stackers accommodate high heels and ankle boots?
Standard shoe stackers are optimized for low-profile footwear like flats, loafers, and sneakers. High heels can be accommodated if you select an adjustable stacker that allows you to tilt the top tier to a steeper angle, provided your wardrobe shelf has enough vertical clearance to house the elevated shoe. Ankle boots and taller boots, however, generally exceed the physical height limits of standard stackers. For these, it is best to use dedicated boot shapers, tall shelf compartments, or store them side-by-side without a stacker to prevent creasing the ankle material.
How much extra space should I leave between stacked shoes?
To ensure smooth daily use and protect your footwear from damage, leave a vertical clearance of at least two centimeters between the top of the upper shoe and the bottom of the shelf above. This prevents the shoe material from rubbing against the wooden shelf, which can cause scuffing or color transfer. Additionally, leave a horizontal gap of two to three centimeters at the front of the shelf so you can easily grip the stacker’s handle or base. Always factor in the thickness of any shelf liners or damp-proofing mats, as these will slightly reduce your total vertical clearance.

Community discussion
Share your experience or ask a question. Comments are reviewed before publication.