
Finding the perfect router storage box for your HDB flat requires balancing aesthetic clutter control with critical hardware performance. In compact Singapore homes, where shelf and wall space is highly contested, placing a router into an improperly sized box can lead to dropped connections, overheating, or physical damage to delicate fiber optic cables. To determine the correct size, you must measure your router’s maximum physical boundaries, add necessary clearance for heat dissipation, and compare these total dimensions against the physical limits of your shelving or wall area.
A successful setup ensures your home network remains stable while keeping unsightly wires hidden. By taking precise measurements of both your hardware and your home’s structural surfaces, you can select an organizer that fits seamlessly into your living room, hallway, or study. This guide outlines the exact steps to measure your equipment, evaluate your HDB’s unique spatial constraints, and avoid common installation pitfalls.
Measure Your Router and Ventilation Needs
Before browsing online marketplaces or local home organization stores, you must establish the absolute minimum internal dimensions your storage box must possess. Start by placing your router on a flat surface in its active operating position. Measure the maximum width, depth, and height of the unit. Do not just measure the plastic chassis; you must include any protruding elements such as external antennas, rear-facing ports, and connected cables.
Products mentioned in this guide
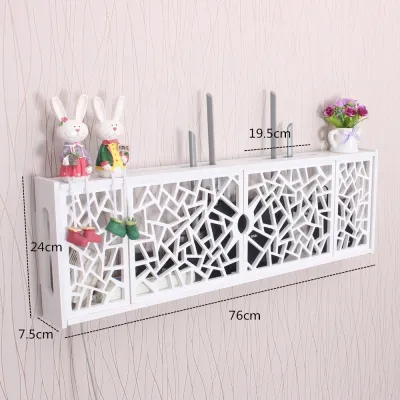
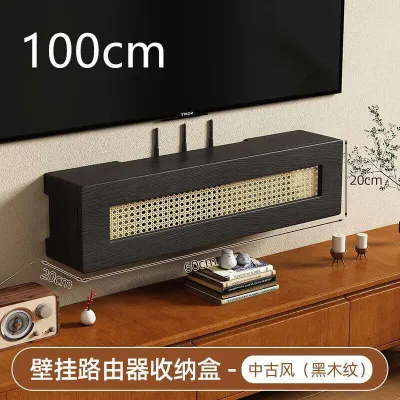

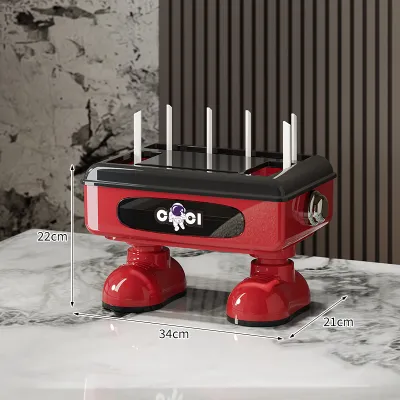
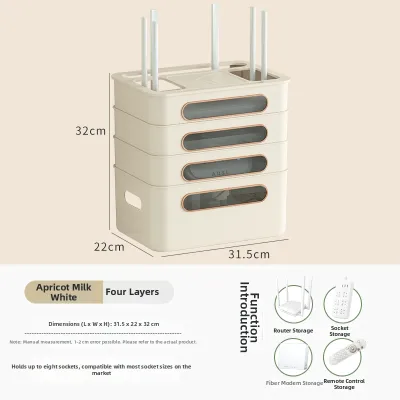

Prices are valid at publication and may change. Please refer to the product page for the latest price.
Antennas require special attention during this measurement phase. If your router features adjustable external antennas, measure them in their fully extended or optimally angled positions. Forcing antennas to fold flat or bend unnaturally to fit inside a tight box can severely degrade your local Wi-Fi signal strength and coverage throughout your flat. If your router has internal antennas, measure the chassis height but keep in mind that the signal still needs to penetrate the box material.
Next, account for the space required by cables and connectors. Power adapters, ethernet cables, and fiber optic patch cords plug into the back or sides of the router and often protrude several centimeters. Fiber optic cables are particularly delicate and must never be bent at sharp angles. Bending a fiber cable too tightly can cause micro-fractures in the glass core, leading to signal loss or complete internet failure. Allow at least 5 to 8 centimeters of extra depth behind the router ports to accommodate these cable bends safely.
Finally, consult your router’s manufacturer manual or product label to identify the recommended ventilation clearance. Routers are active electronic devices that generate heat continuously. Without adequate airflow, heat builds up inside the chassis, leading to thermal throttling, frequent restarts, or permanent hardware failure. Most manufacturers recommend maintaining a clearance of at least 3 to 5 centimeters on all sides of the device to facilitate natural convection and passive cooling.
Assess Your Available HDB Shelf or Wall Space
Once you have determined the minimum internal dimensions required for your router, you must evaluate the physical constraints of your intended installation area. In many HDB flats, routers are placed on TV consoles, open shelving units, or mounted directly onto the wall near the fiber termination point (FTP). Each location presents distinct spatial limitations that dictate the maximum external dimensions of your storage box.

If you plan to place the box on a shelf, measure the exact depth, width, and height clearance of the target shelf tier. Pay close attention to any structural features that might obstruct the box, such as back panels, front lips, or sliding door tracks. A shelf with a front lip may prevent you from sliding a tall box into place, even if the interior height of the shelf is technically sufficient. Additionally, check if the shelf has pre-drilled cable grommets or open backs to route power and data lines to the wall sockets.
For wall-mounted setups, identify the usable flat wall area around your power outlets and fiber termination point. Look out for hidden obstacles such as light switches, electrical trunking, intercom units, or decorative skirting boards. In Singapore, HDB walls are typically constructed of solid concrete or precast panels, which require specific tools for mounting. Ensure the wall space you select allows the box to sit completely flat against the surface without overlapping any existing fixtures.
Weight capacity is another critical factor to verify before finalizing your setup. If you are placing a heavy wooden or solid plastic box on a floating shelf, ensure the shelf brackets can support the combined weight of the box, the router, the power adapter, and any associated cabling. For wall-mounted boxes, the mounting surface must be strong enough to hold the assembly securely over time. Concrete walls offer excellent support but require appropriate masonry wall plugs and screws, whereas partition walls require specialized hollow-wall anchors.
Match Box Dimensions to Your Space and Setup
With both sets of measurements in hand, you can now find a router storage box that bridges the gap between your hardware needs and your home’s physical limits. The ideal box must have internal dimensions that are larger than your router’s total footprint (including cable bends and antennas) plus the required ventilation clearance. Simultaneously, its external dimensions must be smaller than the available space on your shelf or wall.
When comparing candidate boxes, prioritize models that feature built-in cable routing slots, ventilation grilles, or open-back designs. These features are essential for managing the entry and exit of power cords and network cables without forcing you to modify the box yourself. Ensure the positions of these routing holes align logically with the location of your wall sockets and fiber termination point to keep cable runs as short and neat as possible.
Shelf Placement Considerations
When selecting a router storage box for a freestanding shelf or TV console, focus heavily on the external depth of the box. The box should sit fully on the shelf surface without overhanging the front edge. An overhanging box is not only visually unappealing but also poses a tipping hazard if accidentally bumped by family members or pets.
Additionally, ensure the top of the box remains clear of any low-hanging shelf tiers above it. If the box features a top-opening lid for easy access to the router’s buttons or status lights, you will need sufficient vertical clearance to open the lid fully without removing the entire box from the shelf.
Wall-Mounted Setup Considerations
For vertical wall installations, carefully check the footprint of the box’s mounting brackets or keyhole slots against your available flat wall area. The mounting points must align with solid sections of the wall to ensure a secure hold. Avoid placing mounting screws too close to the edges of concrete pillars or electrical conduits hidden within the wall.
You must also ensure that the combined weight of the storage box, router, and heavy power bricks does not exceed the load capacity of the chosen wall anchors. In Singapore’s humid climate, adhesive-based mounting solutions should be used with extreme caution. Heavy boxes or those housing warm routers can cause adhesive backings to degrade and fail over time, potentially leading to a costly drop that damages your networking equipment.
Common Sizing Mistakes to Avoid
One of the most frequent errors homeowners make is ignoring the height of the router’s antennas. Many assume that antennas can simply be folded flat or angled horizontally to fit into a slim, low-profile box. However, altering the antenna orientation can severely disrupt the polarization of the Wi-Fi signal, leading to weak coverage in bedrooms or kitchen areas furthest from the router. Always measure the router with its antennas in their recommended upright positions.
Another common mistake is purchasing a storage box that matches the router’s dimensions perfectly, leaving zero room for air circulation. Enclosing a router in a tight, unvented space creates a miniature greenhouse effect. As the temperature rises, the router’s internal components degrade faster, leading to dropped connections, slower internet speeds, and a significantly shortened lifespan for your expensive networking gear.
Lastly, do not overlook the physical volume occupied by bulky power adapters, splitters, and excess cabling. A standard HDB fiber setup often involves both an Optical Network Terminal (ONT) and a separate Wi-Fi router, each with its own power brick. If you plan to house both devices inside a single storage box, you must calculate the combined volume of both units, their power adapters, and the coiled slack of the fiber patch cable. Failing to account for these extra items will result in a box that cannot be closed properly.
Frequently Asked Questions (FAQ)
Can I use a fully enclosed box if my router runs hot?
Using a completely sealed, airtight box for a router that generates noticeable heat is highly discouraged. Fully enclosed spaces trap thermal energy, which can quickly exceed the safe operating limits of your router and cause thermal throttling or hardware failure. If you prefer a clean, enclosed look, choose a box specifically designed with ventilation slots, mesh panels, or an open-back structure that encourages passive airflow. Always monitor the temperature of your router during the first few days of use inside a new box to ensure it remains warm to the touch rather than hot.
Do I need to drill into HDB walls for a mounted box?
For a secure and durable installation, drilling into your HDB wall to install plastic wall plugs and screws is the most reliable method. This is especially true for solid concrete walls, which provide an exceptionally stable foundation for heavier wooden or plastic storage boxes. While some lightweight plastic shelves or boxes claim to support mounting via heavy-duty adhesive tapes or nail-free glues, these methods are highly dependent on wall surface conditions, paint quality, and ambient humidity. If you choose an adhesive option, strictly adhere to the manufacturer’s weight limits and regularly inspect the mount for any signs of peeling or loosening.

Community discussion
Share your experience or ask a question. Comments are reviewed before publication.