
Finding the ideal storage solution for a tight corner or a narrow hallway can be challenging. When floor space is limited, slim shelves offer an excellent way to utilize vertical space without overcrowding a room.
However, selecting the right dimensions involves more than just measuring a single gap on your wall. To ensure your new furniture fits seamlessly, you must account for structural obstacles, walkway clearances, and safety requirements. Taking a systematic approach to measurement and planning will help you find a shelf that is both highly functional and safe for your home.
Measure Your Available Wall Gap and Room Layout
To find a slim shelf that fits precisely, start by measuring the physical space where you plan to place it. Walls in residential homes are rarely completely straight or square.
Products mentioned in this guide
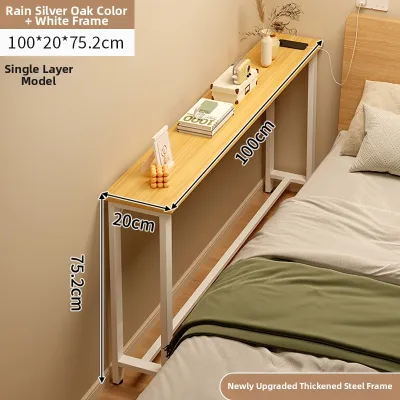
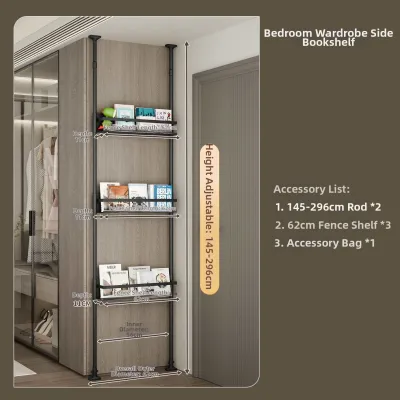

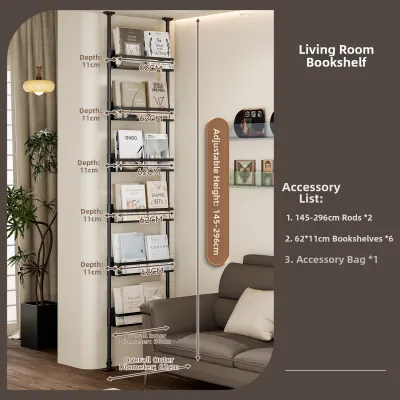
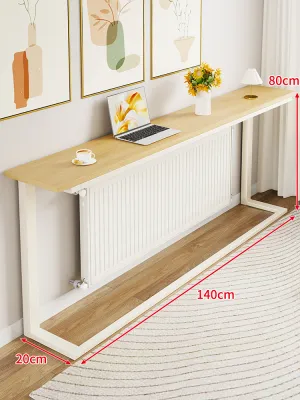
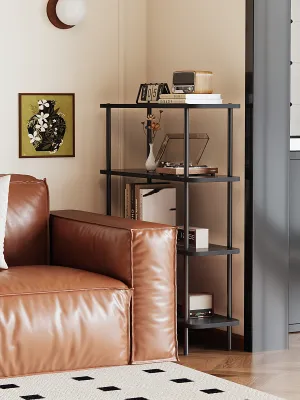
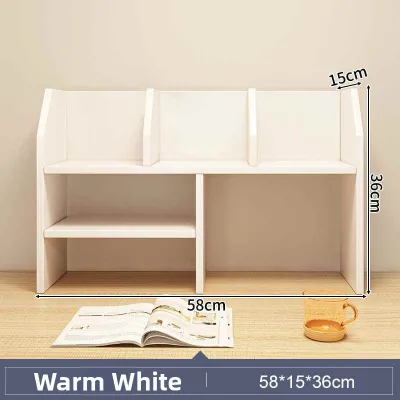
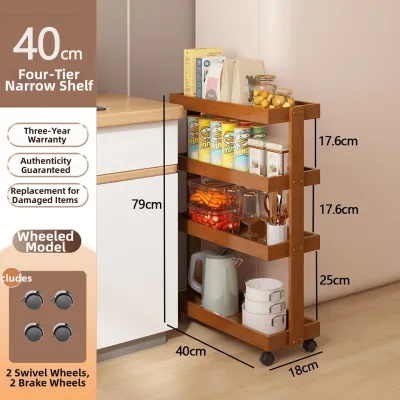
Prices are valid at publication and may change. Please refer to the product page for the latest price.
To avoid purchasing a unit that is too wide, measure the width of your target gap at three different heights: near the floor, in the middle, and near the top. Use the smallest of these three measurements as your maximum width limit. This ensures the shelf will not get stuck against a bulging wall or a misaligned corner during installation.
Do not forget to account for skirting boards or baseboards at the bottom of the wall. These architectural features can reduce the available width at floor level by several centimeters.
If your chosen shelf does not have a cutout at the back to accommodate skirting boards, the entire unit will be pushed away from the wall. This leaves an unsightly gap and reduces the usable space in front of it. Measure the height and depth of your skirting boards so you can compare these figures with the product specifications before buying.
Next, scan the wall and surrounding area for potential obstructions. Look for wall-mounted items such as power outlets, light switches, light fixtures, or air conditioning units.
A slim shelf that blocks a double power socket or covers a light switch will quickly become a daily frustration. Additionally, check the path of any surface-mounted wiring casings, which are common in many apartments. Ensure there is enough clearance around these fixtures so you can still access plugs and switches comfortably.
Finally, factor in the necessary installation clearance and expansion gaps. Many flat-pack slim shelves require a small amount of breathing room on either side to allow you to slide the unit into place or assemble it.
If you are placing the shelf inside a tight niche or alcove, leaving a clearance of at least one to two centimeters on each side is highly recommended. This gap prevents the furniture from scraping against the paintwork during installation and allows for natural structural shifts over time.
Determine the Ideal Depth for Walkways and Doorways
The depth of your slim shelf is critical for maintaining smooth traffic flow throughout your home. In narrow spaces like entryways, corridors, or utility rooms, a shelf that protrudes too far can turn into a constant tripping hazard.

As a general rule, walkways should maintain a clear path of at least 90 centimeters to allow people to pass comfortably. If your hallway is already narrow, choose an ultra-slim shelf with a depth of 15 to 20 centimeters to keep the walkway unobstructed.
Beyond basic walkway clearance, you must evaluate the movement of nearby doors and drawers. Open a nearby door fully and measure its swing arc to ensure it will not strike the corner of the shelf.
Similarly, check the clearance for drawers or cabinet doors on adjacent furniture. If the shelf is placed too close to a wardrobe or kitchen cabinet, it might prevent those doors from opening fully, rendering your existing storage unusable.
It is also wise to match the depth of the shelf to the specific items you plan to store, rather than simply maximizing the available space. For instance, standard paperback books require a shelf depth of about 15 centimeters, while novels and textbooks may need 20 to 25 centimeters.
If you are storing small decorative items, keys, or toiletries, an ultra-slim shelf is ideal. Choosing a shelf that is deeper than necessary not only wastes valuable floor space but also encourages clutter to accumulate in front of your stored items.
Evaluate Shelf Width and Tier Configurations
Once you have established the maximum width and depth, you can consider the height and tier configuration of your slim shelf. If you have a very narrow horizontal gap, a single, tall column is often the most efficient way to maximize storage.
Tall units draw the eye upward, making a small room feel loftier while providing multiple tiers of storage. However, if you have a bit more horizontal space, a wider, multi-column unit with lower height might offer better stability and a less imposing visual presence.
Adjustable shelves are highly beneficial for slim storage units. Fixed shelves limit you to storing items of a specific height, which can lead to wasted vertical space if your items are small, or frustration if an item is just a few millimeters too tall.
Look for shelves with pre-drilled peg holes that allow you to adjust the height of individual tiers. This flexibility ensures you can reorganize the shelf in the future as your storage needs change, whether you are storing tall bottles or flat storage boxes.
Additionally, pay close attention to the footprint of the shelf base. Some slim shelves feature a wider plinth or flared legs at the bottom to improve stability.
While this design helps prevent tipping, it also means the base of the shelf will require more floor space than the upper tiers. Always check the maximum external dimensions of the base to ensure it will fit over your flooring, especially if you have uneven tiles or transition strips between different rooms.
Verify Stability, Weight Capacity, and Installation Requirements
Because slim shelves have a narrow footprint and a high center of gravity, verifying their stability and weight capacity is a critical safety step. Always check the manufacturer’s specifications for the maximum weight limit per shelf tier and for the entire unit.
Overloading a slim shelf can cause the shelves to sag or, worse, cause the entire structure to warp or collapse. Distribute heavier items, such as heavy books or ceramic pots, on the bottom shelves to keep the center of gravity as low as possible.
Wall anchoring is highly recommended—and often mandatory—for tall, narrow shelving units. Most manufacturers include wall-mounting brackets or safety straps with their products.
If you are placing a slim shelf in a household with children or pets, anchoring the unit to the wall is essential to prevent accidental tip-overs. Before purchasing, check what type of wall you have (such as concrete, drywall, or brick) to ensure you have the correct wall plugs and screws, as these are often sold separately.
Finally, review the assembly conditions and tools required for installation. Some slim shelves come fully assembled, while others require extensive flat-pack assembly.
Ensure you have a flat, level floor space to assemble the unit safely. If your floor is slightly uneven, look for shelves equipped with adjustable leveling feet. These feet allow you to compensate for minor floor slopes, ensuring the shelf remains completely upright and stable without wobbling.
Common Sizing Mistakes to Avoid in Small Spaces
One of the most common mistakes when choosing a slim shelf is forgetting to account for baseboards, wall moldings, or chair rails. If you measure only the wall-to-wall distance at eye level, you may find that the shelf cannot push back fully against the wall because of a thick skirting board at the bottom.
This leaves a gap behind the shelf, which not only looks untidy but also reduces the actual clearance space in your walkway.
Another frequent oversight is ignoring the physical space needed for your hands to reach and retrieve items. If you squeeze a slim shelf into a tight niche with only millimeters of clearance on either side, you may find it incredibly difficult to reach items stored near the back or sides of the shelves.
Always leave enough hand clearance so you can comfortably grasp and lift items without scraping your knuckles against the adjacent walls.
Lastly, never assume that all products labeled as “slim” or “narrow” share the same dimensions. There is no industry standard for what constitutes a slim shelf; one brand’s slim unit might be 30 centimeters deep, while another’s might be only 15 centimeters.
Always rely on exact millimeter or centimeter measurements provided in the product specifications rather than descriptive marketing terms. Taking the time to verify these details will save you the hassle of returning a product that does not fit.
Frequently Asked Questions (FAQ)
How much gap should I leave between a slim shelf and the wall?
You should aim to minimize the gap between the back of the shelf and the wall to maximize stability, especially if you plan to anchor the unit. If your walls are uneven or you have thick skirting boards, look for shelves with a built-in baseboard cutout.
This design allows the back of the shelf to sit flush against the wall. If no cutout is present, the gap will be determined by the thickness of your skirting board, which is typically around 1.5 to 2 centimeters.
Can I use a slim shelf in a humid area like a bathroom?
Yes, but you must check the material specifications and care instructions first. Standard wooden or particleboard shelves can swell, warp, or peel when exposed to high humidity and moisture.
For damp environments like bathrooms or laundry yards, look for slim shelves made from moisture-resistant materials such as powder-coated metal, stainless steel, plastic, or specially treated bamboo. Always follow the manufacturer’s guidelines regarding wet-area usage to ensure longevity.

Community discussion
Share your experience or ask a question. Comments are reviewed before publication.