
Commissioning a custom kitchen island table is one of the most significant investments you can make in a modern Singapore home. Beyond serving as a visual centerpiece, a well-designed island acts as a multi-functional hub for meal preparation, casual dining, and integrated storage. Because every kitchen footprint differs—especially within the structural constraints of local apartments—finding a reliable cabinet brand or specialist fabricator is essential to ensure your island is both structurally sound and highly functional.
To make an informed decision, you must evaluate potential providers on their technical expertise, material transparency, and understanding of local building guidelines. A successful installation relies on precise engineering, moisture-resistant materials suited to our tropical climate, and meticulous space planning. By focusing on these core competencies, you can select a brand that delivers a durable, beautiful island tailored to your daily routines.
Key Criteria for Evaluating Custom Kitchen Island Providers
When searching for a kitchen cabinet brand to build your custom island, the evaluation process must go beyond browsing aesthetic portfolios. You need a provider with proven technical capabilities in spatial planning, structural engineering, and precise on-site execution.
Products mentioned in this guide

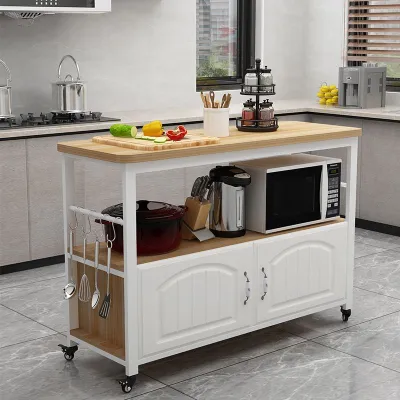
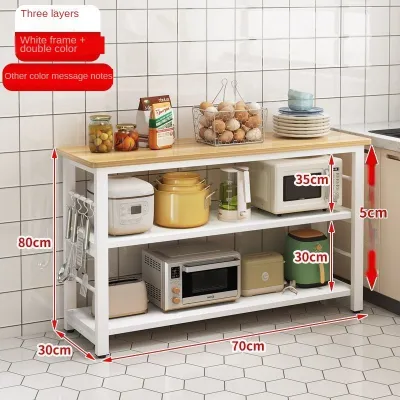

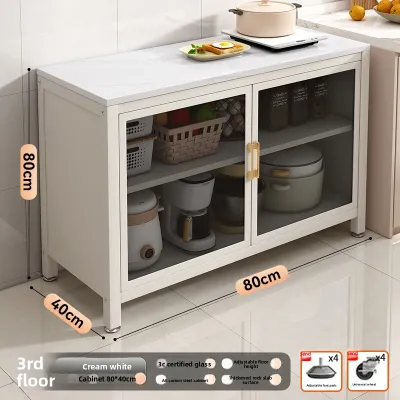

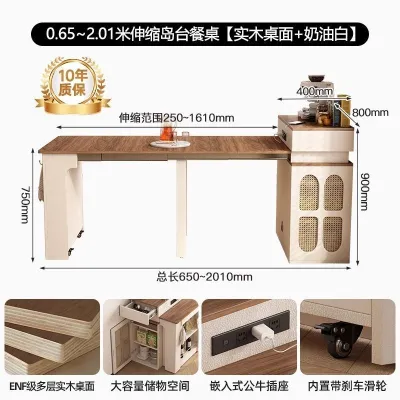
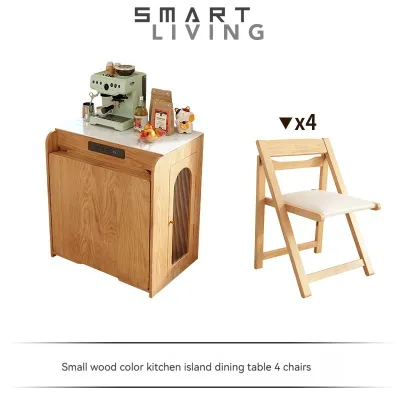
Prices are valid at publication and may change. Please refer to the product page for the latest price.
Design Consultation and Spatial Planning Skills
A qualified provider should offer comprehensive design consultations that address the unique flow of your home. In Singapore, where kitchen layouts range from narrow galley styles to open-concept living areas, the designer must understand how to balance the island’s proportions with the surrounding space. They should provide detailed technical drawings showing how the island interacts with existing walls, structural pillars, and utility lines.
During the initial consultation, observe whether the designer asks about your cooking habits, appliance preferences, and seating requirements. A brand that simply takes orders without analyzing your spatial constraints may deliver an island that disrupts your kitchen’s natural workflow.
Material Sourcing Transparency and Origin Verification
Reliable cabinet brands maintain complete transparency regarding where they source their wood substrates, laminates, and countertop slabs. High-quality providers will readily share technical specifications, environmental certifications, and origin details for their materials.
In our humid climate, using low-grade particleboard can lead to rapid swelling and structural failure. Ensure the brand uses high-density, moisture-resistant materials, such as solid plywood or specialized marine-grade boards, and ask to see physical samples of the internal carcasses to verify their density and construction quality.
Structural Engineering for Heavy Countertops and Overhangs
A kitchen island table often features an extended countertop overhang to accommodate bar stools. Supporting heavy materials like quartz, granite, or sintered stone requires precise structural engineering to prevent sagging, cracking, or tipping.
Ask prospective brands how they intend to support the overhang. Reputable fabricators will integrate concealed steel support brackets, reinforced timber frames, or heavy-duty side panels rather than relying solely on the cabinet carcass. They must also calculate the weight distribution to ensure the island remains perfectly stable when multiple people lean on the edge.
Installation Team Qualifications and Site Protection Protocols
The quality of your custom island is heavily dependent on the skill of the installation team. Many premium brands employ their own in-house carpenters and installers rather than outsourcing the work to third-party contractors, ensuring better quality control and accountability.
Before hiring a provider, ask about their site protection protocols. The installation process involves moving heavy stone slabs and large cabinet carcasses through tight condominium corridors or HDB service lifts. The team must protect your existing flooring, walls, and doorways with protective sheets, and they should use dust-extraction tools during any on-site trimming or adjustments.
Navigating Material and Finish Options for Island Tables
The materials you select for your custom kitchen island will dictate its longevity, maintenance requirements, and daily usability. Because the island is highly visible and frequently used, every surface must be chosen with both durability and aesthetics in mind.

Countertop Material Checks and Specific Care Requirements
The countertop is the hardest-working surface of your island. Popular options include engineered quartz, sintered stone, solid surfaces, and natural granite, each requiring different levels of care.
Quartz is highly popular due to its non-porous nature and resistance to staining, making it ideal for busy kitchens. Sintered stone offers exceptional heat and scratch resistance, allowing you to place hot pans directly on the surface, though it can be more prone to edge chipping if struck with heavy objects. Solid surfaces offer seamless joints and easy repairability but are susceptible to scratches and heat damage. Always verify the manufacturer’s care instructions to ensure the material aligns with your cooking style.
Cabinet Door Finishes and Moisture Resistance
The cabinet doors and side panels of your island are exposed to splashes, kicks, and cleaning agents. In high-humidity environments, selecting the right finish is crucial to prevent delamination and warping.
High-pressure laminates (HPL) applied over a high-quality plywood substrate offer excellent impact resistance and a vast range of textures and colors. For a seamless, modern look, consider acrylic or lacquered finishes, which provide a smooth surface that is easy to wipe down. Ensure that all cabinet edges are sealed with high-quality edge banding, such as laser or PUR (polyurethane) bonding, to prevent moisture from penetrating the core material.
Hardware Durability and Soft-Close Mechanisms
The longevity of your island’s drawers and doors depends entirely on the hardware. Because island drawers are often deep and packed with heavy cookware, they require heavy-duty runner systems.
Look for brands that utilize premium, certified hardware systems featuring soft-close hinges and full-extension drawer runners. These systems should have a high load capacity—typically at least 30kg to 50kg per drawer—to ensure smooth operation even when fully loaded. High-quality hardware also prevents doors from slamming, protecting the cabinet structure from long-term vibrational damage.
Edge Profile Options for Safety and Cleaning
The edge profile of your countertop affects both the safety of your household and the ease of maintaining the island. Common profiles include eased, chamfered, bullnose, and mitered apron edges.
If you have young children or a tight kitchen layout, rounded profiles like a pencil round or bullnose edge are safer, reducing the risk of painful bumps. For a modern, minimalist aesthetic, a mitered apron edge creates the illusion of a thick, solid block of stone. However, keep in mind that sharp, square edges are more vulnerable to chipping and can be harder to clean along the seams.
Space Planning and Ergonomic Checks for Your Layout
A beautiful kitchen island can quickly become a daily frustration if it is poorly positioned or incorrectly proportioned. Precise ergonomic planning ensures the island enhances your kitchen’s workflow rather than obstructing it.
Verifying Clearance Distances Around the Island
Maintaining adequate clearance around all sides of the island is critical for comfortable movement and safe appliance operation. As a general rule, you should aim for a minimum clearance of 900mm to 1050mm between the island and surrounding countertops or walls.
If your kitchen accommodates multiple cooks, extending this clearance to 1200mm is highly recommended. This space ensures that you can fully open oven doors, dishwashers, and refrigerator drawers without blocking the walkway or risking collisions. Before finalizing the design, mark the proposed island footprint on your kitchen floor using masking tape to physically test the traffic flow.
Adjusting Heights for Prep Tasks and Seating
The ideal height of your kitchen island depends on its primary function. If the island is solely used for food preparation, a standard height of 850mm to 920mm aligns comfortably with most users’ elbow heights.
If you plan to integrate casual seating, you must decide between counter-height seating (matching the prep surface at around 900mm) or bar-height seating (raised to approximately 1050mm). Raised bar seating helps screen prep clutter from the living area but requires taller bar stools. Ensure there is sufficient knee clearance—typically 300mm to 450mm of depth under the overhang—for comfortable seating.
Safe Integration of Built-In Appliances and Sinks
Integrating appliances like induction hobs, ovens, wine chillers, or sinks into your island requires careful technical planning. You must coordinate with your cabinet brand to ensure proper ventilation, electrical routing, and plumbing access.
For islands with built-in hobs, plan for adequate countertop space on both sides of the appliance for safety and food prep. If installing a sink, ensure the cabinet carcass is constructed from highly water-resistant materials and that the plumbing lines are neatly organized to maximize the remaining storage space. Electrical outlets should be positioned away from water sources, utilizing pop-up sockets or flush-mounted side outlets for convenience.
Storage Accessibility and Drawer Configurations
To maximize the utility of your island, prioritize deep drawers over standard cabinets with shelves. Drawers pull out fully, allowing you to access items stored at the back without bending down or kneeling.
Configure your drawers based on the items you plan to store. Shallow top drawers are ideal for cutlery, utensils, and spice organizers, while deep bottom drawers can house heavy pots, pans, and small appliances. Consider incorporating internal dividers, peg systems, or non-slip mats to keep your kitchen tools organized and secure during movement.
Essential Questions to Ask Before Signing a Contract
Before committing to a custom kitchen island project, you must clarify the contractual terms, warranties, and project timelines. Asking the right questions upfront protects your investment and ensures a smooth fabrication and installation process.
What is the exact scope of the warranty?
A reputable cabinet brand should offer a clear, written warranty covering both materials and workmanship. Ask for a detailed breakdown of what is included and the duration of the coverage.
Typically, warranties cover structural defects in the cabinet carcasses, hinge failures, and laminate delamination for a period of 5 to 10 years. However, surface wear and tear, accidental impact damage, or water damage caused by plumbing leaks are often excluded. Ensure you understand the process for filing a claim and whether the brand charges for transport or labor during warranty repairs.
How are measurement errors and installation delays handled?
Because custom islands are fabricated off-site based on precise measurements, even a minor error can prevent the island from fitting your kitchen correctly. Ask the brand who takes responsibility for measurement discrepancies.
The contract should state that the provider is responsible for rectifying any fabrication errors at their own expense. Additionally, clarify their policy on installation delays. If the delivery of your island is delayed, understand how this impacts your overall renovation timeline and whether any compensation or alternative arrangements are provided.
What is the post-installation support and repair turnaround?
Once your island is installed, you may occasionally require minor adjustments, such as realigning drawer fronts or tightening hinges. Ask the brand about their typical turnaround time for after-sales service requests.
A reliable provider should have a dedicated customer service team and a reasonable response window—ideally within 3 to 5 working days for non-urgent issues. Knowing that the brand offers dependable post-installation support provides peace of mind that your kitchen will remain fully functional for years to come.
What are the payment milestones and cancellation terms?
Review the payment structure carefully before signing. A standard payment schedule for custom cabinetry typically involves a deposit (e.g., 30% to 40%), a progress payment upon fabrication or delivery (e.g., 50%), and a final retention payment (e.g., 10%) upon successful installation and defect rectification.
Avoid brands that demand 100% payment upfront, as this reduces your leverage if issues arise during installation. Additionally, read the cancellation policy to understand your financial liability if you need to halt or modify the project before fabrication begins.
Frequently Asked Questions (FAQ)
Can a custom kitchen island be added to an existing kitchen layout?
Yes, a custom kitchen island can be retrofitted into an existing kitchen, provided you have sufficient floor space and traffic clearance. The primary challenge lies in routing utilities like electricity and plumbing. If you want a sink or hob on the island, running pipes or electrical conduits may require cutting into your existing flooring or raising a portion of the floor, which can disrupt the continuity of your tiles or vinyl. If routing utilities is too invasive, a dry island dedicated solely to food preparation and storage is a highly feasible and straightforward alternative.
How should I budget for a fully customized kitchen island?
When budgeting for a custom kitchen island, expect to allocate your funds across cabinetry, countertop materials, hardware, and utility integration. The countertop material is typically the largest cost driver, with premium quartz or sintered stone slabs commanding higher prices than solid surfaces. Cabinetry costs will vary based on the complexity of the drawer configurations and the choice of laminate finishes. Additionally, remember to set aside a portion of your budget for professional installation, plumbing, and electrical works, which are often billed separately from the cabinet fabrication.

Community discussion
Share your experience or ask a question. Comments are reviewed before publication.