
To calculate the right shoe box storage capacity, you must audit your current footwear collection by size and style, apply a 20% to 30% growth buffer based on your shopping habits, and cross-reference this total with the physical limits of your home’s layout. Balancing these factors ensures you purchase enough storage units to house your collection without cluttering your living space or overspending on unnecessary boxes.
Failing to plan your storage capacity systematically often leads to mismatched box sizes, unstable stacks, and shoes that end up squished or damaged. By taking systematic measurements of both your footwear and your available floor space, you can build a clean, modular storage system that protects your investment and keeps your home organized.
Step 1: Audit Your Current Shoe Collection
Before browsing online marketplaces or visiting local furniture showrooms, you need an accurate inventory of your current footwear. Begin by gathering every pair of shoes you own from closets, entryways, and under-bed storage areas. Group them into distinct categories based on their physical profiles: low-top sneakers, flat sandals, high-heeled shoes, high-top sneakers, and boots. Different styles have vastly different spatial requirements, and treating them as uniform items will lead to critical sizing errors later.
Products mentioned in this guide
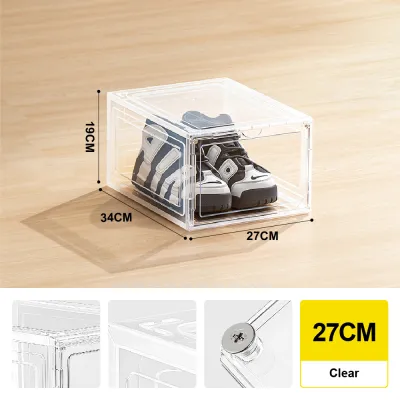
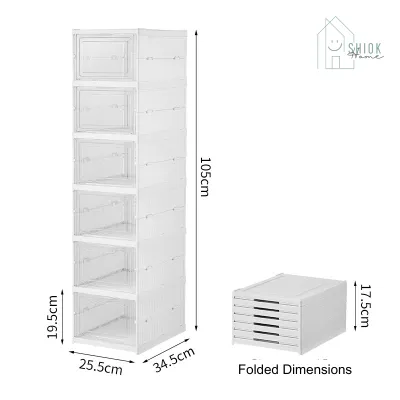
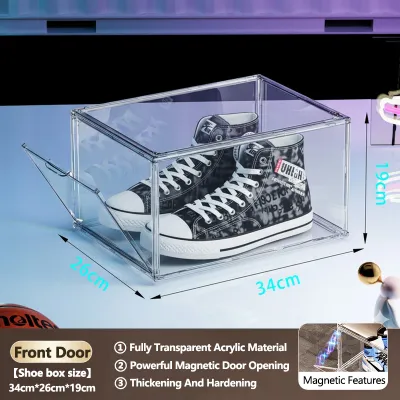
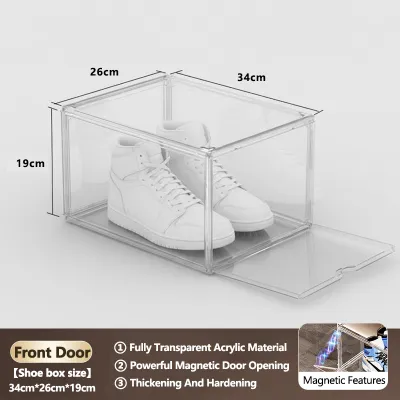
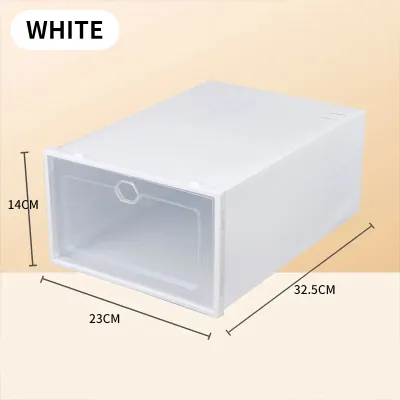
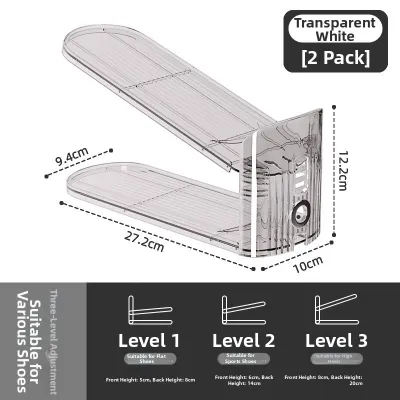
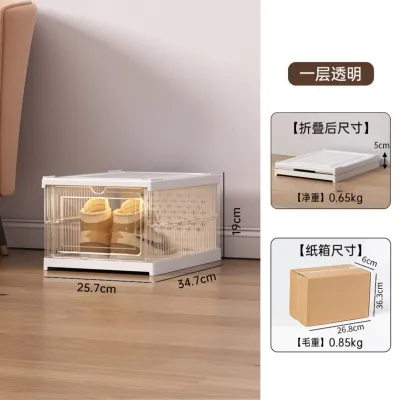
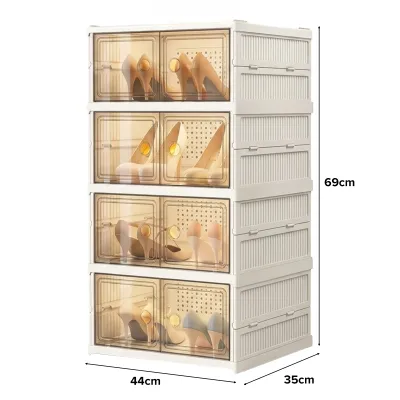
Prices are valid at publication and may change. Please refer to the product page for the latest price.
Standard shoe box storage units are typically designed around average shoe sizes, often accommodating low-profile footwear like flats, running shoes, and standard loafers. However, chunky lifestyle sneakers, basketball high-tops, and high heels require significantly more vertical and lateral clearance. For example, a pair of men’s high-top sneakers or platform heels can easily stand 15 to 20 centimetres tall, which will not fit inside a standard 13-centimetre-high utility box without laying the shoes awkwardly on their sides.
To establish your baseline requirements, locate the largest, tallest, and widest pairs of shoes in your collection. Use a physical measuring tape to record the maximum length, width, and height of these individual pairs. When measuring length, measure from the very back of the heel counter or sole protrusion to the tip of the toe. For width, measure the widest part of the outsole. These maximum dimensions represent the absolute minimum internal clearance your chosen shoe boxes must provide.
Step 2: Forecast Future Purchases and Growth
Your shoe collection is rarely static, so buying storage that only fits your current inventory guarantees you will run out of space within a few months. To prevent this, estimate your future acquisition habits by looking at your purchasing patterns over the last year. Ask yourself how many new pairs you typically buy annually, whether you collect limited-edition releases, and how often you discard or donate older footwear.

If you are an active collector or seasonal shopper, incorporate a 20% to 30% buffer capacity into your final storage calculation. For a stable collection of 30 pairs, a 20% buffer means planning for at least 36 storage slots, while a 30% buffer requires 39 slots. This extra capacity allows you to integrate new purchases seamlessly without forcing you to immediately buy more boxes, which might no longer be available in the same style or model.
Conversely, if you practice a strict “one-in, one-out” decluttering policy, you can minimize this buffer to around 5% or 10%. Maintaining a lean collection means your storage capacity remains highly predictable. Understanding your personal rotation habits prevents you from over-purchasing plastic or acrylic boxes that will sit empty, taking up valuable floor space in your home.
Step 3: Calculate Total Storage Capacity Required
Once you have your current inventory count and your growth buffer percentage, you can calculate your total capacity using a straightforward formula. Multiply your current shoe count by your chosen growth buffer, then add that number to your current count. For example, if you currently own 25 pairs of shoes and want a 20% buffer, your calculation is: 25 + (25 x 0.20) = 30 total shoe storage slots required.
Total Required Capacity = Current Shoe Count x (1 + Buffer Percentage)

Example:
Current Count: 40 pairs
Buffer: 25% (0.25)
Calculation: 40 x 1.25 = 50 storage slots
Next, convert this total number into concrete product units. If you plan to buy modular, stackable shoe boxes that are sold in packs of six, divide your total required capacity by the pack size. For a target of 30 slots, you would need exactly five 6-packs of boxes. If your calculation results in a fraction, always round up to the nearest whole pack to ensure you do not leave any shoes without a dedicated home.
Be careful to distinguish between “total theoretical capacity” and “usable capacity” when evaluating storage furniture. A large wooden shoe cabinet might claim to hold 40 pairs of shoes, but this estimate is often based on small, narrow flat shoes. If you fill the cabinet with wide-soled sneakers or bulky work boots, the actual usable capacity might drop by 30% or more. Internal partitions, door hinges, and corner angles can also restrict physical access, reducing the practical number of shoes you can comfortably store.
Step 4: Measure Your Available Space and Layout Constraints
With your total box count determined, you must verify where these units will physically live. Measure the footprint of your designated storage zone, such as an entryway alcove, a bedroom corridor, or a walk-in wardrobe. Record the maximum width, depth, and height available, taking careful note of baseboards, light switches, electrical outlets, and wall moldings that could prevent your storage units from sitting flush against the wall.
Always compare your spatial measurements against the external dimensions of the shoe boxes, rather than their internal capacity. Stackable plastic boxes often feature interlocking frames, thick plastic walls, and protruding door handles that add one to two centimetres to their outer width and depth. Over a stack of ten boxes, these minor differences accumulate, potentially causing the column to overshoot your ceiling height or block adjacent walkways.
Checking Clearance and Walkways
When planning shoe storage in Singapore, you must account for local housing layouts and safety regulations. For those living in HDB flats or private condominiums, common corridors and entryways are subject to strict fire safety guidelines. The Singapore Civil Defence Force (SCDF) mandates a minimum clear escape passage of 1.2 metres along common corridors. Ensure your shoe storage setup does not encroach on this space or create a tripping hazard for neighbors and emergency personnel.
Inside your home, measure the swing radius of your main entrance door, safety gate, and adjacent room doors. A tall stack of shoe boxes placed too close to the foyer can prevent your front door from opening fully, making it difficult to carry groceries or move furniture. Leave at least 60 to 90 centimetres of clear walkway space in front of your storage setup so you can stand, bend down, and open the shoe box doors comfortably without hitting surrounding walls.
Accounting for Humidity and Ventilation
Singapore’s tropical climate, characterized by high relative humidity that regularly exceeds 80%, presents a major challenge for footwear preservation. Storing shoes in completely airtight, unventilated plastic enclosures traps ambient moisture inside, creating an ideal breeding ground for mold, mildew, and unpleasant odors. Over time, trapped moisture can also accelerate hydrolysis, a chemical reaction that causes polyurethane soles on sneakers and formal shoes to crumble and disintegrate.
To protect your collection, prioritize shoe box designs that incorporate ventilation features, such as rear air vents, mesh panels, or slotted doors. If you prefer clear, hard acrylic display cases that tend to be more sealed, avoid placing freshly worn, damp shoes directly inside them. Allow your shoes to air out on an open rack for a few hours first, and consider placing small, rechargeable silica gel packs or moisture-absorbing sachets inside each box to control local humidity levels.
Step 5: Match Capacity to the Right Storage Solutions
Your calculated capacity and spatial constraints will ultimately dictate which storage format is most practical for your home. Each system offers distinct trade-offs regarding capacity density, accessibility, and visual impact:
- Stackable Clear Boxes: Excellent for maximizing vertical space and keeping your entire collection visible. They allow you to build custom modular configurations around awkward wall shapes. However, they require stable, flat flooring and can look cluttered if not kept clean.
- Adjustable Shelving Units: Highly flexible systems that let you change the vertical clearance of individual shelves to accommodate different shoe heights, from flat sandals to tall boots. They offer great ventilation but do not protect shoes from settling dust.
- Under-Bed Storage: Ideal for seasonal footwear, formal shoes, or pairs you rarely wear. This format utilizes otherwise wasted horizontal space, though it is less convenient for daily-wear items and requires regular cleaning to prevent dust accumulation.
To optimize your setup, consider mixing and matching these solutions. You can use an open, highly ventilated shoe rack in your entryway for your daily-wear flats and sandals, while housing your premium sneakers or formal heels in stackable, drop-front acrylic boxes inside your bedroom or closet. This hybrid approach keeps your high-traffic areas clear while ensuring your valuable shoes remain protected from dust and physical damage.
When building tall columns of stackable boxes, always prioritize structural safety and stability. Check the manufacturer’s maximum weight limits and stacking recommendations, as cheaper, flexible plastic boxes can buckle or warp under the weight of heavy leather boots. Always place your heaviest footwear at the bottom of the stack to lower the center of gravity, and ensure the interlocking tabs or pegs of each box are fully engaged to prevent the entire column from tipping over.
Common Sizing and Capacity Mistakes to Avoid
To ensure your storage system functions flawlessly, avoid these four common pitfalls during the planning and purchasing phases:
- Confusing internal and external dimensions: Many online product listings highlight the spacious internal volume of a shoe box while downplaying the bulkier external frame. Always use the external measurements to calculate whether a stack will fit inside your closet or alcove.
- Forgetting operational clearance: A drop-front shoe box requires several centimetres of clear space in front of it for the door to swing downward or outward. If your walkway is too narrow, you will struggle to access your shoes without squeezing uncomfortably against the wall.
- Mixing non-uniform box brands: Avoid buying different brands of stackable boxes over time, even if they claim to have similar dimensions. Minor differences in interlocking tabs, plastic thickness, and frame designs will prevent them from nesting securely, resulting in an unstable, unsafe stack.
- Ignoring the depth of the storage unit: Standard shoe boxes often measure 33 to 35 centimetres in depth. If you wear a men's US size 12 or larger, or if you collect chunky, oversized sneakers, your shoes may measure over 36 centimetres in length. Storing them in standard boxes will force you to place them sideways, which cuts your usable storage capacity in half.
Frequently Asked Questions (FAQ)
How much extra space should I leave between stacked shoe boxes?
While high-quality stackable shoe boxes are designed to lock together securely without any gaps, you should leave a small margin of clearance around the perimeter of the entire stack. Aim for at least 2 to 3 centimetres of clearance on the sides and top of your column. This gap prevents the boxes from rubbing against walls or wardrobe frames, allows for natural air circulation, and gives your fingers enough room to grip and adjust individual boxes if you need to slide them out for cleaning.
Can I use standard shoe boxes for ankle boots?
Standard low-profile shoe boxes, which typically feature a height of 13 to 14 centimetres, are generally too short to accommodate ankle boots. Forcing boots into these standard containers will crush the ankle shaft, leading to permanent creasing, cracked leather, or ruined zippers. Instead, measure the exact height of your boots from the heel to the top of the shaft. Look for specialized boot storage boxes or extra-tall drop-front cases that offer at least 18 to 22 centimetres of internal height to preserve the shoes’ natural shape.

Community discussion
Share your experience or ask a question. Comments are reviewed before publication.