
Building a custom display cabinet using modular shelving components allows you to design a personalized showcase that fits your exact space and aesthetic preferences. By combining standardized uprights, adjustable shelves, and specialized connectors, you can assemble a highly stable and visually appealing unit without advanced carpentry skills. The process involves measuring your space, selecting compatible modular parts, assembling the frame from the ground up, and securing the structure for safety. This approach offers the flexibility to adapt your display as your collection or storage needs evolve over time.
Whether you want to showcase delicate collectibles, books, or retail merchandise, modular systems provide a scalable foundation. Unlike fixed, pre-assembled furniture, modular components let you determine the height, depth, and spacing of each shelf to match the specific dimensions of your items. By taking a systematic approach to planning, assembly, and safety, you can create a professional-looking display cabinet that balances structural integrity with clean, modern design.
Planning Your Space and Modular Layout
Before purchasing any modular components, you must determine the physical footprint, weight requirements, and overall layout of your planned display cabinet. Begin by measuring the available floor space, ceiling height, and surrounding clearance. Ensure that the cabinet will not obstruct walkways, electrical outlets, light switches, or the swing path of nearby doors. In compact living environments or tight retail spaces, even a few centimeters of misalignment can make a room feel cramped or block natural light.
Products mentioned in this guide
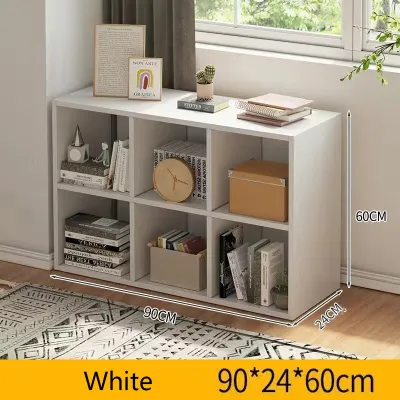
![[SG STOCK] Ultra Clear Figurine Display Box Figurine Display Case Pop Mart Lego Toy Display Cabinet Removable Shelf](https://img.lazcdn.com/g/p/cba1e6e243bc566ce6fbaca713abfb4b.jpg_400x400q80.jpg_.webp)
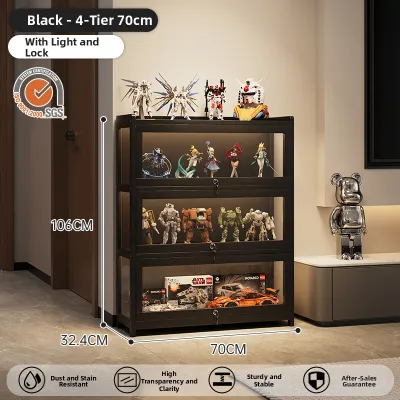
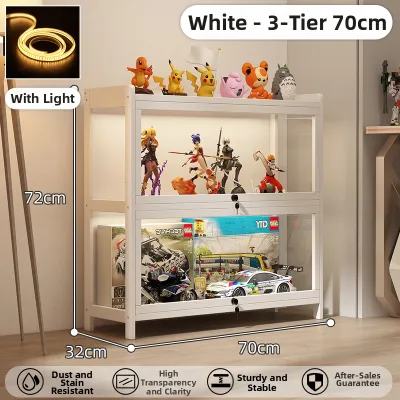
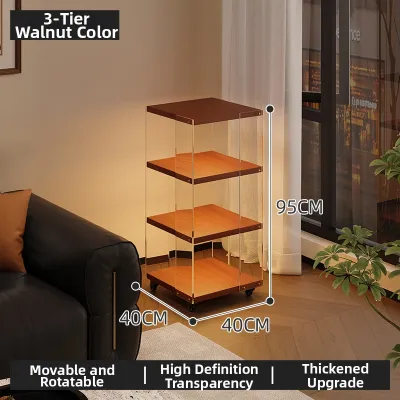
![[Local Seller] Toy Transparent Box Display Rack / LEGO Showcase / POP Mart Showcase](https://img.lazcdn.com/g/p/59c1f7e078b5aba93a12e1cb6ba65b84.jpg_400x400q80.jpg_.webp)
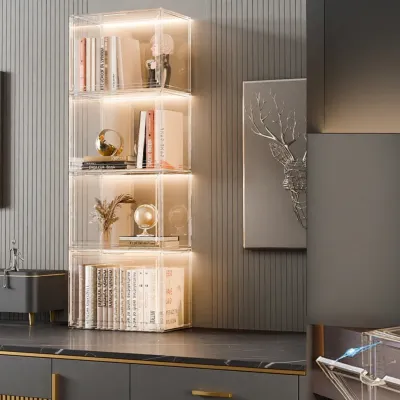
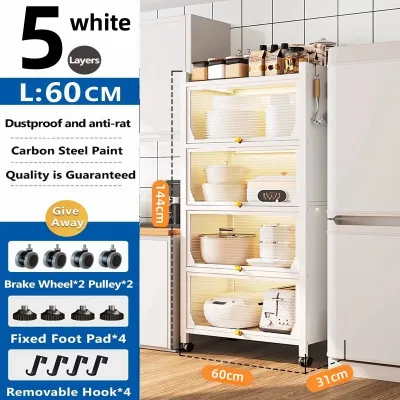
Prices are valid at publication and may change. Please refer to the product page for the latest price.
Next, check the manufacturer’s specifications for the maximum load capacity of both the individual shelves and the overall frame. Different materials, such as powder-coated steel, engineered wood, or tempered glass, have distinct weight thresholds that must not be exceeded. If you plan to display heavy items like ceramic sculptures, thick books, or dense electronics, you will need a heavy-duty modular system with reinforced uprights.
Sketching a detailed layout on paper or using a digital planning tool is an essential step before assembly. This visual plan helps you balance aesthetic symmetry with structural weight distribution. Aim to place larger, heavier items toward the bottom of the sketch to establish a low center of gravity. Additionally, plan the vertical spacing to leave adequate breathing room around each displayed object, ensuring the cabinet looks curated rather than cluttered.
Essential Tools and Materials for the Build
Having the correct tools and materials on hand before you begin prevents unnecessary delays and ensures a secure assembly. Most modular shelving systems are designed for straightforward installation, requiring only basic hand tools rather than specialized power equipment. You should gather a high-quality screwdriver set, a rubber mallet for tapping joints into place without marring the finish, a spirit level to verify alignment, and a reliable measuring tape.

The core of your build will consist of the specific modular components you have selected. Ensure you have the correct count of vertical uprights, horizontal shelves, corner connectors, and base plates or leveling feet. It is wise to inspect all parts upon unboxing to confirm there are no manufacturing defects, missing hardware, or warped elements that could compromise the stability of the final structure.
Depending on your display goals and the installation environment, you may want to include optional customizations. Anti-tip kits are highly recommended for any tall or narrow cabinet to secure it to the wall. If you want to protect your items from dust, look for compatible cabinet doors, glass side panels, or drawer inserts designed for your modular system. Low-voltage LED strip lights can also be integrated to illuminate individual shelves, so plan for cable management clips and access to a nearby power outlet.
Step-by-Step Assembly Process
Constructing your modular display cabinet requires a methodical, step-by-step approach to ensure the frame remains square and stable. By working systematically from the foundation upward, you can maintain proper alignment and prevent structural stress on the joints.
Assembling the Base and Vertical Frames
The foundation of your display cabinet dictates the stability of the entire structure. Begin by connecting the base plates, leveling feet, or bottom rails to the primary vertical uprights according to the manufacturer’s instructions. If your modular system uses threaded leveling feet, screw them in fully before placing the base frame in its designated location. This initial step ensures that you have maximum adjustment range later if the floor proves to be uneven.
Use a spirit level to check that the base assembly is perfectly flat in both directions before you tighten any primary joints. An uneven base will cause the vertical uprights to lean, placing uneven stress on the connectors and making it difficult to install shelves properly. If the floor has a slight slope, adjust the leveling feet until the bubble on your spirit level is perfectly centered.
Once the base is level, raise the vertical supports and secure them to the base frame. Verify that all uprights are plumb—meaning they are perfectly vertical—using your spirit level against the side of each post. Tighten the structural connectors just enough to hold the frame upright, but avoid final, high-torque tightening until the entire skeleton is assembled. This allows for minor adjustments as you add horizontal components.
Installing Shelves and Cross-Bracing
With the vertical frame standing and aligned, you can begin installing the horizontal shelves. Start from the lowest shelf level and work your way upward to keep the structure stable during assembly. Slot, clip, or screw the shelves into the uprights at your pre-planned heights, ensuring that each shelf is fully seated and level. If your system uses support clips, double-check that all four clips for a single shelf are set at the exact same height increment on the uprights.
To prevent lateral swaying and improve overall structural rigidity, install any cross-braces, tension rods, or back panels included in your modular kit. These components are critical for resisting shear forces, especially when the cabinet is fully loaded. For open-backed metal shelving, diagonal cross-bracing is typically installed on the rear frame, while wooden modular systems often rely on a thin, slide-in back panel to lock the frame into a rigid square.
After all shelves and bracing elements are in place, perform a thorough check of every connection point. Ensure that all shelf connectors, locking cams, or screws are fully engaged and tightened according to the manufacturer’s specifications. Walk around the unit to inspect the joints from different angles, verifying that there are no gaps or misaligned brackets that could fail under load.
Adding Customizations and Finishing Touches
Once the primary structure is secure, you can integrate functional and aesthetic upgrades to complete your display cabinet. If your modular system supports them, install cabinet doors, glass panels, or drawer inserts. When mounting glass doors, handle the panels with care and adjust the hinges gradually to ensure the doors align perfectly and close smoothly without rubbing against the frame or adjacent shelves.
For integrated lighting, route low-voltage LED strip cables along the back edges or pre-drilled channels of the shelves. Clean cable management is essential for a professional look; use adhesive cable clips or zip ties to secure the wires along the rear uprights, keeping them hidden from direct view. Ensure that the power adapter and controller are positioned in an accessible, well-ventilated area near the base or back of the cabinet.
Finally, use the adjustable feet to fine-tune the leveling of the completed cabinet. Adding weight to the structure can cause minor settling, so re-checking the level at this stage is highly recommended. Turn the adjustable feet slowly until the cabinet is completely stable and does not rock when light pressure is applied to the sides.
Safety Checks and Stability Verification
Before placing any valuable items on your new display cabinet, you must conduct a thorough safety and stability assessment. Begin with a physical shake test by gently pushing the frame from different angles to check for lateral movement, loose connections, or clicking sounds. Any noticeable wobble or sway indicates that a joint is loose, a shelf is not fully seated, or the base is not perfectly level. Address these issues immediately before proceeding.
Wall anchoring is a critical safety step that should never be bypassed, particularly for tall, narrow cabinets or units placed in high-traffic areas. Review the manufacturer’s guidelines for anchoring and install the provided anti-tip kits. If you have children or pets in your home, wall anchoring is essential to prevent accidental tip-overs caused by climbing or pulling. Secure the anchor brackets to a wall stud or use appropriate heavy-duty wall anchors designed for your specific wall material.
Always confirm that the total weight of your displayed items remains well within the verified load limits specified in the product manual. Distribute the weight evenly across each shelf rather than concentrating heavy objects in a single spot. If your wall anchoring process involves unfamiliar masonry, hidden electrical wiring, or structural uncertainties behind the drywall, stop the installation immediately and consult a qualified professional to ensure the unit is anchored safely.
Organizing and Styling Your Display Cabinet
The way you arrange your items plays a significant role in both the visual appeal and the physical safety of your display cabinet. Always place your heaviest items, such as large books, heavy vases, or thick storage boxes, on the bottom shelves. This lowers the overall center of gravity of the cabinet, significantly reducing the risk of tipping and enhancing the structural stability of the entire unit.
To create an engaging visual display, use acrylic risers, varied spacing, and strategic lighting to highlight key pieces. Avoid overcrowding the shelves; leaving empty space around your items allows each piece to stand out and prevents the cabinet from looking cluttered. Group items in odd numbers, such as sets of three, and vary the heights of objects on the same shelf to create a dynamic, balanced composition that draws the eye naturally.
Maintaining your display cabinet is key to preserving both its appearance and structural integrity over time. Establish a regular routine for dusting the shelves and cleaning any glass panels with a soft microfiber cloth. Periodically check the tightness of the joints, connectors, and wall anchors, especially after moving items or during seasonal changes in humidity, to ensure the cabinet remains safe and secure for years to come.

Community discussion
Share your experience or ask a question. Comments are reviewed before publication.