
Building a custom display cabinet using modular shelving components is a highly practical way to showcase your collectibles, books, or decorative items while tailoring the furniture to your exact room dimensions. By selecting modular components, you bypass the limitations of standard pre-built furniture and avoid the high costs of fully custom carpentry. Achieving a stable, level, and secure finish requires a systematic approach that begins with precise spatial planning, moves through careful step-by-step assembly, and finishes with reliable wall anchoring.
This guide details how to plan, assemble, and secure your modular storage system to create a functional and safe showcase for your home.
Planning Your Modular Display Cabinet Layout and Dimensions
Before purchasing any modular components, you must accurately assess both your physical space and the items you intend to showcase. Begin by measuring the width, depth, and height of the designated wall area. Always account for architectural obstacles such as baseboards, electrical outlets, light switches, and door swing clearances. A baseboard that projects even a centimeter can prevent a tall cabinet from sitting flush against the wall, which impacts both aesthetics and your ability to anchor the unit securely.
Products mentioned in this guide
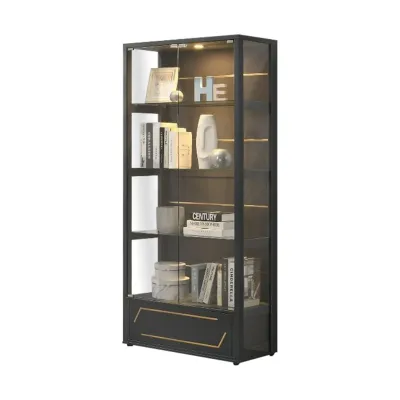
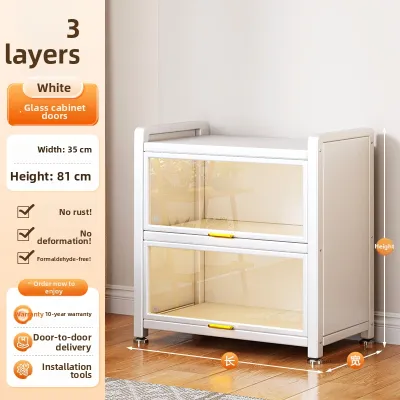
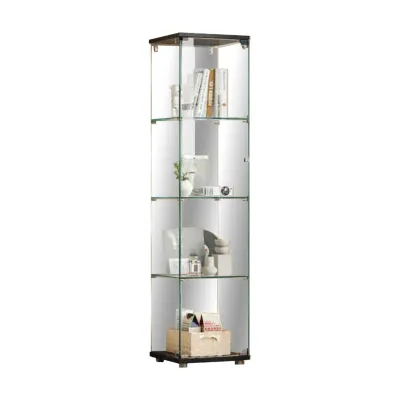


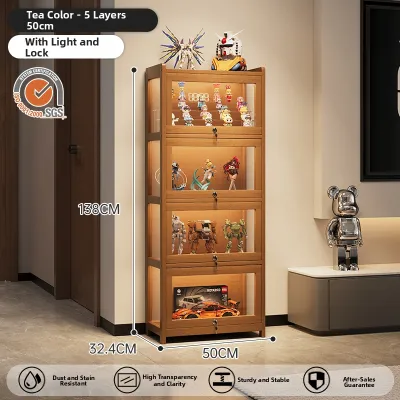

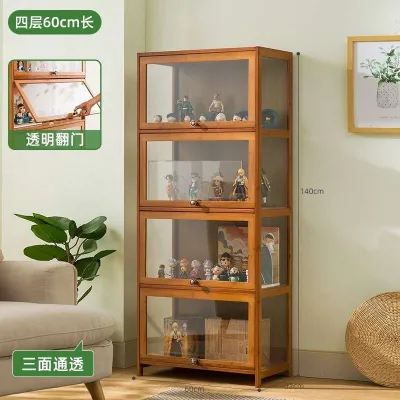
Prices are valid at publication and may change. Please refer to the product page for the latest price.
In Singapore, where many residents live in high-rise apartments or HDB flats, logistical planning is just as critical as spatial planning. Before ordering your modular parts, verify the packaged dimensions of the components against the size of your building’s lift, stairwells, and entryways. Flat-pack boxes containing long vertical uprights or wide glass panels can be incredibly difficult to maneuver through tight corridors or standard door frames. Ensuring these packages can physically reach your living room saves significant delivery and return headaches.
Next, determine the internal dimensions required for your display items. Measure your tallest, widest, and heaviest display pieces, such as large art books, sculptures, or acrylic display cases. This step helps you decide on the spacing of your horizontal shelves and the overall depth of the cabinet. If you plan to display a varied collection, look for modular systems that feature adjustable shelf heights, allowing you to reconfigure the interior layout as your collection evolves.
Finally, consult the manufacturer’s technical specifications for your chosen modular system. Pay close attention to the maximum recommended height for a single unit and the structural limits of different configurations. Modular systems are engineered to perform within specific geometric boundaries; exceeding the recommended height or building an unsupported wide span can compromise the structural integrity of the entire system.
Essential Tools and Materials for the Assembly
Having the correct tools and components organized beforehand prevents assembly errors and protects your materials from accidental damage. Lay out a clean, soft workspace using a large blanket, clean cardboard, or a foam mat to protect your flooring and the finish of the modular components during the building process.

Your material checklist should include the following core modular components:
- Vertical uprights or side panels: These form the main structural frame.
- Shelving boards: The horizontal platforms that support your items.
- Connector joints or brackets: Hardware that locks the shelves to the uprights.
- Base feet: Adjustable leveling feet or solid base blocks.
- Optional back panels or doors: Glass, acrylic, or solid wood panels to enclose the cabinet.
Gather these essential hand tools before you begin:
- Rubber mallet: Essential for tapping modular joints together tightly without marring or cracking the surface finish.
- Phillips-head screwdriver: For securing brackets, hinges, and structural screws.
- Measuring tape: To verify alignment and shelf spacing.
- Spirit level: To ensure the entire structure remains perfectly level and plumb.
- Wall-anchoring hardware: Heavy-duty wall plugs and screws selected specifically for your wall type.
Before assembling a single joint, unbox all parts and cross-reference them with the manufacturer’s inventory checklist. Confirming that you have every screw, bracket, and panel prevents frustrating delays mid-build.
Step-by-Step Assembly Guide for Modular Shelving
Assembling modular furniture requires patience and a methodical approach. Always work on a flat, stable surface and avoid the temptation to fully tighten structural screws or locking cams immediately. Keeping connections slightly loose during the initial assembly stages allows the frame to settle naturally, making it much easier to square the cabinet before final tightening.
Phase 1: Preparing the Base and Ensuring Level Alignment
The stability of your entire display cabinet depends on the quality of its foundation. Begin by assembling the bottom frame or attaching the base feet directly to the lowest shelf panel according to the manufacturer’s instructions. If your modular kit includes adjustable leveling feet, thread them halfway into the base to allow room for both upward and downward adjustments.
Once the base is assembled, place it in its final position against the wall and use your spirit level to check it. Check for levelness in two directions: from side to side, and from front to back. In many homes, floors are slightly uneven due to settling, tiling grout lines, or screed variations. If the base is not level, adjust the leveling feet or insert thin, high-density plastic shims beneath the base until the spirit level bubble is perfectly centered.
Skipping this leveling step will lead to compounding alignment issues as you build upward. A base that is off-level by just a few millimeters can cause the vertical uprights to lean, making it difficult to install shelves, align doors, or prevent the cabinet from wobbling.
Phase 2: Erecting Vertical Supports and Installing Shelves
With a perfectly level base established, you can begin building the vertical structure. Insert the first set of vertical uprights into the base connectors. Depending on the modular design, these may lock in place with cam screws, friction-fit tension joints, or metal brackets. Ensure that all connector joints are oriented in the correct direction as indicated by the assembly manual.
Slide or lock the horizontal shelf panels into place layer by layer, working from the bottom upward. Use your rubber mallet to gently tap the joints into a snug, fully seated position. Avoid using a standard metal claw hammer, as the metal face can easily dent powder-coated steel, chip wood laminates, or shatter glass components. If a joint feels resistant, double-check that the shelf is aligned straight and that no packing material is trapped inside the connector.
As you add each tier of shelving, periodically check the structure for squareness. You can do this by using a measuring tape to measure the diagonal distances from the top-left corner to the bottom-right corner, and from the top-right corner to the bottom-left corner of each rectangular section. If the two diagonal measurements are identical, your frame is perfectly square. If they differ, gently nudge the frame until they match before proceeding to the next level.
Phase 3: Attaching Back Panels and Securing Structural Integrity
Once the main frame is erected, it is time to install the back panels or structural cross-bracing. Many modular systems rely on thin back panels slid into grooves or screwed onto the rear of the frame to prevent “racking”—the lateral swaying motion that can cause a tall cabinet to collapse sideways. If your system uses a slide-in back panel, ensure it is fully seated in its tracks before securing the top cap.
If your display cabinet design includes glass or acrylic doors, handle these components with extreme care. Lay them on your soft work mat to install hinges, handles, and magnetic catches. When hanging the doors, adjust the hinge screws incrementally to ensure the doors hang straight, close flush, and clear the cabinet frame without rubbing or binding.
With all structural components, back panels, and doors in place, perform a final pass over the entire cabinet. Systematically tighten every screw, cam lock, and bracket. Do not over-tighten screws into particleboard or MDF components, as this can strip the pre-drilled holes and weaken the joint.
Anchoring and Safety Checks for a Stable Display Cabinet
Any tall, narrow furniture piece like a display cabinet poses a significant tipping hazard, especially when loaded with heavy items or placed in homes with active children or pets. As a rule of thumb, any unit exceeding 120 centimeters in height must be anchored securely to the wall. Do not rely on the weight of the items inside to keep the cabinet grounded; opening a heavy glass drawer or a child climbing a shelf can easily shift the center of gravity forward.
To anchor your cabinet safely, use the anti-tip brackets or L-straps provided by the manufacturer. If none are included, purchase heavy-duty metal L-brackets from a local hardware store. The choice of wall anchor must match your specific wall material:
- Concrete or brick walls: These are highly common in Singapore HDB flats and condos. You must use a hammer drill, a masonry drill bit, and plastic wall plugs (or expansion anchors) to secure the screws.
- Drywall or partition walls: Use hollow-wall anchors, toggle bolts, or screw directly into the wooden or metal studs behind the drywall plaster.
Before loading your shelves, check the manufacturer’s specified weight capacity limits for both individual shelves and the overall unit. Never exceed these ratings. When placing your items, always follow a bottom-heavy distribution strategy: place your heaviest books, large sculptures, or storage boxes on the lowest shelves. This lowers the overall center of gravity of the display cabinet, making it inherently more stable. Distribute the weight evenly across each shelf rather than clustering heavy objects in the center, which can cause the shelf board to sag over time.
Conduct a final physical stability check. Gently shake the cabinet from the top; if you detect any lateral wobble, if the wall anchors pull loose, or if the joints show signs of stress, immediately remove all items. Empty the cabinet, inspect the wall connections, and consult the manufacturer’s troubleshooting guidelines to resolve the instability before putting the cabinet back into use.
Organizing and Styling Your Finished Display Cabinet
With your modular display cabinet fully assembled, leveled, and anchored, you can transition from building to curating your display. Start by testing the doors and drawers one last time to ensure they open and close smoothly without catching on the shelves. If they rub, slightly adjust the hinge alignment screws.
Take advantage of the modular nature of your shelving to create visual interest. Instead of setting all shelves at identical heights, vary the compartment heights to match the scale of your items. For instance, dedicate a tall, open section to a statement vase or tall collectible, and use narrower compartments for smaller figurines or books. This varied layout prevents the cabinet from looking monotonous and draws the eye to different focal points.
To illuminate your collection safely, use low-heat lighting solutions. Avoid high-voltage halogen bulbs, which generate significant heat that can warp plastics, dry out wood finishes, or damage delicate collectibles. Instead, choose battery-operated LED puck lights or low-voltage LED strip lights. These can be easily mounted to the undersides of shelves using adhesive backing, providing clean, bright illumination without creating wiring hazards or heat buildup.
Finally, protect your valuable display items from accidental slips or vibrations. If your display cabinet is located near a high-traffic hallway or a sliding door, minor floor vibrations can cause delicate items to drift on smooth wood or glass surfaces. Apply a small bead of removable museum putty or place clear, non-slip silicone liners beneath fragile items to keep them securely in place.
Frequently Asked Questions (FAQ)
Can I easily reconfigure the shelves after initial assembly?
Yes, modular shelving systems are specifically designed for layout flexibility. However, you must never attempt to adjust or dismantle shelves while the cabinet is loaded. Always empty the display cabinet completely before changing shelf heights or adding new modules. This prevents sudden weight shifts that could damage the connector joints or cause the unit to tip. After reconfiguring, always verify that the new layout still complies with the manufacturer’s structural guidelines and that the unit remains securely anchored to the wall.
What is the safest way to clean modular shelving components?
To maintain the finish of your cabinet, always check the manufacturer’s specific care instructions, as cleaning methods vary by material. For general maintenance on laminate, powder-coated metal, or sealed wood, wipe surfaces with a soft, slightly damp microfiber cloth. Avoid using abrasive scrubbing pads, steel wool, or harsh chemical cleaners containing bleach or ammonia, which can strip protective coatings and dull the finish. Always dry the surfaces immediately with a clean towel to prevent moisture from seeping into joints or causing wood composites to swell.

Community discussion
Share your experience or ask a question. Comments are reviewed before publication.