
Building a custom modular wood rack is an excellent way to maximize vertical space while retaining the flexibility to reconfigure your storage as your needs evolve. Unlike fixed shelving, a modular system allows you to adjust shelf heights, swap components, and expand the footprint over time. By selecting the right materials, planning your dimensions carefully, and following a systematic assembly process, you can construct a durable, professional-grade storage solution tailored to your home.
Planning Your Modular Wood Rack Design
Before purchasing any materials, you must determine the exact physical limits of your designated storage area. In compact living environments, such as apartments or HDB flats, every centimeter counts. Measure the width, depth, and height of the space, making sure to account for baseboards, which can prevent a tall rack from sitting flush against the wall. Check the locations of electrical outlets, light switches, and wall-mounted fixtures to ensure they remain accessible after the rack is installed.
Next, define the modular grid that will govern your design. Decide whether your system will rely on adjustable shelf pins, stackable wooden cubes, or a track-and-bracket system. A standard grid pattern, such as spacing holes every 32 mm or 50 mm, ensures that shelves can be easily moved or swapped. Sketch your design on paper or use digital planning software to map out the exact dimensions of each component, ensuring all vertical and horizontal elements align perfectly.
Products mentioned in this guide

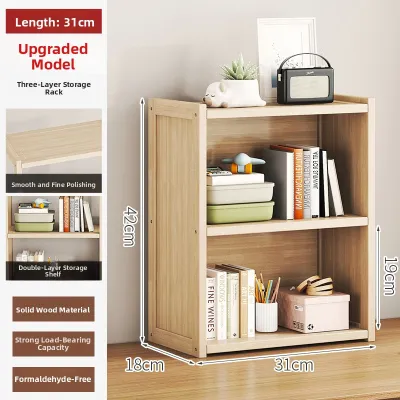
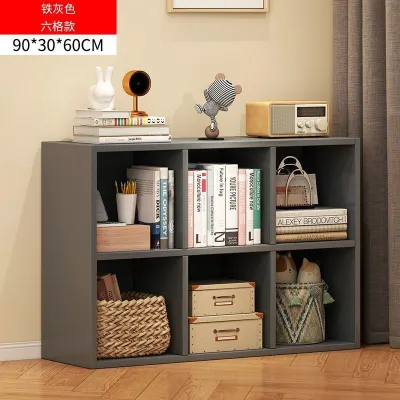
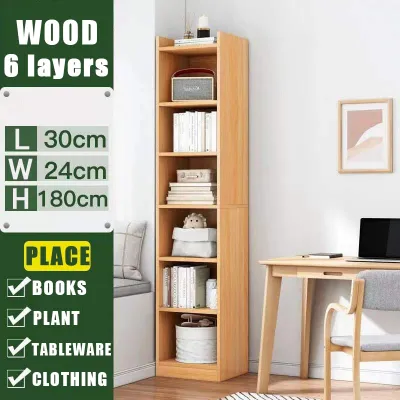
Prices are valid at publication and may change. Please refer to the product page for the latest price.
Finally, consider the logistics of moving the assembled unit. If you plan to build the rack in a workshop, balcony, or corridor and transport it to its final location, verify the clearance of doorways, narrow hallways, and lift doors. A rack that is too tall to fit into a standard passenger lift or turn a tight corner in a stairwell will cause significant frustration. If access routes are highly restricted, design the unit in smaller, manageable sub-assemblies that can be joined together in the final room.
Selecting Wood and Hardware
Choosing the right lumber is critical for both the appearance and longevity of your modular wood rack. For indoor furniture, common softwoods like pine are lightweight, easy to cut, and budget-friendly, though they are prone to denting. Hardwoods like oak, ash, or teak offer superior durability and a refined grain pattern, but they require more effort to cut and carry a higher price tag. Engineered wood products, such as high-quality plywood or medium-density fibreboard (MDF), provide excellent dimensional stability and resist warping, making them ideal for flat shelf boards.

The structural integrity of your modular wood rack depends heavily on the fasteners you choose. Pocket hole screws, wood screws, and corner brackets are standard joining methods. When purchasing hardware, check the manufacturer’s packaging for verified load ratings, shear strength, and recommended applications. Avoid generic fasteners that do not specify their weight-bearing limits, especially if you plan to store heavy books, kitchen appliances, or tools.
Environmental protection is another key consideration, particularly in high-humidity environments where raw wood can swell, warp, or develop mold. To protect your project, select appropriate surface treatments. Apply a wood primer followed by high-quality polyurethane, varnish, or wood wax. Ensure the sealant is rated for high-humidity environments, and verify the manufacturer’s instructions regarding the number of coats required for optimal moisture resistance.
Essential Tools for the Project
Accurate cuts are the foundation of a square, stable rack. You will need a reliable steel tape measure, a combination square to mark precise 90-degree lines, and a sharp pencil. For cutting the lumber, a circular saw or a miter saw is highly recommended for straight, clean edges. If you do not own power saws, a fine-tooth hand saw can be used, though it requires more time and physical effort.
For joining and assembly, a power drill and driver set is essential for pre-drilling pilot holes and driving screws efficiently. Clamps—such as bar clamps or corner clamps—are indispensable for holding wooden components securely in place while you fasten them, preventing the wood from shifting. A rubber mallet is also useful for gently tapping joints into alignment without marring the wood surface.
Safety should always be your top priority when working with wood and power tools. Wear safety glasses to protect your eyes from flying wood chips and sawdust. Use hearing protection when operating loud power tools like miter saws or sanders. Additionally, wear a well-fitting dust mask to avoid inhaling fine wood dust, particularly when sanding or cutting engineered woods like MDF.
Step-by-Step Assembly Instructions
Building a modular wood rack requires a systematic approach to ensure all components align perfectly. Rushing the process or skipping steps can lead to a crooked frame, wobbly shelves, or pieces that do not fit together. The assembly is divided into three main phases: preparing the individual wood components, constructing the primary vertical frame, and installing the modular shelving hardware. Following this sequence carefully guarantees a sturdy and functional end product.
Cutting and Preparing the Components
Begin by transferring your planned dimensions onto the lumber. Use a combination square to draw straight, perpendicular cut lines across the wood faces. Double-check your measurements before making any cuts—remember the classic woodworker’s rule: measure twice, cut once.
Execute your cuts slowly and steadily, keeping the saw blade on the waste side of your marked line to maintain exact dimensions. Once all pieces are cut, use a sanding block or an orbital sander with medium-grit sandpaper to smooth out rough edges and remove splinters. Progress to a finer grit for a smooth surface finish.
Before applying any glue or fasteners, lay out all the cut pieces on a flat floor and perform a dry-fit. This step allows you to verify that parallel supports are identical in length and that the modular components align precisely. If you notice any discrepancies, trim or sand the pieces now before proceeding to permanent assembly.
Building the Frame and Vertical Supports
The vertical frame serves as the backbone of your modular wood rack. Start by assembling the base and top frames. Use pocket hole joinery or heavy-duty corner brackets to connect the horizontal rails to the base plates. Ensure these joints are perfectly square by measuring diagonally from corner to corner; if the two diagonal measurements are equal, your frame is square.
Next, attach the vertical uprights to the base assembly. Use clamps to hold the uprights securely while you drive the structural screws. Use a spirit level to verify that the uprights are perfectly vertical in both directions. Any slight tilt in the uprights will compound as the rack grows taller, making it difficult to insert modular shelves later.
Reinforce critical load-bearing joints according to your hardware manufacturer’s instructions. If your design includes a back panel or diagonal bracing, install it now. A solid plywood back panel or a simple wooden X-brace dramatically increases the lateral stability of the rack, preventing it from swaying or racking under load.
Installing the Modular Shelves
With the main frame secured, you can now install the modular shelf support system. If you are using adjustable shelf pins, use a commercial peg jig to drill consistent, evenly spaced holes along the inside faces of the vertical uprights. Ensure the holes on the left and right sides align perfectly to prevent tilted shelves.
If you prefer a heavy-duty track system, mount the metal standards or wooden support cleats to the uprights using the recommended screws. Once the supports are in place, position your shelf boards onto the brackets or pins. Place a spirit level on each shelf to confirm it sits perfectly flat before applying any weight.
Test the modularity of your design by moving the shelves to different heights, swapping their positions, or removing them entirely. The shelves should slide in and out smoothly without binding against the vertical uprights. If a shelf is too tight, sand down the sides slightly until it fits comfortably.
Finishing, Safety, and Maintenance
Applying a protective finish enhances the appearance of the wood and shields it from environmental damage. Work in a well-ventilated area, such as an open garage, balcony, or a room with active fan ventilation. Apply your chosen stain, paint, or clear sealant using a high-quality brush or lint-free cloth. Follow the manufacturer’s instructions strictly regarding drying times between coats, recommended application temperatures, and the maximum number of coats. Allow the finish to cure completely before placing items on the shelves.
Safety is paramount, especially for tall or narrow shelving units. Evaluate the need for anti-tip wall anchors. If your modular rack exceeds a height-to-depth ratio of 3:1, or if you plan to store heavy items on the upper shelves, anchoring the unit to the wall is highly recommended. Choose anchors appropriate for your wall type: expansion anchors or toggle bolts for drywall, or masonry plugs for concrete and brick walls. Secure the brackets to the solid wall studs or concrete structure, following the anchor manufacturer’s safety guidelines.
Establish a routine maintenance schedule to keep your modular wood rack safe and functional over the long term. Every six months, inspect the rack for any signs of wood bowing, cracking, or moisture damage, particularly near the base. Use a screwdriver or hex key to check the tightness of all structural fasteners and shelf supports, as wood can expand and contract with seasonal humidity changes, occasionally loosening joints.
Frequently Asked Questions (FAQ)
Can I use reclaimed wood for a modular rack?
Yes, reclaimed wood can add unique character and rustic charm to your modular rack. However, salvaged lumber requires careful inspection and preparation. Before cutting, thoroughly inspect every piece for structural integrity, rot, and pest infestations. Use a metal detector or a strong magnet to locate and remove hidden nails, screws, or staples that could damage your saw blades or cause injury. Additionally, plan for extra preparation steps: you will likely need to plane the surfaces, deep-clean the wood to remove dirt and old finishes, and verify that the wood is completely dry to prevent warping after assembly.
How do I make the shelves adjustable?
Making your shelves adjustable is straightforward with the right hardware. The most common method is using metal or plastic shelf pins inserted into pre-drilled holes along the vertical uprights. To ensure perfect alignment, use a commercial shelf-pin drilling jig, which guarantees consistent spacing and depth. Alternatively, you can install adjustable metal track systems directly onto the uprights. This system allows you to easily reconfigure shelf heights by clipping brackets into different slots along the track, providing a robust and highly flexible storage solution.

Community discussion
Share your experience or ask a question. Comments are reviewed before publication.