
Building a custom tea shelf using standard modular shelving components allows you to design a storage system tailored precisely to your collection of teaware, canisters, and brewing accessories. Instead of settling for a pre-made unit that might not fit your specific wall space or accommodate taller teapots, modular parts let you adjust shelf heights, expand the layout as your collection grows, and select materials that complement your home decor. By planning the layout, selecting compatible components, and securing the structure properly, you can create a stable, functional, and visually appealing display.
Planning Your Tea Shelf Layout and Dimensions
Before purchasing any components, measure the physical space where the shelf will stand or hang. Take note of baseboards, skirting boards, and any nearby light switches or power outlets that might restrict placement. Ensure there is adequate clearance for doors to swing open and for comfortable movement around the brewing area.
Next, take inventory of your tea collection. Estimate the total weight of your teapots, cups, water kettles, and storage canisters. A heavy clay or cast-iron teapot requires far more structural support than a collection of loose-leaf tea tins.
Products mentioned in this guide
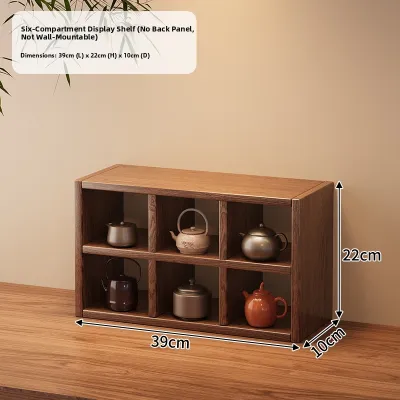
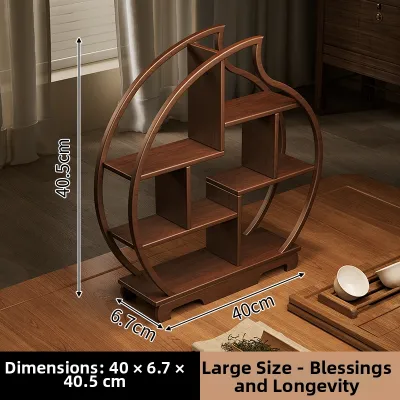
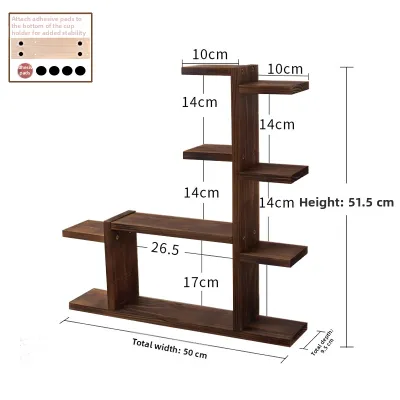
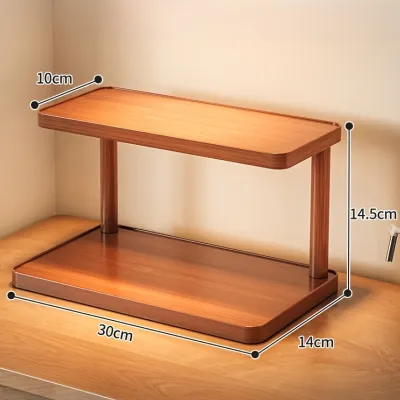
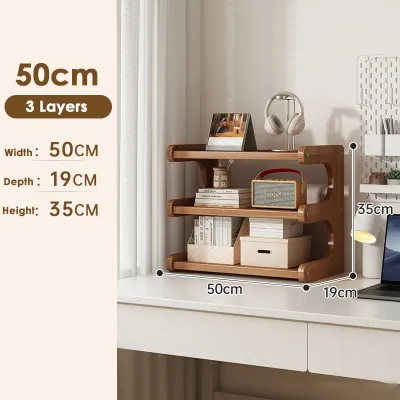
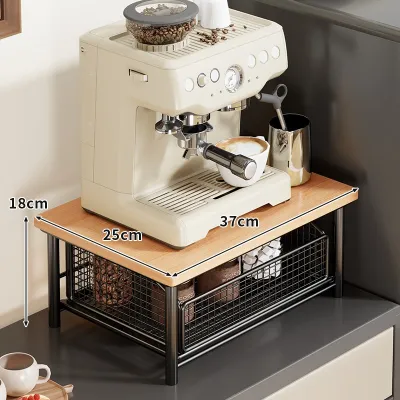
Prices are valid at publication and may change. Please refer to the product page for the latest price.
Plan the vertical spacing between shelves based on your tallest items. Measure your tallest tea canisters, vertical brewing vessels, or tiered serving trays, and add a few centimeters of clearance above them to allow for easy retrieval. This prevents a cramped layout and ensures every piece of teaware is easily accessible.
Additionally, consider the potential growth of your tea collection. Choosing a modular system that allows you to easily add extra shelves or extend the uprights vertically ensures your setup remains functional as you acquire new teaware or discover new tea varieties over time.
Selecting the Right Modular Shelving Components
When browsing modular shelving systems at your local home improvement store or online marketplace, always verify the manufacturer’s load capacity labels. These ratings are typically specified per shelf or per upright bracket; ensure the combined capacity of your chosen components comfortably exceeds the estimated weight of your fully loaded tea display.

Pay close attention to surface treatments and material care instructions. Since tea preparation involves water, steam, and occasional spills, the shelf boards must be able to withstand moisture. Check if the boards have a water-resistant laminate, a sealed veneer, or require a protective coating before use.
Match the depth of the shelf boards to your largest tea trays, presentation boxes, or brewing equipment. A shelf that is too narrow will cause items to overhang, creating a tipping hazard, while an excessively deep shelf might waste valuable room space. Aim for a depth that keeps all items fully supported and flush with or slightly recessed from the front edge.
Evaluate the aesthetic compatibility of the shelving materials with your existing room decor. While metal wire shelving offers high ventilation and a modern industrial look, solid wood or wood-veneer shelves provide a warmer, more traditional backdrop that complements classic clay teaware.
Gathering Tools and Preparation
Before starting the assembly, gather all necessary tools to ensure a smooth installation process. You will need a reliable tape measure, a pencil for marking reference points, and a high-quality spirit level to guarantee every shelf sits perfectly horizontal. If you plan to mount the system to a wall, a stud finder is essential for locating structural framing behind drywall.
Check the manufacturer’s installation manual to identify the specific hardware requirements. Depending on the modular system, you may need specific screwdrivers, drill bits, or Allen keys. Having these on hand prevents interruptions and avoids stripping screw heads with ill-fitting tools.
Prepare your workspace by clearing a large, flat area on the floor. Lay down a drop cloth, blanket, or cardboard packaging to protect your flooring and the shelving components from scratches. If drilling is required, wear safety goggles to protect your eyes from dust and debris, and ensure the room is well-ventilated.
Step-by-Step Assembly Process
Begin by installing the foundational elements of your modular system. For wall-mounted systems, this involves securing the top horizontal track or the individual vertical uprights to the wall. For free-standing units, assemble the base frame or bottom feet first, ensuring they rest flat on the floor surface.
Use your spirit level constantly throughout this process. Check the level of the horizontal tracks before tightening any screws, and verify that the vertical uprights are perfectly plumb. Even a minor misalignment at the base can amplify as you build upward, leading to unstable shelves and crooked brackets.
If you are mounting the uprights directly to wall studs, use your stud finder to mark the exact center of each stud. Securing the main vertical supports directly into these structural studs provides the highest level of stability and load capacity for your tea shelf.
Once the uprights are securely in place, insert the shelf brackets at your pre-planned heights. Double-check that brackets on opposing uprights are aligned at the exact same level. Gently place the shelf boards onto the brackets, pressing them down to engage any locking tabs or securing screws provided by the manufacturer. Ensure the boards sit flush against the back support and do not wobble.
Securing and Stabilizing the Structure
Tipping hazards are a serious concern for any shelving unit, especially when loaded with fragile ceramic or glass teaware. Assess the height-to-depth ratio of your assembled shelf; tall, narrow units are inherently less stable and must be anchored to a wall.
To anchor the shelf securely, identify your wall type. Drywall, plaster, brick, and concrete each require specific types of wall anchors and drill bits. Check the hardware instructions included with your anchoring kit, and if you are uncertain about your wall’s composition or structural integrity, stop the installation and consult a qualified professional.
Distribute the weight of your tea collection strategically to lower the center of gravity. Place your heaviest items, such as cast-iron teapots, large water vessels, or heavy ceramic jars, on the lowest shelves. Keep lighter items, like loose-leaf tea tins, tea towels, and delicate cups, on the upper tiers to minimize the risk of the unit becoming top-heavy.
Organizing and Styling Your Tea Display
Group your tea accessories by frequency of use to create an ergonomic and functional setup. Place your daily brewing vessel, favorite teacup, and primary tea selection at eye or hand level for effortless access during your daily tea rituals.
Protect your tea leaves from environmental degradation. Light, heat, and humidity can quickly spoil delicate teas like green or white tea. Store these teas in opaque, airtight canisters rather than transparent glass jars, and position them away from direct sunlight or steam rising from your kettle.
Use protective accessories to safeguard the shelf surfaces. Placing non-slip liners, silicone mats, or decorative bamboo trays under your active brewing area helps catch water drips and prevents heat damage or scratches from rough ceramic bases. This keeps your modular shelf looking pristine for years to come.
Maintenance and Safety Checks
Establish a regular schedule to inspect your tea shelf and ensure its long-term safety. Every few months, check for loose screws, bracket slippage, or any signs of structural wear. Gently wiggle the shelves to confirm they remain firmly locked into the uprights.
Clean the shelf boards according to the manufacturer’s specific guidelines. Avoid using harsh chemical cleaners or abrasive scrubbing pads, which can strip away protective finishes and expose the underlying material to moisture damage. A soft, slightly damp microfiber cloth is usually sufficient for dusting and wiping away minor spills.
Be vigilant for clear signs of structural failure. If you notice visible sagging in the shelf boards, bent metal brackets, splintering wood, or a persistent wobble that cannot be resolved by tightening screws, immediately unload the shelf. Do not attempt to load it again until you have replaced the damaged components or reinforced the structure.
Frequently Asked Questions (FAQ)
Can I use standard modular shelving for heavy cast-iron teapots?
Yes, but you must verify the specific point-load and uniform-load limits on the manufacturer’s packaging first. Standard modular shelves can support significant weight, but heavy cast-iron teapots concentrate weight in a small area. Check the shelf board material and bracket span to prevent localized sagging, and consider placing a solid wood or reinforced board directly over the brackets to distribute the load.
How do I protect wooden modular shelves from tea spills?
To protect wooden shelves, check the existing factory finish and apply compatible water-resistant sealants only if permitted by the manufacturer’s warranty. For active brewing areas where spills are common, the most reliable solution is to use removable, waterproof trays, silicone mats, or coaster sets under your teaware to prevent moisture from contacting the wood directly.
Is it necessary to anchor a low-profile tea shelf to the wall?
Tipping risks depend heavily on the shelf’s height-to-depth ratio and the center of gravity when fully loaded. Even a low-profile shelf can become unstable if heavy items are placed on the top shelves or if the unit is bumped. Always follow the included hardware warnings, and if you are uncertain about the stability of your setup or the composition of your walls, consult a professional installer.

Community discussion
Share your experience or ask a question. Comments are reviewed before publication.