
Building a custom corner display shelf using modular components is an efficient way to reclaim underutilised space, especially in compact urban apartments where every square metre counts. Unlike pre-assembled, rigid furniture, modular systems allow you to tailor the height, shelf spacing, and overall footprint to your exact storage needs. By combining vertical uprights, corner-specific tiers, and adjustable brackets, you can construct a highly functional unit that fits seamlessly into any 90-degree intersection. The process requires careful planning, precise measurements, methodical assembly, and proper safety anchoring to ensure the final structure remains stable and secure over years of use.
Measure and Plan Your Corner Space for Modular Shelves
Before purchasing any modular components, you must thoroughly evaluate and measure the intended corner. Begin by measuring the floor-to-ceiling height, as well as the available width along both walls forming the corner. It is a common mistake to assume walls meet at a perfect 90-degree angle. To verify this, use a framing square or create a simple cardboard template of a 90-degree angle and slide it directly into the corner apex. If you notice gaps at the corner or along the sides, your walls are irregular, which means you must select modular shelves that offer a slight clearance or adjustable feet to compensate for the deviation.
Additionally, take note of any structural obstacles. In many residential layouts, skirting boards, cornices, or low-hanging light switches can prevent vertical uprights from sitting flush against the wall. Measure the height and depth of your skirting boards so you can choose modular brackets or uprights designed with a cutout or offset. You must also locate any power outlets, internet ports, or light switches in the corner. Blocking these can create long-term inconveniences, so plan your shelf heights to allow easy access to these points.
Products mentioned in this guide
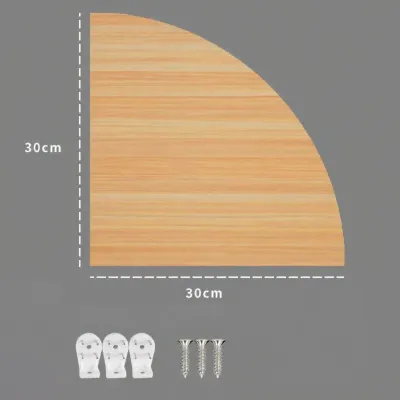
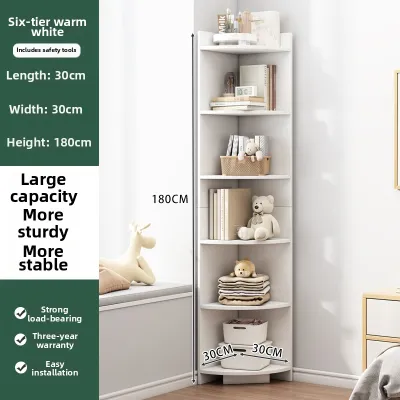
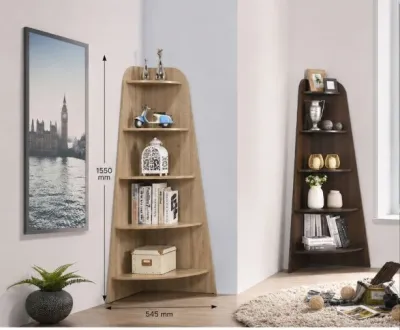
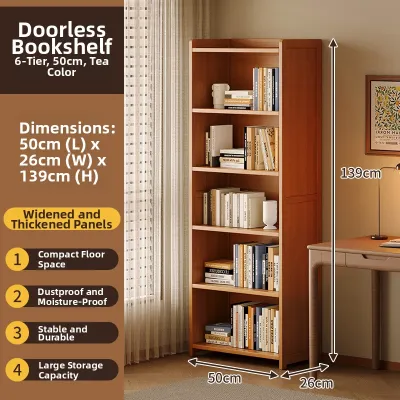
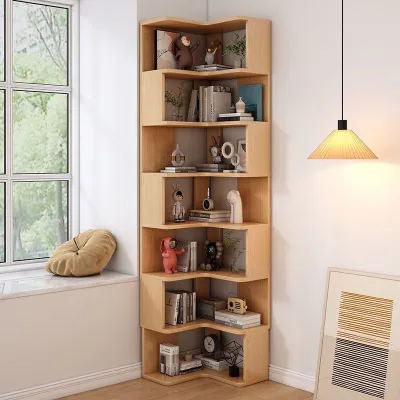
Prices are valid at publication and may change. Please refer to the product page for the latest price.
Once you have these dimensions, calculate the exact number of modular uprights, shelves, and specialised corner connectors required. If you are using a modular wire system, you will typically need three or four upright posts depending on whether the corner shelves are triangular or pentagonal. If you plan to bridge two standard rectangular shelves in an L-shape, calculate the number of corner joiner clips or brackets required to connect the adjacent wire or wooden panels. Ensure you also check the dimensions of your building’s lift and doorways to guarantee that long vertical uprights can be easily transported into your home.
Gather Your Tools and Modular Components
Having all your components and tools organised beforehand prevents mid-assembly frustration and ensures a smoother workflow. Lay out all the modular parts on a clean, protected floor surface to verify that nothing is missing from your kit.

Your modular component checklist should include:
- Vertical uprights or posts: The structural backbone of the shelving unit.
- Corner-specific shelves: Triangular, pie-cut, or pentagonal tiers designed to maximise corner depth.
- Connecting sleeves, clips, or brackets: The hardware that locks the shelves to the uprights.
- Base feet or locking casters: Leveling feet are highly recommended for permanent display units, while locking casters are suitable for lighter, mobile setups.
Your tool checklist should include:
- Measuring tape: For double-checking alignment and spacing.
- Spirit level: Crucial for ensuring every shelf is perfectly horizontal.
- Rubber mallet: For gently tapping components into place without scratching the finish.
- Screwdrivers or a power drill: For wall anchoring and securing brackets.
- Pencil: For marking wall anchor points and alignment heights.
Before beginning, always review the manufacturer’s instruction manual. Different modular brands use proprietary locking mechanisms, such as split-sleeve tapered collars, wedge locks, or threaded bolts. Understanding the specific torque limits and assembly directions of your selected kit will prevent damage to the components during construction.
Step-by-Step Guide to Assembling the Corner Shelf
Assembling a modular corner display shelf is a systematic process that relies on building a square, level foundation before extending upward. Attempting to assemble the unit from the top down or rushing through the leveling steps will result in an unstable, skewed structure that is difficult to correct later.
To ensure a safe and efficient build, divide the process into three distinct phases: establishing a level base, installing the middle shelving tiers, and securing the top structure. Work on a flat, clean surface—ideally covering your floor with cardboard or a soft drop cloth to protect both your flooring and the shelf finish from scratches. Keep all small screws, clips, and brackets organised in small containers to avoid losing vital hardware during the assembly process.
Step 1: Build the Base and Vertical Supports
The stability of your entire corner shelf depends heavily on the base. Begin by attaching the leveling feet or locking casters to the bottom of your lower vertical uprights. If your modular system uses threaded leveling feet, screw them in fully, then back them out by two or three full turns. This leaves you with enough adjustable thread to level the unit once it is placed in the final corner.
Next, connect the lower vertical poles or frame sections using the provided modular sleeves, clips, or locking joints. If you are using a metal wire system, snap the plastic split sleeves onto the lowest groove of each post at the exact same height. Slide the bottom shelf down over the posts until it seats firmly on the sleeves. Use a rubber mallet to tap the corners of the shelf gently, ensuring a snug, locked fit.
Before proceeding to higher tiers, slide the base assembly into its designated corner. Place a spirit level across the shelf in multiple directions—left to right, and front to back. Adjust the threaded leveling feet individually until the bubble sits perfectly in the centre of the level. Additionally, verify that the unit sits parallel to both walls. If the corner is slightly out of square, adjust the position of the uprights slightly to find a compromise that looks visually balanced without putting structural stress on the joints. Once aligned, slide the base back out slightly to give yourself working room for the next steps.
Step 2: Install the Corner Brackets and Shelving Tiers
With a stable, level base established, you can begin adding the remaining shelving tiers. Determine your desired shelf spacing based on the items you plan to display. Use a measuring tape to mark the exact heights on each vertical upright with a pencil, ensuring the supports are perfectly aligned across all posts.
Attach the shelf supports, clips, or corner brackets at your marked heights. If you are using a specialised corner shelf, slide the shelf down onto the supports. If you are joining two standard rectangular shelves to form an L-shaped corner, install the modular corner brackets or bridge clips that join the inner edges of the two shelves. These brackets eliminate the need for a central upright post in the very corner, creating an open, unobstructed display area.
As you install each tier, place your spirit level across the shelf. It is vital to check the level of every single shelf as you go, rather than waiting until the entire unit is built. Even a minor deviation of a few millimetres on a lower shelf can compound as you build upward, leading to a severely tilted top tier. A level shelf prevents displayed items from rolling off and ensures that weight is distributed evenly down the vertical supports.
Step 3: Secure the Top Tier and Finish the Frame
If you are building a tall, floor-to-ceiling modular unit, you will now need to attach the upper vertical upright extensions. Screw or lock these extensions onto the lower posts, ensuring the joints are completely tight and seamless. Repeat the shelf installation process for the upper tiers until you reach your desired height.
Once the final, top shelf is in place, install any top caps, finials, or final cross-braces included in your modular kit. Top caps seal the exposed ends of metal or wooden posts, preventing dust accumulation and providing a clean, finished appearance. Cross-braces, if provided, should be secured across the back sections of the frame to add lateral stability and prevent the unit from swaying side to side.
Before loading any items onto the shelves, perform a preliminary “shake test.” Gently grasp the frame at chest height and give it a light shake. Listen for any rattling, and inspect the joints to ensure no shelves are sliding or loose. If you detect any movement, re-tighten the modular clips, brackets, or locking collars. If the unit remains wobbly, re-verify the level of the base feet and make necessary adjustments.
Secure the Shelf: Safety Checks and Wall Anchoring
A completed corner display shelf may feel sturdy on its own, but once it is loaded with books, plants, or decorative items, its centre of gravity shifts upward. This shift makes tall modular units highly susceptible to tipping over, presenting a serious safety hazard, particularly in households with children or pets. Wall anchoring is a critical, non-negotiable step for any shelving unit taller than one metre.
To anchor your shelf safely, you must first identify the type of wall in your home. In Singapore, residential walls differ significantly depending on the building type and location within the flat:
- Solid concrete or brick walls: Standard in most HDB flats and condominium perimeter walls. These require heavy-duty masonry wall plugs (such as plastic rawlplugs) and a hammer drill with a masonry drill bit.
- Drywall or gypsum partitions: Often used for internal room dividers in newer developments or renovated spaces. These walls require specialised hollow-wall anchors, such as butterfly toggles or self-drilling drywall anchors, which expand behind the plasterboard to distribute the load.
To install the anchors, push the assembled shelf flush against the wall in its final position. Mark the anchor bracket holes on the wall using a pencil. Move the shelf aside, drill the holes to the depth specified by your anchor manufacturer, and insert the appropriate wall plugs. Slide the shelf back into position and secure the brackets to both the wall and the shelf frame. Always check the manufacturer’s instructions for the correct drill bit size and torque requirements. If your wall material is crumbling, damaged, or if you are unsure of its structural composition, stop immediately and consult a qualified professional contractor to perform the installation.
In addition to physical anchoring, proper weight distribution is essential for long-term safety and structural integrity. Always place your heaviest items—such as large books, heavy ceramic vases, or storage boxes—on the lowest shelves. This lowers the unit’s overall centre of gravity, significantly reducing tipping risks. Reserve the higher, lighter shelves for smaller collectibles, photo frames, and lightweight decorative pieces. Never exceed the manufacturer’s stated maximum load capacity per shelf, as overloading can cause metal shelves to bow or wooden shelves to warp and crack.
Organize and Style Your Completed Display Shelf
With your custom modular corner shelf securely assembled and anchored, you can begin organising and styling your display. A well-styled corner shelf should balance functional storage with visual appeal, preventing the corner from looking cluttered or heavy.
Start by utilizing the unique depth of the corner. Corner shelves often have a deep apex that can accommodate larger, three-dimensional objects. Place a prominent statement piece, such as a large sculpture or a decorative bowl, deep in the corner of a middle shelf to serve as a visual anchor. Surround it with smaller, staggered items on the outer edges to create depth and dimension. Grouping items in odd numbers (such as clusters of three or five) generally looks more pleasing than symmetrical pairings.
To keep the modular frame looking clean and organised, incorporate functional storage solutions on the lower shelves. Woven baskets, fabric bins, or sleek wooden boxes are perfect for holding loose items, cables, or documents that would otherwise create visual clutter. Placing these heavier, solid elements at the bottom also anchors the design visually, allowing the upper shelves to feel lighter and more open.
When styling, pay close attention to the environmental conditions of your room. Singapore’s high-humidity tropical climate can affect various modular materials over time. If your shelf is made of wood, engineered wood, or non-treated metal, avoid placing moisture-prone items like unsealed potted plants or humidifiers directly on the surfaces. Always use protective coasters, silicone mats, or waterproof trays under plants to prevent water rings, warping, or rust. Regularly wipe down the shelves with a dry microfiber cloth to prevent dust buildup, and check the manufacturer’s care instructions for the appropriate cleaning agents to preserve the finish.
Frequently Asked Questions (FAQ)
Can I use standard modular shelves for a corner setup without special corner pieces?
While it is physically possible to place two standard rectangular modular shelving units side-by-side at a 90-degree angle, this configuration is highly inefficient. Doing so creates an overlapping zone in the corner apex that is difficult to access, resulting in awkward, unusable dead space. Additionally, standard units placed adjacent to each other will have double the number of upright posts in the corner, which looks bulky and cluttered. Using purpose-built modular corner shelves or specialised L-bracket connectors allows you to bridge standard shelves seamlessly, maximizing your storage footprint and creating a clean, continuous look.
How do I adjust the shelf height after it is fully assembled?
To adjust the height of a modular shelf safely without damaging the components, you must follow a careful, step-by-step procedure. First, completely unload all items from the shelf you wish to move, as well as any shelves directly adjacent to it. Do not attempt to adjust a loaded shelf. Next, gently release the modular clips, locking pins, or bracket screws according to your manufacturer’s specific mechanism. If the shelf is tight, use a rubber mallet to tap it upward from underneath to loosen it. Reposition the supports or sleeves to the new height on the uprights, ensuring all corners are perfectly aligned. Carefully lower the shelf back onto the supports, use a spirit level to verify it is horizontal, and re-tighten all locking mechanisms before reloading your items.
Is it safe to place a modular corner display shelf outdoors or in a bathroom?
Unless the modular components are explicitly rated and certified by the manufacturer for outdoor or high-humidity environments, they should be kept strictly indoors in dry areas. Standard indoor modular shelves—whether made of powder-coated steel, chrome-plated wire, or laminated particleboard—are highly susceptible to damage when exposed to moisture. High humidity in bathrooms or direct rain on balconies can quickly lead to rust, bubbling of laminate finishes, structural warping of wood, and mold growth. For damp or outdoor areas, always verify that the product specifications explicitly state suitability for outdoor use, marine-grade durability, or rust-proof polymer construction.

Community discussion
Share your experience or ask a question. Comments are reviewed before publication.