
Assembling a modular desktop shelf is an efficient way to maximize vertical space, clear surface clutter, and improve the ergonomics of your home office or study. By organizing your assembly process systematically—from verifying your desk’s structural limits to building the frame from the ground up—you can create a highly stable and customized storage solution. This guide provides a comprehensive, step-by-step walkthrough to help you safely construct, configure, and maintain your desktop shelf for long-term reliability.
Preparation and Workspace Assessment
Before unboxing your new desktop shelf, take precise measurements of your existing desk surface. Use a metal measuring tape to record the available width, depth, and vertical clearance of your workspace. In compact home offices or typical Singapore HDB study rooms, vertical space may be restricted by wall-mounted air conditioning units, overhead bookshelves, window ledges, or wall sockets. Ensure the footprint of the shelf does not block essential wall outlets or interfere with monitor arms, cable management trays, and desk lamps.
Next, evaluate the structural integrity and weight capacity of your desk. Desktop shelves add concentrated weight to specific points on your desk surface, especially when fully loaded with books, files, or tech accessories. Solid wood, plywood, and thick metal-framed desks are highly resilient and can easily support heavy modular systems. However, if your desk is made of hollow-core paper-filled composite or thin particleboard, placing a heavy shelf on it can cause the desktop to bow, sag, or even puncture. Check your desk manufacturer’s specifications to ensure it can safely handle the combined weight of the shelf and your gear.
Products mentioned in this guide
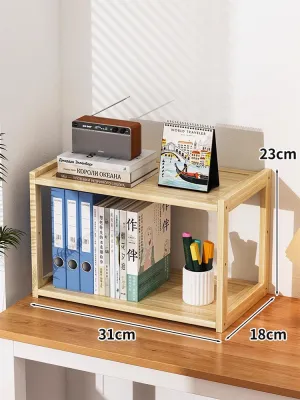
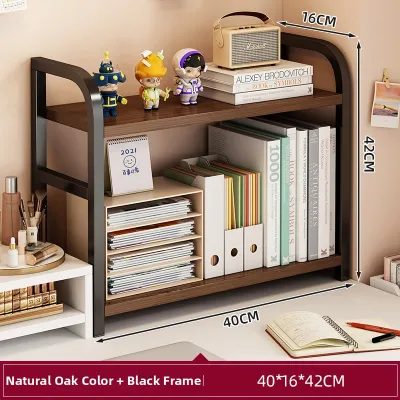
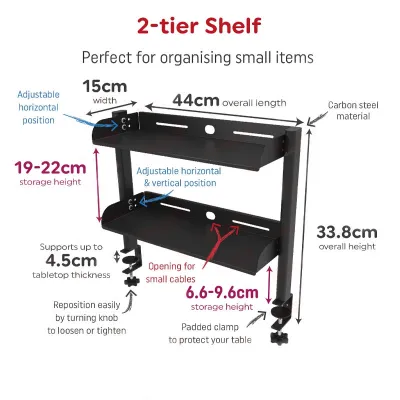
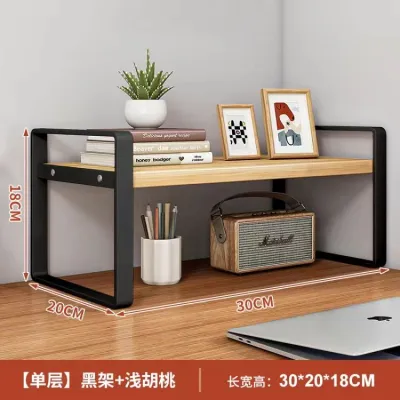
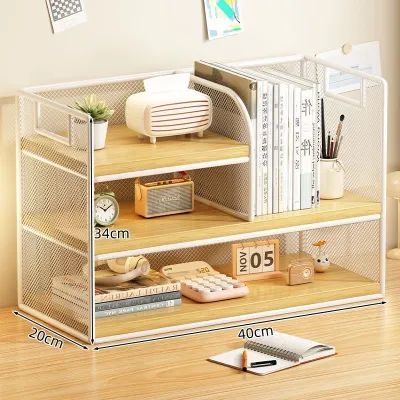

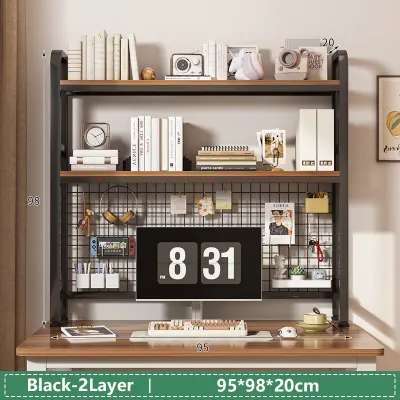
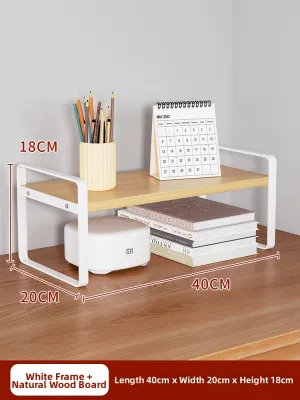
Prices are valid at publication and may change. Please refer to the product page for the latest price.
Once your workspace is assessed, unbox the modular shelf components in a spacious, well-lit area. Carefully lay out all panels, vertical supports, connectors, screws, and brackets. Group similar hardware items together in small trays or on a clean surface to prevent them from rolling away. Cross-reference every item with the manufacturer’s parts inventory list; starting assembly only to find a missing cam lock or structural bracket midway can stall your progress and compromise safety.
To protect both your desk surface and the finish of your new shelf pieces during assembly, prepare a soft working area. Lay down a clean towel, a yoga mat, or the flattened cardboard packaging from the product box. Gather basic hand tools before you begin, including a manual Phillips-head screwdriver, a flathead screwdriver, a measuring tape, and a small spirit level. Having these tools within arm’s reach ensures a smooth, uninterrupted assembly process.
Step-by-Step Assembly Guide
Building the Base and Vertical Supports
Begin the physical assembly by constructing the foundation of the shelf. Position the base plates, bottom panels, or support feet onto your protected flat surface. If your modular kit includes adjustable leveling feet or rubber pads, screw them into the underside of the base panels first. Setting these feet level at the start prevents the shelf from rocking or scratching your desk once it is upright.

Insert the vertical support pillars, frames, or side panels into the base connectors. Pay close attention to the manufacturer’s orientation markers, such as “UP” arrows, front-versus-back labels, or pre-drilled pilot holes. Aligning these pieces correctly now is crucial, as reversing a vertical support can prevent upper shelves or modular accessories from fitting properly later in the process.
Secure the vertical supports to the base using the provided fasteners, such as screws, bolts, or dowels. When tightening these joints, use manual hand tools rather than power drills. Hand tightening allows you to feel the resistance and prevents over-tightening, which can easily strip screw threads, split solid wood, or crack composite materials like MDF and particleboard. Tighten each fastener until it is snug and flush, but do not force it past its natural stopping point.
Before moving on to the upper tiers, place a small spirit level across the vertical supports to verify their alignment. If you do not have a level, perform a careful visual check from multiple angles to ensure the uprights are perfectly perpendicular to the base. A minor lean at the bottom of the frame will amplify as you add height, leading to a severely misaligned and unstable top tier.
Attaching Shelves and Modular Add-ons
With the foundational frame secure, you can begin installing the horizontal shelving tiers. Always work from the bottom tier upward. This bottom-up approach provides better physical leverage, keeps the structure stable during assembly, and ensures you do not have to awkwardly balance upper shelves while trying to secure lower ones.
Slide or position the horizontal shelf panels onto their designated support pegs, brackets, or pre-drilled slots. Secure each shelf using the kit’s specific locking mechanisms. For wood or composite shelves, this often involves turning cam locks clockwise with a manual screwdriver until they click or lock firmly into place. For metal modular units, ensure the shelf brackets are fully seated into the vertical slots by tapping them gently with the palm of your hand.
Once the primary horizontal shelves are locked in, integrate your specific modular accessories. This may include sliding in drawer units, mounting pegboards, attaching side hanging hooks, or setting up dedicated monitor riser platforms. Ensure these add-ons snap or screw into their designated tracks smoothly; if a component feels jammed, remove it and check for debris or misalignment rather than forcing it, which could scratch the protective finish.
Conclude this phase by performing a comprehensive joint check. Run your hands along all connection points to ensure every panel is flush, every bracket is fully engaged, and there are no visible gaps between the shelves and the vertical frame. Gently press down on each horizontal tier to confirm there is no vertical play or side-to-side wobble before you begin placing items on the shelf.
Configuring and Organizing Your Desktop Shelf
To maintain the stability of your assembled shelf, apply the “heavy-bottom, light-top” rule when organizing your items. Position your heaviest equipment—such as printers, stacks of heavy reference books, or desktop PC towers—on the lowest shelf tier or directly on the desk surface beneath a riser. Keeping heavy items at the base lowers the overall center of gravity of the setup, significantly reducing the risk of the shelf tipping over if it is accidentally bumped.
Distribute weight evenly across the horizontal plane of each individual shelf tier. Avoid clustering heavy items on one side or directly in the center of a shelf, as concentrated loads can cause wood, laminate, or thin metal panels to bow and sag over time. Spreading your books, organizers, and tech devices evenly across the width of the shelf preserves its structural integrity and keeps the joints balanced.
Reserve the higher tiers and elevated compartments exclusively for lightweight items. These sections are ideal for storing small notebooks, lightweight stationery holders, small decorative plants, or wireless peripherals. Placing heavy objects on high shelves makes the entire structure top-heavy, which compromises stability and poses a safety hazard in active workspaces.
Manage your device cables carefully to prevent accidental pulls and snags. Route power cords, monitor cables, and charger wires through the shelf—using integrated grommets, rear cutouts, or adhesive cable clips. Secure cables neatly along the back of the frame so they do not hang loose. A dangling cable can easily catch on a desk chair, a vacuum cleaner, or a passing hand, potentially pulling expensive devices or the shelf itself off your desk.
Stability Checks and Maintenance
Once your shelf is fully configured and loaded, perform a final stability check. Gently apply pressure to the top corners of the shelf from the front and sides to conduct a “wobble test.” If you detect any shifting, swaying, or creaking, immediately remove your items and check for loose fasteners or uneven leveling feet. A stable shelf should feel rigid and firmly planted on your desk.
Verify that no part of the shelf’s base overhangs the edges of your desk. The entire footprint of the shelf must rest securely on the flat desktop surface. Any overhang creates an immediate tipping hazard, as pressure applied to the protruding section can cause the shelf to pivot and fall. Keep the unit pushed slightly back, ensuring it is clear of the desk’s edge.
If your modular desktop shelf is tall (typically over 60 cm) or if you use an adjustable standing desk, install anti-tip straps or desk-clamp stabilizers. These safety accessories anchor the shelf directly to the back edge of your desk or to the adjacent wall. Always follow the manufacturer’s explicit instructions when installing these anchors to ensure they provide reliable tip-over protection during desk transitions.
Establish a simple maintenance routine to keep your workspace safe over time. Every 3 to 6 months, perform a quick check of all screws, bolts, and cam locks. Daily typing vibrations, the movement of height-adjustable desks, and regular use can gradually loosen fasteners. Taking five minutes to re-tighten them with a manual screwdriver ensures the frame remains rigid.
In Singapore’s warm, humid tropical climate, proper surface care is essential to protect your furniture from moisture damage and mold. Wipe the shelf surfaces regularly using a dry or slightly damp microfiber cloth. Avoid using harsh chemical cleaners, abrasive scrubbing pads, or excessive water, which can seep into the seams of composite wood, damage the edge banding, and cause the material to swell or warp. If you spot any minor moisture buildup or dust, wipe it away promptly to preserve the shelf’s protective finish.
Frequently Asked Questions (FAQ)
Can I assemble a modular desktop shelf without power tools?
Yes, you can assemble most modular desktop shelves entirely with basic hand tools. In fact, manufacturers generally recommend using manual screwdrivers and the included Allen keys rather than power drills. Power tools generate high torque that can easily strip screw threads, damage plastic connectors, or split engineered woods like MDF and particleboard. Using hand tools gives you precise control over the tightness of each joint, ensuring a safer and more secure build.
What should I do if the shelf wobbles after assembly?
If your shelf wobbles, first verify that your desk surface is completely flat and level. If the desk is stable, check that all adjustable leveling feet on the shelf’s base are resting firmly on the surface. Next, inspect all structural joints to ensure every cam lock, bolt, and bracket is fully tightened and aligned. If the wobble persists due to an uneven desk, you can adjust the leveling feet or place a thin, non-slip felt pad or shim under the shallow foot to stabilize the frame.
Is it safe to place a heavy monitor on the top tier?
Generally, it is not recommended to place a heavy monitor on the top tier of a tall desktop shelf. Doing so raises the center of gravity, making the entire assembly top-heavy and increasing the risk of tipping. Always check the manufacturer’s specific weight limit for each tier before placing electronics. For optimal safety and ergonomics, heavy monitors should be placed on the main desk surface, mounted on a dedicated desk-clamped monitor arm, or set on a low, robust monitor riser module designed specifically for heavy loads.

Community discussion
Share your experience or ask a question. Comments are reviewed before publication.