
Assembling and customizing a modular shelf rack with wheels allows you to create a highly adaptable storage solution tailored to your specific spatial constraints and organizational needs. Whether you are setting up a mobile pantry in a compact kitchen, organizing tools in a utility room, or managing inventory in a home office, a wheeled shelving unit offers the unique advantage of dynamic space management. By understanding the structural logic of modular components and planning your layout before assembly, you can maximize vertical storage capacity while retaining the freedom to reconfigure or relocate your setup at a moment’s notice. The process requires careful measurement, systematic assembly from the ground up, and strategic weight distribution to ensure long-term stability and safety.
Pre-Assembly Preparation and Space Measurement
Before purchasing or assembling a mobile shelving unit, precise spatial planning is essential to ensure the fully loaded rack can move freely. Begin by measuring the exact floor area where the rack will reside when stationary, allowing for at least five to ten centimeters of clearance on all sides to prevent the unit from scraping against walls. It is equally important to measure the height of your ceilings, the clearance of all doorways, and the dimensions of any elevators or corridors through which the unit must travel during relocation. In many residential layouts, particularly compact apartments, tight corners and low door frames can restrict the movement of a fully assembled, tall shelving unit.
Once you have verified the spatial dimensions, unbox all components in a spacious, clear area and group them by type to simplify the assembly process. Lay out the vertical poles, horizontal shelves, plastic split sleeves or shelf clips, and the caster wheels to verify them against the manufacturer’s parts inventory list. Identifying any missing or damaged hardware at this stage prevents frustrating interruptions mid-assembly. If any parts appear bent or cracked, contact the manufacturer for replacements before proceeding, as compromised structural components can severely reduce the load capacity of the completed rack.
Products mentioned in this guide
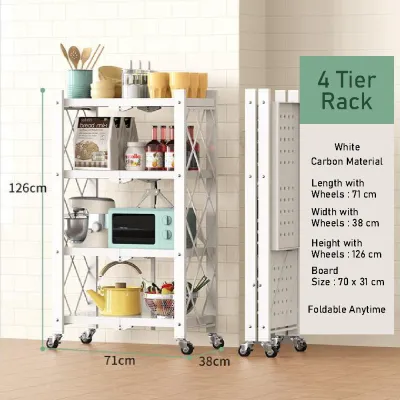
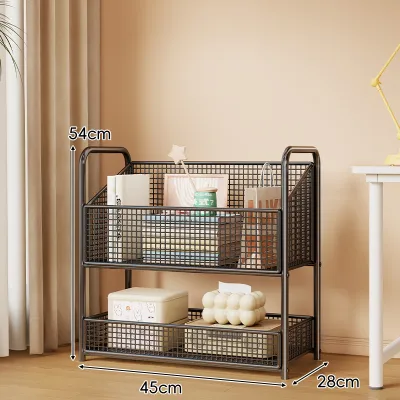
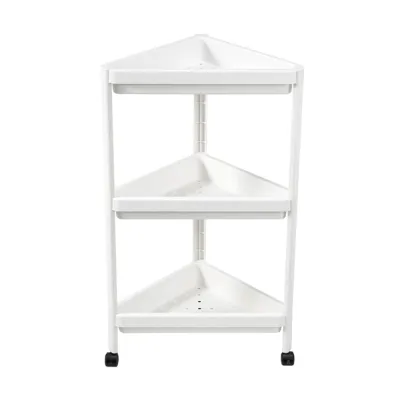
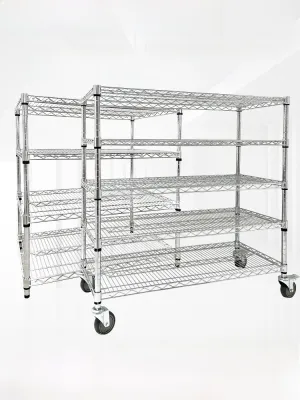
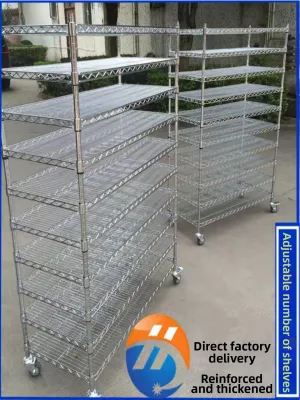
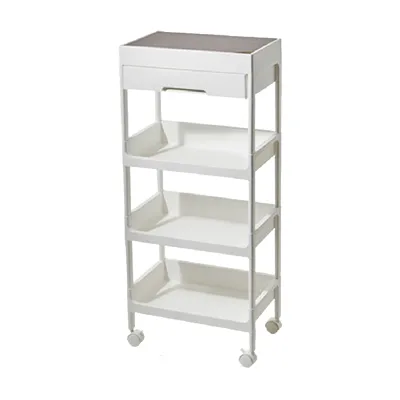
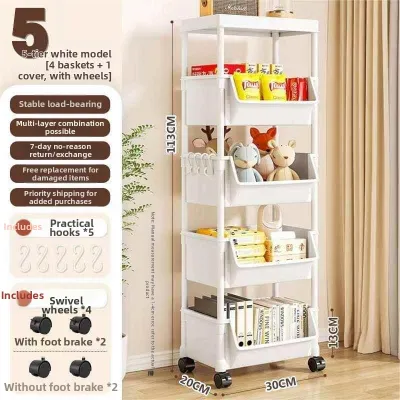
Prices are valid at publication and may change. Please refer to the product page for the latest price.
While many modular shelf kits include basic assembly tools, having a few standard household tools on hand will make the process smoother and more secure. A rubber mallet is highly recommended for wire shelving units, as it allows you to seat the shelves firmly onto the support clips without scratching the metal finish or denting the frame. Adjustable wrenches or open-ended wrenches of the correct size are also useful for tightening the threaded stems of the caster wheels into the bottom of the vertical poles. Avoid using metal hammers, which can chip protective powder coatings or deform the structural joints of the rack.
Step-by-Step Assembly of the Base Frame and Casters
The foundation of any mobile shelving unit determines its overall stability, weight capacity, and ease of movement. Begin by examining the caster wheels provided in your kit, which typically consist of two locking casters and two non-locking casters. It is crucial to plan the placement of these wheels so that the locking casters are positioned on the side of the rack that will face outward or be most accessible to your foot. This placement ensures you can easily engage and disengage the brakes without having to reach awkwardly underneath or behind a fully loaded shelf.

To install the casters, thread the stem of each wheel into the bottom opening of the lower vertical poles, turning them clockwise by hand until they are finger-tight. Once threaded, use an adjustable wrench to tighten the hex nut at the base of the caster stem securely against the bottom of the pole. A loose caster can cause the pole to lean, putting uneven stress on the joints and potentially leading to a structural failure under load. If your kit includes leveling feet instead of casters, or if you plan to switch between them, ensure the threads are clean and free of debris before insertion.
After securing the wheels, connect the bottom poles and the base rails or the lowest shelf tier according to the structural diagram in your instruction manual. For standard wire shelving, this involves snapping a pair of plastic split sleeves onto the lowest groove of each vertical pole, ensuring the “TOP” arrow on the sleeves points upward. Slide the corners of the bottom shelf down over the poles and onto the sleeves until they wedge tightly. If the pre-drilled holes or clips do not align easily, stop and consult the manual rather than forcing the parts together, as forcing misaligned components can strip threads or crack plastic connectors.
Before proceeding to the upper tiers, verify that the base frame is completely level and that all four corners of the bottom shelf are fully seated on their respective sleeves. You can check this by placing a spirit level across the shelf in both directions or by measuring the distance from the floor to the shelf corner at all four points. If the base is uneven, the entire structure will lean as you add height, which increases the risk of tipping. Tap each corner of the bottom shelf gently with a rubber mallet to ensure a secure, friction-locked fit before adding any vertical weight.
Configuring Shelf Heights for Your Specific Storage Needs
One of the primary benefits of a modular shelf rack is the ability to customize the vertical spacing between shelves to accommodate items of varying heights. To optimize this space, measure the tallest items you plan to store, such as kitchen appliances, plastic storage bins, or file boxes, and add approximately five to ten centimeters of clearance above them. This extra clearance ensures you can easily slide items in and out of the rack without scraping the shelf above or straining your hands. Planning these heights beforehand prevents the need to disassemble the upper sections of the rack later if an item does not fit.
When planning your shelf layout, always place the heaviest, bulkiest items on the lowest tiers of the rack to maintain a low center of gravity. Storing heavy items like bulk liquids, toolboxes, or heavy kitchen equipment near the bottom significantly improves the stability of the wheeled unit when it is stationary or in motion. Conversely, reserving the upper shelves for lightweight, frequently accessed items like paper goods, small organizers, or linens reduces the risk of the unit becoming top-heavy. A top-heavy wheeled rack is highly susceptible to tipping over when navigating thresholds, carpet edges, or minor floor imperfections.
To secure each subsequent shelf tier, count the grooves on the vertical poles carefully to ensure that the split sleeves or support clips are placed at the exact same height on all four poles. Even a single groove of misalignment will cause the shelf to sit at an angle, which compromises its load-bearing capacity and can cause stored items to slide off. Once the clips are snapped into place, lower the shelf over the poles and press down firmly on the corners. Use your rubber mallet to tap each corner downward until the shelf is wedged tightly over the plastic sleeves, ensuring a rigid and stable connection.
Adding Modular Accessories and Customizations
Once the main frame of your wheeled shelf rack is assembled, you can enhance its functionality by adding compatible modular accessories tailored to your specific storage workflow. For kitchen setups, side hooks and hanging rods are excellent for holding oven mitts, utensils, or lightweight pans, keeping them within arm’s reach. In utility rooms or offices, adding pull-out drawer inserts, wire baskets, or solid shelf liners can prevent small items from falling through the gaps of wire shelves while keeping loose supplies neatly organized.
Before installing any add-ons, always check the manufacturer’s specified weight limits for both the individual accessories and the overall rack. Hanging heavy items from side hooks or extending heavy drawers outward can exert asymmetrical forces on the vertical poles, potentially bending the frame or causing the unit to tilt. Accessories should be used primarily for lightweight or medium-weight items, and their weight must be factored into the total load capacity of the entire shelving unit to avoid overloading the casters.
To maintain structural balance, distribute all modular accessories evenly across the frame of the shelf rack. If you install a hanging rod or a set of utility hooks on one side of the unit, consider balancing the opposite side with a similar accessory or keeping the stored items on that side exceptionally light. Avoid clustering all accessories on a single side or near the top of the rack, as this uneven distribution can make the unit difficult to steer and increase the likelihood of tipping when the wheels are in motion.
Safety Checks, Maintenance, and Relocation Tips
Before placing your customized shelf rack into active service, perform a thorough safety check to ensure the unit is stable and secure. Conduct a gentle stability shake test by grasping the middle poles and shaking the unit slightly to verify that all shelf clips are locked and there is no excessive wobbling. Next, engage the caster brakes on a flat surface and attempt to push the unit to ensure the brakes hold firmly on your specific floor type, whether it is smooth tile, vinyl, or hardwood. If the unit slides easily even with the brakes engaged, consider placing a non-slip mat under the wheels when stationary.
Over time, the vibrations caused by rolling the rack and the shifting of stored loads can cause screws to loosen or plastic shelf clips to migrate slightly. Establish a routine maintenance schedule every few months to inspect the structural integrity of the unit. Check that the casters remain tightly threaded into the poles, and use a rubber mallet to re-seat any shelf corners that may have lifted or shifted. Keeping the joints tight and the frame square extends the lifespan of your shelving unit and prevents sudden structural failures.
When relocating the wheeled shelf rack, always clear heavy or fragile items from the top shelves before attempting to roll the unit. Lowering the overall height of the load reduces the momentum of the rack if it encounters an obstacle, making it much easier to control. When pushing the unit, place your hands on the middle or lower section of the vertical poles rather than pulling or pushing from the top edge. Pushing from the top can easily cause a tall rack to pivot over its front wheels and tip forward, especially when crossing uneven floors, door thresholds, or carpet transitions.
Frequently Asked Questions (FAQ)
Can I retrofit casters onto a stationary modular shelf?
You can often retrofit casters onto a stationary modular shelf, provided the bottom of the vertical poles features threaded inserts designed to accept wheel stems. Before purchasing aftermarket casters, check the manufacturer’s specifications to identify the exact thread size and pitch required for your specific model. Additionally, you must verify that the total weight capacity of the existing frame can support the dynamic loads associated with a mobile unit. Keep in mind that adding wheels typically reduces the overall weight capacity of a shelving unit compared to its stationary configuration, as casters introduce moving parts that bear the concentrated weight of the entire load.
How do I prevent a tall wheeled shelf from tipping over when moving it?
To prevent a tall wheeled shelf from tipping over during relocation, always lower its center of gravity by removing heavy items from the upper shelves and placing them on the bottom tier. Before moving the unit, ensure that any remaining items are secured or packed tightly so they cannot slide and shift the weight distribution mid-transit. When pushing the rack, position your hands at the midpoint of the vertical poles and apply steady, forward pressure. Never pull the unit from the top edge or push it at a high speed, as sudden stops or encounters with floor thresholds can cause the top-heavy structure to tip forward.

Community discussion
Share your experience or ask a question. Comments are reviewed before publication.