
Assembling a modular shelf unit is one of the most rewarding and cost-effective ways to optimize storage in your home. Whether you are setting up a study room in a cozy apartment or organizing a living area, a versatile modular shelf allows you to customize your storage to fit your exact needs. However, a successful build requires more than just unpacking the box and tightening screws. Proper preparation, a systematic assembly sequence, and correct structural securing are essential to prevent alignment errors, wobbly frames, or damage to the materials. By following a structured approach, you can construct a stable, safe, and visually seamless shelving unit that stands the test of time.
Pre-Assembly Preparation and Workspace Setup
Before you open any packaging, you must carefully plan your space and prepare your environment. Begin by measuring the exact floor area where the modular shelf will stand, checking the height, width, and depth against the dimensions of the fully assembled unit. In modern high-rise residential spaces, it is equally important to measure the clearances of your doorways, hallways, and lift access. If you plan to assemble the unit in a spacious living room and later move it to a study or bedroom, verify that the completed structure can navigate tight corners and door frames without getting stuck.
Once you have confirmed the spatial fit, carefully unbox the components. Avoid using sharp utility knives deep in the box, as they can easily scratch the laminate or veneer surfaces of the panels. Lay out all the wooden panels, shelves, and hardware components systematically. Group similar items together: place wooden dowels, cam locks, screws, and shelf pins into separate small bowls or containers to prevent them from rolling away. Cross-reference every item with the manufacturer’s parts inventory list to ensure nothing is missing before you begin the physical build.
Products mentioned in this guide
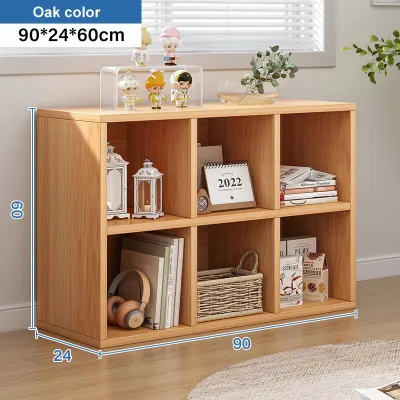
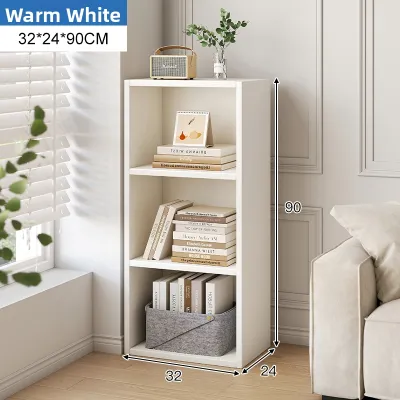
Prices are valid at publication and may change. Please refer to the product page for the latest price.
Creating a clean, flat, and protected workspace is the next crucial step. Clear a floor area that is at least twice the size of the fully assembled shelf. Lay down the discarded packaging cardboard or a soft, clean blanket to act as a protective barrier. This simple step prevents the shelf finishes from getting scratched by grit on the floor and protects your home’s flooring, whether it is parquet, vinyl, or polished tile, from accidental dents or marks.
Gather all the necessary tools before starting. While many modular kits include basic tools like an Allen key, you will typically need to supply a few of your own. Prepare a Phillips-head screwdriver, a flathead screwdriver, a spirit level, and a rubber mallet. A rubber mallet is particularly useful for tapping wooden dowels into place gently without denting or splitting the engineered wood. Avoid using a high-power electric drill unless you can adjust it to a very low torque setting, as excessive force can easily strip pre-drilled holes in particleboard or medium-density fibreboard (MDF).
Step-by-Step Assembly Instructions
Building the Base and Vertical Supports
Establishing a perfectly level foundation is the single most important step in the assembly process. Any slight tilt at the base of the shelf will amplify as the unit grows taller, leading to severe alignment issues, stuck drawers, or structural instability. Begin by attaching any base plates, adjustable leveling feet, or casters to the bottom panel according to the manufacturer’s diagram. If your unit features adjustable feet, use them to compensate for any unevenness in your flooring, which is common in tiled utility areas or older apartments.

Next, prepare the vertical side panels by inserting the connecting hardware. Insert wooden dowels or thread metal cam bolts into the pre-drilled holes on these panels. When inserting wooden dowels, tap them gently with your rubber mallet until they bottom out, ensuring they remain straight and do not bend. If the dowels are loose, check the instructions to see if wood glue is recommended, though many modern modular systems rely on dry-fit dowels for easier disassembly.
Connect the prepared vertical supports to the base panel. Align the dowels and bolts with the corresponding holes on the base, pressing them together firmly. Secure the joints using the provided screws or cam locks. At this stage, follow the critical rule of modular assembly: leave all screws and cam locks slightly loose, about 80% tight. Keeping the joints somewhat flexible allows for minor adjustments as you add more components, preventing the frame from locking into an skewed position early on.
Installing the Shelves and Modular Cubes
With the lower frame stabilized, you can begin installing the horizontal shelves and internal modular dividers. Slide the horizontal shelves onto their designated supports or place them onto metal shelf pins inserted into the vertical panels. Ensure that each shelf sits completely flush against the back edge of the frame. If your modular unit features fixed structural shelves that hold the frame together, secure them using the designated cam locks or screws, again keeping them slightly loose until the entire skeleton is erected.
If your shelf unit includes a thin back panel, install it now. Many DIY builders assume the back panel is purely cosmetic, but it actually plays a vital role in providing diagonal stability, known as racking resistance. Slide the back panel into the grooved tracks of the vertical frames, or nail/screw it into place along the perimeter. Before securing the back panel permanently, measure the diagonals of the frame from corner to corner; if the two diagonal measurements are equal, your unit is perfectly square. Securing the back panel while the frame is square locks the shelf into its correct shape.
Once the main framework is stable, insert any optional modular cubes, drawers, or decorative dividers according to your chosen configuration. Ensure that drawer slides are aligned parallel and that modular inserts slide in smoothly without rubbing against the sides. Perform a thorough visual inspection at this point: check for any gaps between panels, ensure all shelves are seated correctly on their pins, and verify that no panels are installed backward or upside down.
Final Tightening and Structural Securing
Now that all components are in place and the unit is square, you can proceed to the final tightening phase. Place a spirit level on top of the horizontal shelves and against the vertical side panels to verify that the unit is perfectly level and plumb. If you detect a slight tilt, gently nudge the frame until the bubble on the spirit level is centered.
To lock the structure into place safely and evenly, use the cross-pattern tightening method. Instead of fully tightening the screws on one side of the shelf all at once, systematically tighten them in a diagonal or crisscross sequence. For example, tighten the bottom-left joint, then the top-right joint, followed by the bottom-right, and finally the top-left. This method distributes tension evenly across the entire frame, preventing the wood from warping or pulling to one side as the joints compress.
The final, non-negotiable step for any tall modular shelf is the installation of anti-tip wall anchors. Even the most stable-looking shelf can tip over if a child climbs on it, a pet jumps on top, or heavy items are placed on the upper shelves. Most manufacturers provide basic wall-anchoring brackets or straps in the hardware kit. Identify the mounting points on the top or back of the unit and prepare to secure them to your wall, ensuring the shelf is locked firmly in place before loading it with items.
Troubleshooting Alignment and Stability Issues
Even with careful assembly, you may encounter minor issues like a leaning frame, uneven shelves, or stubborn hardware. If you notice a wobbly or leaning frame after tightening, do not try to force it straight. Instead, loosen all the main joints and cam locks by about half a turn. Place the unit on a flat floor, gently push it into a square shape, and use your spirit level to verify its alignment. Once square, retighten the hardware systematically using the cross-pattern method.
If a horizontal shelf does not sit flush or is rocking on its pins, check for common assembly mistakes. Ensure that none of the vertical panels are installed upside down or backward, as pre-drilled holes can vary slightly by a few millimeters between the front and back edges. Additionally, inspect the pre-drilled holes for manufacturing debris, such as compressed wood dust or loose laminate pieces. Gently clear any blockages using a dry cotton swab or a toothpick so the shelf pins can seat fully.
Stripped screws and stuck cam locks are common challenges when working with engineered woods like particleboard or MDF. If a screw spins freely without tightening, or if a cam lock refuses to turn, stop forcing the hardware immediately. Forcing the components can permanently strip the surrounding wood fibers, rendering the joint useless. Back the hardware out gently, clear any debris from the hole, and realign the panels. If a screw hole in particleboard is stripped, you can often repair it by inserting a small wooden toothpick coated in wood glue into the hole, letting it dry, trimming it flush, and then reinserting the screw.
It is crucial to recognize when to stop and seek assistance. If you find that pre-drilled holes do not align at all, or if critical parts are missing, do not attempt to drill new holes into the panels. Altering the structural panels yourself can compromise the load capacity of the shelf, split the engineered wood, and void the manufacturer’s warranty. Under these conditions, stop assembly immediately and contact the manufacturer or retailer for replacement parts or professional support.
Post-Assembly Safety and Load Verification
Before placing any books, electronics, or decorative items on your newly assembled shelf, you must verify its physical stability and load capacity. Begin by performing a simple stability check: gently apply lateral pressure to the top and sides of the unit to ensure there is no swaying, rocking, or creaking. If the unit feels loose or sways, double-check that all joints are fully tightened and that the back panel is securely fastened.
Next, consult the manufacturer’s instruction manual or product labels to identify the maximum load capacity for each individual shelf and the unit as a whole. Never exceed these limits. When loading the shelf, always practice proper weight distribution: place your heaviest items, such as large books, storage bins, or heavy kitchen appliances, on the bottom shelves. This lowers the center of gravity of the entire unit, making it significantly more stable and reducing the risk of tipping.
Properly securing the wall-anchoring hardware is essential for long-term safety. In Singapore, residential walls are typically constructed from solid concrete, brick, or masonry. To mount wall anchors into these surfaces, you must use a hammer drill equipped with a masonry drill bit, insert plastic wall plugs (anchors) into the drilled holes, and then drive the screws through the anchoring brackets. If you are mounting the shelf against a drywall partition, standard concrete plugs will not hold; you must use specialized toggle bolts or heavy-duty hollow-wall anchors designed to grip the back of the plasterboard.
Finally, incorporate routine maintenance into your household cleaning schedule. Modular furniture can settle, and joints can loosen slightly over time due to weight distribution changes and local environmental factors. Singapore’s high relative humidity can cause engineered wood to absorb moisture and expand slightly, while air conditioning can dry it out, causing minor shifts. Check and retighten all cam locks, screws, and brackets every few months to ensure the shelf remains rigid, safe, and stable for years to come.
Frequently Asked Questions (FAQ)
Do I need to anchor a modular shelf to the wall?
Yes, wall anchoring is highly recommended for safety, especially for any unit that is tall, narrow, or top-heavy. As a general safety guideline, any shelving unit taller than 75 cm, or any unit with a height-to-depth ratio exceeding 3:1, should be securely anchored to the wall. This precaution is critical in households with young children or pets, who may attempt to climb or pull on the shelves, creating a severe tipping hazard.
Can I reconfigure the modular shelves after assembly?
You can easily reconfigure adjustable shelves that rest on metal pins or slide into pre-designed slots without affecting the unit’s stability. However, you should avoid frequently disassembling and reassembling the main structural frame. The joint systems used in modular furniture, such as cam locks and wooden dowels, are designed to bite into engineered wood like MDF or particleboard. Repeatedly taking these joints apart can wear out the pre-drilled holes, leading to loose connections and a permanently weakened structure.

Community discussion
Share your experience or ask a question. Comments are reviewed before publication.