
Assembling a flat-pack rack storage cabinet is a highly practical way to maximize vertical space in your home, whether you are organizing a utility yard, a bomb shelter, or a home office. While these modular systems are designed for straightforward DIY installation, a rushed assembly can lead to a misaligned frame, unstable shelves, or a unit that does not fit its intended space. Successfully building your rack storage cabinet requires a systematic approach: preparing a clear workspace, verifying your floor and ceiling dimensions, and assembling the components from the ground up. By following a logical sequence and checking your alignment at every stage, you can construct a sturdy, level storage solution that safely holds your belongings without the need for professional installation services.
Pre-Assembly Preparation and Space Checks
Before unboxing your new rack storage cabinet, verify that the physical path from your delivery point to the final installation site is completely clear. In high-rise apartments or homes with tight entryways, measure your doorway widths and lift dimensions to ensure the flat-pack boxes can be easily transported. Once in the designated room, clear a flat, clean assembly area on the floor. This workspace should be large enough to lay out the tallest vertical posts and all horizontal shelf panels side by side without crowding. Working on a cramped floor increases the risk of scratching your home’s flooring or damaging the cabinet’s finish during the build.
Next, take precise measurements of the installation site. Use a tape measure to verify that the ceiling height accommodates the fully assembled height of the rack storage cabinet, leaving at least a few centimeters of clearance at the top. It is equally important to check the levelness of the floor. Many utility yards, service balconies, and storerooms feature slightly sloped floors designed for water drainage. Identifying these slopes early allows you to plan for leveling adjustments later in the assembly process.
Products mentioned in this guide
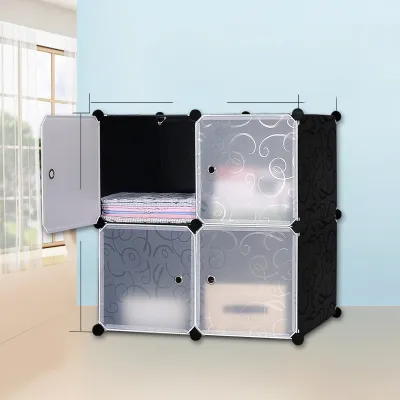

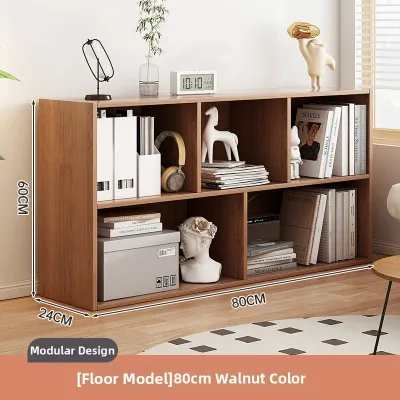
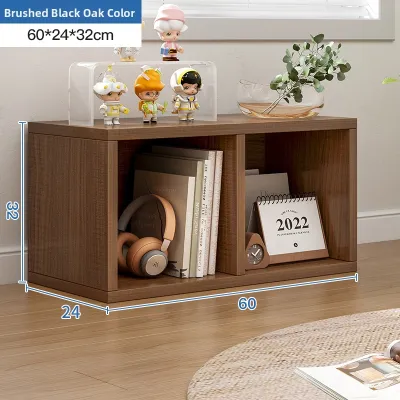
Prices are valid at publication and may change. Please refer to the product page for the latest price.
Finalizing your preparation, carefully unpack all components and group similar parts together. Lay out the vertical uprights, horizontal beams, shelf panels, and all fastening hardware such as screws, bolts, clips, or pins. Cross-reference every item with the parts inventory list in the manufacturer’s instruction manual. If any structural components are missing or visibly bent from transit, pause the assembly immediately and contact the manufacturer or retailer for replacements, as using compromised parts can severely undermine the structural integrity of the completed rack.
Essential Tools and Component Inventory
Having the correct tools on hand before you begin prevents unnecessary interruptions and protects the modular components from damage. Most modular rack storage cabinets require only a few basic hand tools for assembly. A high-quality rubber mallet is indispensable for boltless or rivet-style racks, as it allows you to tap components firmly into place without denting the metal or chipping the protective paint. You will also want an adjustable wrench or a socket set if your model uses traditional nut-and-bolt fasteners, along with a reliable spirit level to monitor alignment throughout the build.

While it may be tempting to speed up the process using a power drill or an electric impact driver, doing so requires extreme caution. High-torque power tools can easily strip threads, warp thin metal brackets, or over-tighten fasteners, which can crack plastic shelf clips or bend the structural frames. If you choose to use a power drill, set it to a very low torque limit and finish the final tightening passes by hand. Always refer to the manufacturer’s guidelines, as some brands explicitly forbid the use of power tools to maintain warranty coverage.
Personal safety should also be a priority during a DIY furniture build. Metal shelving components, particularly those made of steel or heavy-duty aluminum, can have sharp edges or burrs along the pre-drilled holes and corners. Wearing a pair of fitted work gloves protects your hands from cuts and pinches while handling these parts. Additionally, wearing safety glasses is highly recommended when using a rubber mallet to tap joints together, as small metal fragments or plastic clips can occasionally splinter or fly off under impact.
Step-by-Step Assembly Process
Building a modular rack storage cabinet is a progressive process that relies on a stable foundation. The general workflow begins with constructing the base frame, erecting the vertical uprights, installing the intermediate shelves, and finishing with the top tier before performing a final structural check. One crucial rule of thumb for any flat-pack assembly is to leave all fasteners slightly loose during the initial stages. Keeping the bolts or clips finger-tight allows the frame to flex slightly, making it much easier to align subsequent parts and ensure the entire structure is perfectly squared before the final tightening pass.
Building the Base and Vertical Frames
The foundation of your rack storage cabinet dictates the stability of the entire unit. Begin by identifying the bottom-most sections of the vertical posts and attaching any protective plastic end caps or adjustable leveling feet included in the kit. If your rack uses a boltless rivet system, align the horizontal base beams with the lowest keyhole slots on the upright posts. Insert the base pins or clips into these slots, ensuring they slide down fully into the narrow neck of the keyholes. For bolted systems, thread the bolts through the pre-drilled holes at the base, adding washers where specified by the manual to distribute the clamping force evenly.
Once the base perimeter is assembled, use your spirit level to check that the bottom frame is square. You can verify squareness by measuring diagonally from corner to corner in both directions; if the two diagonal measurements are equal, your base is perfectly square. If they differ, gently nudge the corners until the measurements match. Ensuring a square base at this stage prevents the vertical posts from twisting as you build upward, which would otherwise make installing the upper shelves extremely difficult.
As you begin extending the vertical frames upward, pay close attention to the orientation of the posts. Many modular racks feature uprights with directional slots—often shaped like teardrops or tapered channels—that must point downward to lock the shelf supports securely. Double-check that all vertical posts are oriented in the same direction and that the finished, painted sides face outward. Reversing a single post early on will force you to disassemble the entire frame later when you find that a shelf bracket cannot be inserted.
Attaching Shelves and Cross-Braces
With the base and vertical uprights securely positioned, you can begin installing the intermediate shelves. Start from the lowest shelf level and work your way upward to keep the center of gravity low during assembly. Slide the shelf support brackets or clips into the designated slots on the vertical posts. If your cabinet uses a boltless design, use your rubber mallet to tap the shelf supports downward until they are firmly seated in their slots. Always strike the components gently near the joints rather than in the middle of a long beam to avoid bending or warping the metal.
If your modular rack storage cabinet includes diagonal or horizontal cross-braces, install them alongside the shelves. These braces are critical for lateral stability, preventing the cabinet from swaying or leaning when loaded. Align the braces with the mounting points on the back or sides of the frame and secure them with the provided hardware. Even if you do not plan to load the cabinet to its maximum capacity, never omit these braces, as they provide the structural rigidity necessary to keep the unit upright over time.
Before locking the shelves permanently into place, verify that the vertical spacing between each tier matches your storage needs. It is far easier to adjust the shelf heights now than after the cabinet is fully assembled and loaded. Measure the height of the tallest items you plan to store—such as plastic storage tubs, storage boxes, or household appliances—and position the shelf supports accordingly, ensuring you leave sufficient clearance to slide the items in and out easily.
Securing the Top Tier and Final Tightening
The final phase of the physical build involves installing the top shelf or top cap of the rack storage cabinet. Position the top shelf brackets flush with the upper ends of the vertical posts. If your model features protective top caps or decorative trim, fit them over the exposed metal edges of the uprights. This not only gives the cabinet a finished, professional appearance but also covers any sharp metal corners that could cause scratches or snag clothing.
Once all shelves, brackets, and braces are in place, perform a systematic tightening pass across the entire structure. Starting from the bottom base frame and working your way up to the top tier, tighten every bolt, screw, and locking clip securely. If you are using hand tools, apply firm pressure but avoid over-tightening, which can deform the metal frames or strip the threads. For boltless systems, give each shelf joint a final, firm tap with the rubber mallet to ensure all rivets are completely bottomed out in their slots.
After tightening, grasp the middle shelves of the empty cabinet and gently shake the unit to check for any residual wobble. If you notice any movement, inspect the joints to identify where the play is coming from. A loose connection or an unseated clip is usually the culprit. Make the necessary micro-adjustments to the fasteners or tap the loose joints again until the entire frame feels rigid and solid.
Stability Checks and Safety Anchoring
A fully assembled rack storage cabinet must stand perfectly plumb and level to function safely. Place your spirit level vertically against the front and side of each upright post to check that the unit is plumb. Then, place the level horizontally across each shelf, checking both front-to-back and side-to-side alignment. If your floor is uneven, as is common in utility areas or older homes, use the cabinet’s built-in adjustable leveling feet to raise or lower individual corners until the spirit level indicates the unit is perfectly balanced. If your model does not have adjustable feet, you may need to use durable, non-slip shims designed specifically for furniture leveling.
Even a perfectly leveled rack storage cabinet can pose a serious tip-over hazard if it is tall, narrow, or loaded unevenly. As a general safety rule, any storage cabinet with a high height-to-depth ratio should be securely anchored to the wall. Refer to the manufacturer’s safety guidelines to determine if wall-anchoring is mandatory for your specific model. Most heavy-duty racks include wall-mounting brackets or safety straps in the hardware kit.
To install the wall anchors, position the cabinet in its final location and mark the bracket mounting holes on the wall. Move the cabinet aside and drill the pilot holes, ensuring you use the correct wall plugs or anchors for your specific wall type—such as expansion plugs for solid concrete walls or toggle bolts for drywall. Secure the brackets to the wall, slide the cabinet back into place, and connect the brackets to the cabinet frame. This simple step prevents accidental tip-overs, protecting both your household and your stored items.
Common Assembly Mistakes and Troubleshooting
Even with careful preparation, DIY assembly can occasionally run into minor hurdles. One of the most common issues is dealing with misaligned shelf clips or brackets that refuse to slide into the vertical post slots. This usually happens when the vertical posts are pulled too tight or are slightly out of square. To resolve this, slightly loosen the fasteners on the adjacent horizontal beams to relieve the tension. This small amount of play should allow you to align and insert the stubborn clips easily, after which you can re-tighten all the hardware.
If you find that the completed frame is leaning to one side, the issue typically stems from an unsquared base or misaligned diagonal braces. To correct a leaning frame, loosen the bolts on the diagonal braces and the base frame slightly. Use your spirit level to pull the cabinet back into a perfectly vertical position, and then re-tighten the braces while holding the frame plumb. If the lean persists, double-check that the floor itself is level and adjust the leveling feet accordingly.
In some cases, you may encounter bolt holes that consistently fail to line up, even after loosening adjacent parts. If you find yourself forcing a bolt through a misaligned hole or if a component seems manufactured incorrectly, stop immediately. Forcing fasteners can strip the threads or permanently warp the metal frame, rendering the unit unsafe. Check the manual once more to ensure you have not swapped two similar-looking parts, and if the issue remains, consult the manufacturer’s customer service for guidance or replacement components.
Frequently Asked Questions (FAQ)
How do I determine the safe weight limit for each shelf?
To find the safe weight capacity of your rack storage cabinet, always consult the product label, the packaging, or the official manufacturer’s manual. These documents specify the maximum weight limit per shelf as well as the total weight capacity for the entire unit. It is crucial to remember that these ratings assume the weight is distributed evenly across the entire surface of the shelf. To maintain a low center of gravity and maximize stability, always place your heaviest items on the bottom shelves and lighter items on the upper tiers.
Can I disassemble and move the rack later without damaging it?
Yes, modular rack storage cabinets are designed for easy disassembly and reconfiguration. To move the unit safely, use the same hand tools you used for assembly, working in the exact reverse order—starting from the top shelf and working down to the base. Avoid using excessive force or prying tools that can bend the metal tabs or scratch the protective finish. Before reassembling the rack in its new location, inspect all hardware and replace any deformed clips, worn washers, or damaged locking pins to ensure the rebuilt cabinet remains completely secure.

Community discussion
Share your experience or ask a question. Comments are reviewed before publication.