
Assembling a modular heavy duty rack is a highly manageable DIY project that transforms cluttered storage areas into organized, efficient spaces. By following a systematic, bottom-up approach, you can construct a stable and secure shelving system without paying for professional installation services. The key to success lies in careful preparation, checking your space constraints, and ensuring every connection is fully aligned before final tightening.
Whether you are setting up storage in a home utility room, a garage, or a commercial storeroom, modular racks offer the flexibility to adjust shelf heights as your storage needs evolve. Taking the time to assemble the unit correctly ensures it remains safe under heavy loads and serves you reliably for years. This guide walks you through the entire process, from unboxing and checking components to the final safety checks and load testing.
Pre-Assembly Preparation and Space Checks
Before opening any boxes, you must thoroughly evaluate the physical space where the heavy duty rack will stand. Use a high-quality measuring tape to verify the width, depth, and height of the designated area. Remember to account for overhead obstructions such as ceiling beams, light fixtures, water pipes, or air conditioning ducts that might limit your vertical clearance.
Products mentioned in this guide
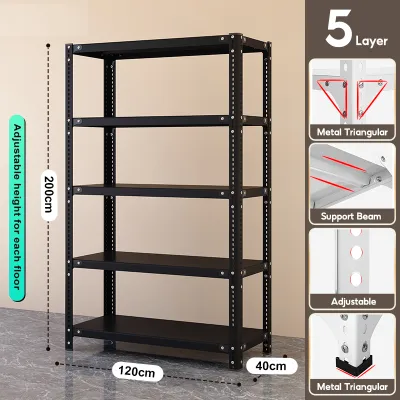
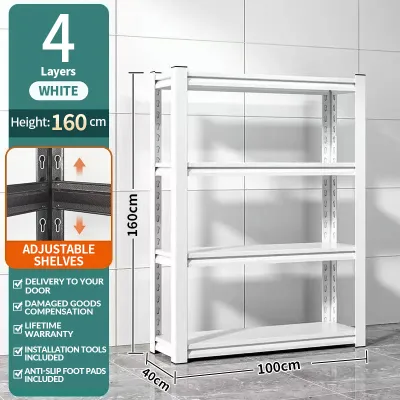
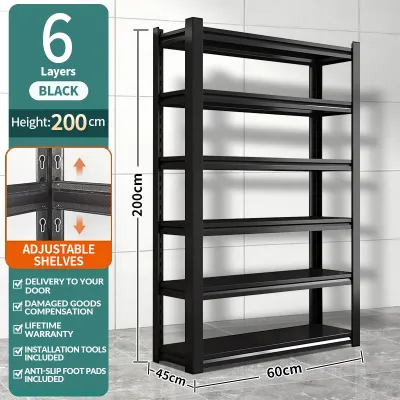
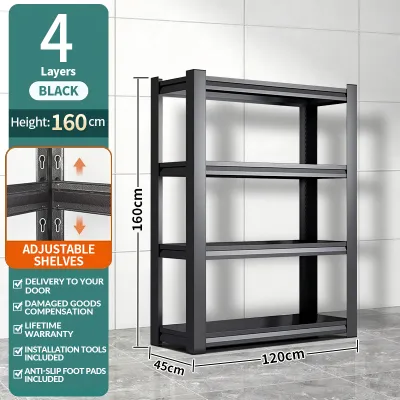
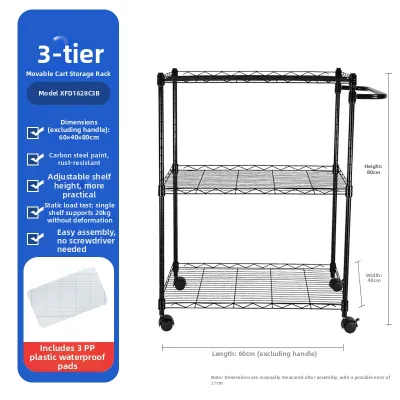
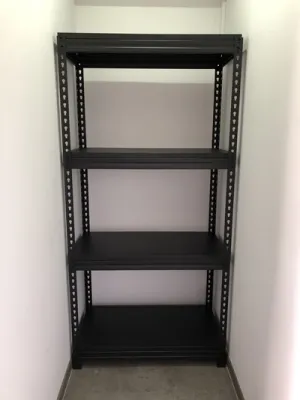
Prices are valid at publication and may change. Please refer to the product page for the latest price.
Equally important is checking the access path to your assembly site. Ensure that doorways, hallways, and lift cabins are wide enough to transport the long uprights and heavy shelf panels. Maneuvering long metal beams around sharp corners can be challenging, so planning your route beforehand prevents unexpected blockages.
Next, inspect the floor surface where the rack will rest. The floor must be structurally sound and capable of supporting both the weight of the rack and the heavy items you plan to store on it. Use a spirit level to check for any slope or unevenness in the floor, as an unlevel surface can cause the rack to lean, compromising its structural integrity.
Once the space is verified, clear a large, flat working area nearby to lay out all the parts. Unbox the packaging carefully to avoid scratching the metal finish, and perform a complete inventory check. Group similar items together—such as upright frames, horizontal crossbeams, shelf support bars, shelf panels, and hardware packets—and cross-reference them with the manufacturer’s packing list.
Essential Tools and Safety Gear
Having the correct tools on hand before you begin prevents unnecessary interruptions and ensures a secure assembly. While many modular racks feature boltless, slot-in designs, you will still need a few basic hand tools to complete the job. A high-quality rubber mallet is indispensable for tapping components firmly into place without denting the metal or chipping the protective powder coating.

For bolted modular systems, gather a set of adjustable wrenches or a socket wrench set that matches the fastener sizes specified in your manual. A spirit level is absolutely essential for verifying that the uprights are perfectly vertical and the shelves are completely horizontal throughout the assembly process. Keep a measuring tape nearby to double-check shelf spacing and alignment.
Personal safety should always be your top priority when handling heavy metal components. Wear heavy-duty work gloves to protect your hands from sharp metal edges, burrs, or pinch points during assembly. Safety glasses are also highly recommended, especially when tapping parts together with a mallet or working beneath overhead components.
Always consult the specific product manual provided by the manufacturer before starting. Some heavy duty racks require specialized tools, specific torque values for fasteners, or unique locking pins that must be installed in a particular sequence. Following these manufacturer-specific instructions is vital to maintaining the rack’s rated load capacity.
Step-by-Step Assembly Instructions
Assembling a modular heavy duty rack requires a logical, step-by-step workflow to ensure the structure remains stable and square. The general sequence begins with forming the base, followed by raising the vertical uprights, connecting the horizontal crossbeams, and finally placing the shelf panels. Rushing this sequence or skipping steps can lead to a misaligned frame that is difficult to correct later.
One of the most important rules of rack assembly is to leave all bolts and fasteners slightly loose during the initial stages. Keeping the connections finger-tight allows the frame to flex slightly, making it much easier to align subsequent parts and square the entire structure. Only after the entire frame is fully assembled and verified as square should you systematically tighten all the hardware.
Incorporate safety pauses into your workflow at key transition points. If you find that a beam or shelf panel does not fit into place easily, stop immediately rather than forcing it. Forcing misaligned parts can bend the metal tabs, strip the threads of bolts, or damage the upright slots, permanently weakening the structural integrity of your rack.
Building the Base and Uprights
Begin by assembling the bottom-most section of the rack, which forms the foundation for the entire structure. Attach the plastic or rubber base plates to the bottom of each vertical upright to protect your flooring from scratches and distribute the weight evenly. If your rack uses heavy-duty steel base plates designed for floor anchoring, position them carefully according to your layout plan.
Connect the lowest horizontal beams or side braces to the first pair of uprights to create a stable end frame. Repeat this process for the second pair of uprights so that you have two independent vertical end frames ready to be joined. Having a helper hold the uprights steady during this step is highly beneficial, but you can also prop them against a wall if assembling alone.
Use your spirit level to check that each upright is perfectly plumb—meaning completely vertical—both from front to back and side to side. If your rack features a boltless slot-in design, use a rubber mallet to gently tap the horizontal beams down into the keyhole slots of the uprights. Ensure the tabs are fully seated at the bottom of the slots to guarantee a secure, rigid connection.
Installing the Shelves and Crossbeams
With the basic end frames standing, you can begin connecting them with the main horizontal crossbeams. To ensure uniform shelf placement, use your measuring tape to measure and mark the desired heights on all four uprights before attaching the beams. Keeping the shelf heights consistent across all corners prevents uneven loading and structural twisting.
Attach the front and rear crossbeams at your marked heights, starting from the lowest shelf level and working your way upward. Most heavy duty racks utilize specific locking mechanisms, such as safety pins, clips, or bolt patterns, to secure the crossbeams to the uprights. Always install these safety devices immediately after positioning each beam to prevent accidental dislodgement during the rest of the assembly.
Once the horizontal beam framework is secure, carefully lower the shelf panels into place on each level. Depending on your rack type, these panels may be wire decking, particle board, or solid steel sheets. Ensure each panel sits completely flush within the step of the crossbeams and does not wobble or slide, as a loose shelf panel poses a severe safety hazard when loaded.
Securing and Finalizing the Structure
Now that the entire frame is assembled and the shelf panels are in place, it is time to secure and finalize the structure. Go through the entire rack systematically, using your wrenches or socket set to tighten every bolt and fastener. If the manufacturer specifies a particular torque value in the manual, use a torque wrench to ensure the fasteners are tightened to the exact engineering standard.
Verify the overall squareness of the rack by measuring the diagonal distances between opposite corners of the frame. Measure from the top-left corner to the bottom-right corner, and then from the top-right corner to the bottom-left corner. If the two diagonal measurements are equal, your rack is perfectly square; if they differ, loosen the bolts slightly, adjust the frame, and retighten.
For racks that are tall, narrow, or intended to carry exceptionally heavy loads, installing anti-tip stabilization is a critical safety step. Use the manufacturer-provided wall anchors or floor bolts to secure the rack to a solid concrete wall or floor. This anchoring prevents the rack from tipping forward if a heavy load is placed unevenly or if someone accidentally pulls on the frame.
Common Assembly Mistakes and How to Avoid Them
Avoiding common DIY mistakes during assembly saves time and prevents potential structural failures down the road. The most frequent error is fully tightening the bolts too early in the process. When fasteners are tightened prematurely, the frame loses the flexibility needed to align the remaining beams, often resulting in a twisted rack where the shelf panels will not fit flush.
Another common mistake is forcing misaligned components together using excessive force. If a tab does not slide easily into a slot, or if a bolt does not thread smoothly, it usually indicates that the frame is out of alignment or the part is oriented incorrectly. Take a step back, check the levelness of your uprights, and adjust the frame gently until the parts slide together naturally.
Ignoring weight distribution guidelines is a dangerous mistake that can lead to catastrophic shelf collapse. Always place the heaviest items on the bottom shelves to maintain a low center of gravity, and distribute the weight evenly across the entire surface of each shelf. Never exceed the manufacturer’s maximum load capacity per shelf, and avoid concentrating heavy weights in a single spot.
Post-Assembly Verification and Load Testing
Before placing your rack into full service, conduct a thorough visual and physical inspection to verify its stability. Walk around the unit and check every joint, ensuring all safety pins are locked, all bolts are tight, and the shelf panels are seated flush. Give the rack a gentle shake from the side to check for any wobbling, swaying, or loose connections that need adjustment.
Perform a gradual load test to safely verify the rack’s load-bearing capacity before loading it with valuable or fragile items. Begin by placing a few known, evenly distributed weights on the bottom shelf, observing how the structure responds. Slowly add weight to the upper shelves over several hours, checking for any signs of bowing, bending, or shifting in the beams and uprights.
If you observe any unusual bowing in the metal beams, hear cracking sounds, or notice the rack leaning under load, stop using it immediately. Unload the rack carefully, starting from the top shelf, and recheck all connections and levelness. If the issue persists, do not attempt to modify the rack yourself; instead, consult the manufacturer or a qualified professional for guidance.
Frequently Asked Questions (FAQ)
Can I assemble a heavy duty rack alone?
While it is physically possible to assemble smaller modular racks alone, having a second person is highly recommended for larger or taller units. Holding heavy, long metal uprights and horizontal beams in place while trying to secure fasteners or tap them with a mallet can be extremely challenging and increases the risk of injury or component damage. If you must assemble the rack alone, use temporary supports, clamps, or prop the uprights securely against a wall to keep them stable during the initial base assembly.
Do I need to anchor my heavy duty rack to the wall?
Anchoring your heavy duty rack to the wall or floor is highly recommended, especially if the rack has a high height-to-depth ratio, is placed on an uneven floor, or is loaded with heavy items near the top. Anchoring provides essential anti-tip safety, preventing the structure from falling forward during loading, unloading, or accidental impacts. Always check your manufacturer’s manual and local building guidelines to determine the specific anchoring hardware and methods required for your wall type, such as concrete, brick, or drywall.

Community discussion
Share your experience or ask a question. Comments are reviewed before publication.