
Assembling a modular glass book display is an effective way to showcase your literary collection while maintaining an airy, open feel in your living space. This is especially valuable in modern apartments where maximizing natural light and visual space is a priority. By combining a sturdy modular frame with tempered glass shelves, you can create a customized storage solution that fits your specific layout. The process requires a methodical approach, starting with careful space measurements and progressing through frame assembly, secure glass installation, and proper weight distribution. With the right preparation and a few basic tools, you can safely construct a stable, elegant display unit that enhances your home organization.
Whether your modular components cost S$100 or S$300, taking the time to assemble them correctly ensures the safety of your books and your household. This guide walks you through the essential steps to build, stabilize, and style your glass shelving unit without risking damage to the delicate glass panels or the modular frame.
Pre-Assembly Preparation and Space Checks
Before unboxing your modular components, measure the designated area. Check the finished dimensions of the modular shelving unit against your available floor space and ceiling height. Ensure there is ample clearance from ceiling fans, light fixtures, and air conditioning units to prevent accidental contact during and after assembly.
Products mentioned in this guide
![[Cozy ]Bookcase Glass Door Dust-Proof Figurine Display Cabinet Wall Mounted Storage Cabinet Display Shelf Bookshelf](https://img.lazcdn.com/g/p/e1a9f82d1777b7c93fb62593f799f528.jpg_webp_400x400q80.jpg_.webp)
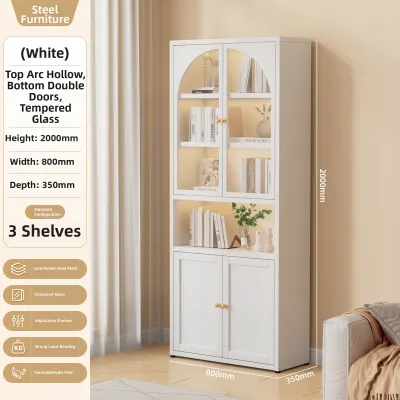



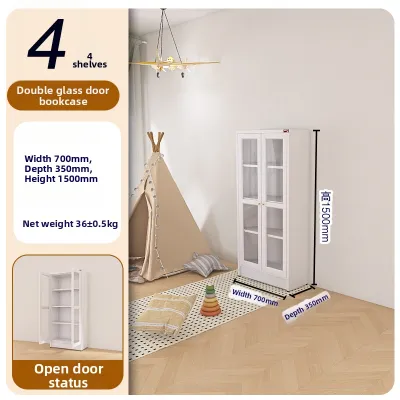
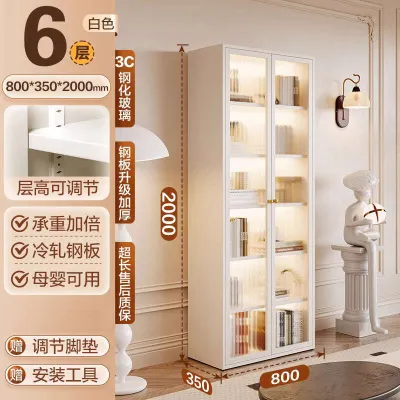

Prices are valid at publication and may change. Please refer to the product page for the latest price.
Consider the delivery pathway. If you live in a high-rise condominium or HDB flat, verify that the packaged boxes can fit into the passenger lift and pass through your front doorway and narrow hallways. Moving heavy glass panels and long metal frame pieces through tight corners requires pre-planned clearance to avoid chips or cracks.
Prepare the assembly zone. Clear a flat, spacious area on the floor. Lay down a thick protective barrier, such as a clean rug, yoga mat, or the flattened cardboard packaging from the product box. This prevents the metal frame components from scratching your flooring and, more importantly, protects the glass panels from chipping or shattering against hard surfaces like ceramic tiles or polished concrete.
Unpack and inventory all components. Group the modular frame parts, glass panels, connector joints, screws, bolts, and rubber or silicone anti-slip pads. Cross-reference every item with the manufacturer’s parts list. If any hardware is missing or a glass panel shows signs of hairline cracks or chipped edges, pause the assembly and contact the supplier immediately.
Gather your tools. Most modular systems include basic assembly tools like an Allen key, but you will also want a manual screwdriver that matches the screw heads, a spirit level to ensure straightness, and a pair of clean, non-slip work gloves for handling the glass safely.
Step-by-Step Frame Assembly
Begin by constructing the base section of the modular frame. The base serves as the foundation for the entire structure, so it must be perfectly square and stable. Lay out the bottom rails and corner connectors on your padded work surface. Fasten the joints together using the provided hardware, tightening them until they are snug but not completely locked. Leaving a small amount of play in the screws allows for minor adjustments as you build upward.

Once the base is secure, attach the vertical uprights. Slide or screw the vertical supports into the base connectors, working from the bottom up. If your modular system uses interlocking poles or tension-based brackets, ensure each segment is fully seated in its joint before moving to the next level.
Install the horizontal crossbars and shelf supports. These horizontal elements provide lateral stability and will eventually hold the glass shelves. Align them carefully with the pre-drilled holes or mounting slots on the vertical uprights.
Use a spirit level frequently throughout this stage. Place the level on the base, the vertical uprights, and each horizontal tier to verify that the frame is plumb (perfectly vertical) and level (perfectly horizontal). If you notice any tilt, gently nudge the frame into alignment.
Tighten the structural bolts in a diagonal or alternating pattern once the entire frame is assembled and aligned. Avoid overtightening, as this can strip the threads of modular aluminum or steel connectors. If a screw does not line up naturally with a pre-drilled hole, do not force it. Loosen the surrounding joints slightly to allow the frame to shift, align the stubborn screw, and then retighten the entire section systematically.
Safely Installing the Glass Shelves
Handling glass panels requires extreme care and focus. Before picking up a panel, ensure your hands are clean and dry, or wear clean rubber-coated grip gloves to prevent slipping. Always lift the glass by supporting its weight evenly from the bottom edges rather than gripping it by the corners, which are the most vulnerable points for chipping.
Prepare the frame supports before bringing the glass to the unit. Install the manufacturer-specified support pins, brackets, or adhesive anti-slip rubber pads onto the horizontal frame rails. These pads are critical; they prevent direct glass-to-metal contact, which can cause localized stress points and lead to sudden shattering.
Gently lower the glass panel onto the supports. Hold the panel horizontally and lower it slowly, keeping it level. Ensure that the glass rests squarely on all four support pads simultaneously. Never let one corner drop hard onto a metal bracket.
Verify the fit and clearance. Once the glass is in place, check that there is a small, uniform gap between the edges of the glass and the metal frame. The glass should not tightly wedge against the vertical uprights, as thermal expansion or minor frame movement could put pressure on the edges.
Test for stability. Lightly press down on each corner of the installed glass panel. If the panel rocks, wobbles, or makes a clicking sound against the frame, remove the glass and check if the support brackets are level or if the rubber pads are seated correctly. Adjust the supports until the glass sits completely flat and motionless.
Stabilizing and Securing the Unit
Even a perfectly assembled frame can wobble if your floor is slightly uneven. Most modular shelving units feature adjustable leveling feet at the bottom of the uprights. Place your spirit level on the top shelf of the frame and adjust these feet—screwing them in or out—until the unit is perfectly level from front to back and side to side.
Assess the necessity of wall anchoring. Because glass book displays carry significant weight and have a high center of gravity when loaded, securing them to the wall is highly recommended to prevent accidental tipping. This is especially crucial if you have children or pets, or if the unit is tall and narrow.
Install the anti-tip wall anchors according to the manufacturer’s instructions. This typically involves securing a bracket or strap to the top rear of the frame and anchoring it directly into a wall stud or solid masonry. In Singapore, many homes feature concrete or brick walls behind plaster, which require specific masonry drill bits and wall plugs rather than standard drywall anchors.
Perform a gentle stability check. Once the leveling feet are adjusted and the wall anchors are secured, apply light pressure to the upper corners of the frame. The unit should feel rigid and show no signs of swaying, shifting, or pulling away from the wall.
If you are unsure about your wall material or do not have the appropriate tools to drill into concrete, consult a qualified local handyman or professional installer. Ensuring the unit is anchored correctly is vital for long-term safety.
Arranging Books for Weight Distribution and Aesthetics
Before placing any books on your newly assembled display, check the manufacturer’s specifications for the maximum weight capacity of each individual glass shelf, as well as the total weight limit for the entire unit. Never exceed these limits, as overloaded glass can fail under sustained stress.
Plan your layout to maintain a low center of gravity. Place your heaviest items—such as large hardcovers, thick reference books, binders, or heavy decorative objects—on the bottom shelves. This anchors the unit and significantly reduces the risk of tipping.
Distribute the weight evenly across each shelf. Avoid stacking a dense pile of heavy books right in the middle of a glass panel, as this concentrates the stress at the weakest point. Instead, spread the books out across the shelf, or place the heaviest volumes near the outer edges where the glass is directly supported by the metal frame.
Use lightweight decorative items, paperbacks, or small framed photos on the upper shelves. This creates a balanced, visually appealing look that does not overload the top of the structure.
Incorporate sturdy bookends to keep your books upright. Sliding or leaning books can exert lateral force against the vertical frame or the glass panels, which can destabilize the arrangement. Ensure the bookends have non-slip rubber bases to prevent them from sliding on the smooth glass surface.
Common Assembly Mistakes to Avoid
One of the most common errors is overtightening the assembly hardware. While you want the frame to be rigid, over-torquing screws can strip the threads of modular connectors or put undue stress on adjacent glass panels if the frame warps slightly. Tighten screws until they are firm, but do not force them past their natural stopping point.
Never skip the installation of rubber grommets, silicone bumpers, or anti-slip pads. Direct glass-to-metal contact is a primary cause of glass breakage, as even minor vibrations from footsteps or closing doors can cause the metal to scratch or chip the glass, leading to structural failure over time.
Do not force misaligned components together. If a shelf bracket or vertical pole does not fit easily, forcing it will warp the frame, making it impossible to level and putting uneven pressure on the glass shelves. Always loosen nearby joints, realign the parts, and then tighten them back up.
Lastly, avoid the temptation to overload the top shelves for aesthetic reasons. Keep a strict eye on weight limits and prioritize structural safety over styling.
Frequently Asked Questions (FAQ)
Can I add extra glass shelves to my modular unit later?
Whether you can expand your display depends on the design of your modular frame. Check if the vertical uprights feature pre-drilled mounting holes or adjustable bracket tracks at different heights. You must also verify that the overall weight capacity of the frame can handle the additional weight of another glass panel plus the books you plan to place on it. If you decide to add a shelf, ensure the new glass matches the exact thickness, tempered safety rating, and dimensions specified by the original manufacturer to maintain structural safety.
How do I clean the glass shelves without damaging the frame?
To clean your glass book display safely, first remove all books and decorative items from the shelf you plan to clean. This prevents accidental scratches or moisture damage to your books. Use a soft, lint-free microfiber cloth and a mild glass cleaner. Instead of spraying the cleaner directly onto the glass—which can cause liquid to run down into the metal joints or pool under the rubber support pads—spray a small amount onto the cloth first, then wipe the glass. Avoid using abrasive scrubbing pads, steel wool, or harsh chemical solvents, as these can scratch the glass and strip the protective finish or paint from the modular metal frame.

Community discussion
Share your experience or ask a question. Comments are reviewed before publication.