
A standard thin shoe cabinet typically holds between 6 and 18 pairs of shoes, depending on the cabinet’s depth, door mechanism, and your shoe sizes. While manufacturers often advertise maximum capacities based on small, flat footwear like sandals, real-world capacity is usually lower when storing bulky sneakers or heels. To avoid purchasing a cabinet that cannot fit your daily footwear, you must look past marketing claims and evaluate the internal dimensions against your household’s specific collection.
Understanding Thin Cabinet Capacity Beyond Advertised Numbers
When browsing for entryway furniture, you will frequently encounter slim shoe cabinets boasting capacities of 12, 18, or even 24 pairs. However, these advertised numbers are almost always calculated under ideal, theoretical conditions. Manufacturers typically base their estimates on standard flat shoes, such as canvas slip-ons or flip-flops, neatly aligned without any overlapping edges. In a real household, where a single shelf must accommodate a mix of running shoes, leather brogues, and ankle boots, the actual capacity can drop by thirty to fifty percent.
The definition of a ‘thin’ cabinet generally refers to an external depth ranging from 15 to 24 centimetres. Because this depth is shorter than the length of an average adult shoe, these cabinets rely on clever internal configurations, such as angled shelves or tilt-out compartments, to store footwear vertically or diagonally. This means the external depth does not directly translate to horizontal shelf space. A cabinet that is 17 centimetres deep might look incredibly sleek against your wall, but its internal usable depth will be further restricted by the thickness of the cabinet backboard, the front doors, and the internal pivoting hardware.
Products mentioned in this guide
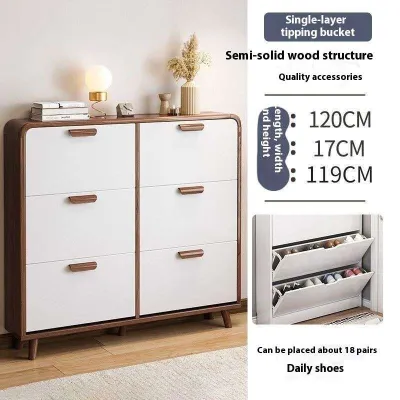
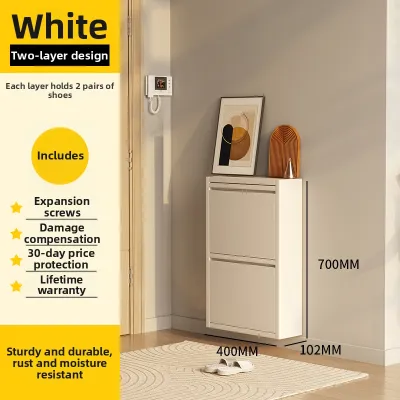
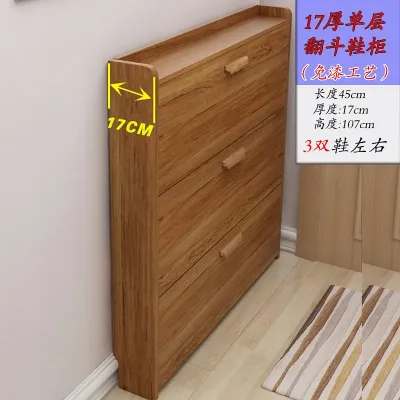
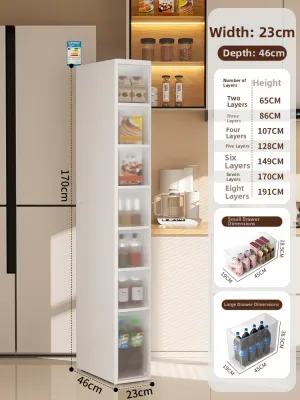
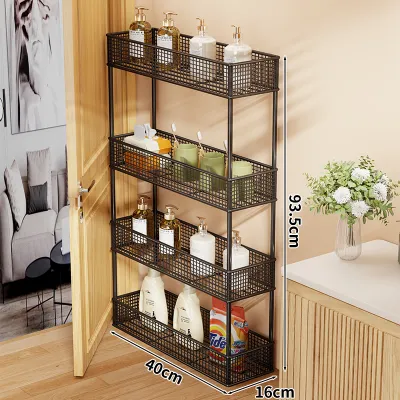
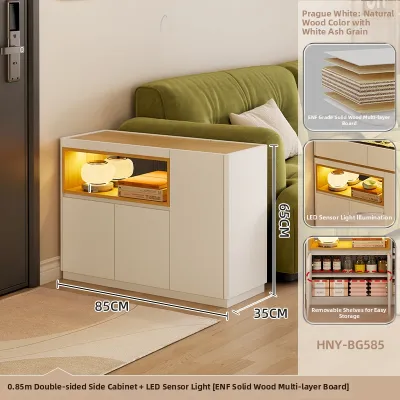
Prices are valid at publication and may change. Please refer to the product page for the latest price.
Before making a purchase, it is essential to look for the manufacturer’s detailed technical drawings or specification sheets rather than relying on the promotional headline. Check the exact internal width, height, and depth of each compartment. Knowing these precise measurements allows you to compare them against the physical dimensions of your largest shoes, ensuring that the cabinet doors can actually close fully without crushing your footwear.
Variables That Dictate Real-World Shoe Storage Capacity
The physical characteristics of your footwear collection play the most significant role in determining how many pairs will fit into a slim cabinet. Bulky athletic sneakers with thick, cushioned soles and wide profiles take up significantly more physical volume than flat leather loafers or ballet flats. Similarly, high-heeled shoes require more vertical clearance, which can prevent the tilt-out drawers from closing if the internal compartments are too shallow. If your household consists primarily of larger shoe sizes, you may find that only two pairs fit onto a shelf designed to hold three standard-sized pairs.

Internal shelving design is another critical variable. Some thin cabinets feature fixed wooden tiers that cannot be adjusted or removed. While this design provides excellent structural stability, it forces you to conform to a single height limit across the entire cabinet. If you have a mix of flat sandals and mid-top sneakers, fixed shelves often result in wasted vertical space above the flats, while the sneakers must be squeezed in or stored elsewhere. On the other hand, cabinets with adjustable or removable dividers allow you to customize the internal layout, maximizing the usable volume by tailoring each compartment to specific shoe heights.
The choice of door mechanism also directly impacts the available storage space. Tilt-out drawers, which pivot outward on plastic or metal brackets, are highly popular for narrow entryways because they keep shoes completely hidden and upright when closed. However, the pivoting hardware and the curved plastic brackets on the sides of these drawers consume valuable internal width and depth. In contrast, slim cabinets with traditional hinged doors and static, angled shelves do not lose space to pivoting mechanisms, but they require more external clearance to open the doors fully.
Matching Cabinet Capacity to Your Household Shoe Collection
To find a cabinet that fits your home perfectly, start by conducting a thorough audit of your current shoe collection. Gather all the shoes currently cluttering your entryway and categorize them by type, size, and frequency of use. Count the exact number of pairs that must be stored at the main entrance of your home. It is also wise to factor in a buffer of two or three extra pairs to accommodate guest footwear or future purchases, preventing your new cabinet from becoming instantly overloaded.
Once you have your target pair count, translate this number into the required internal shelf space. Measure the width of your widest pairs of shoes when placed side-by-side. For example, if three pairs of your daily sneakers require a combined width of 70 centimetres, you will need a cabinet with an internal shelf width of at least that size. If the cabinet you are considering uses a multi-tier tilt-out system, check if the manufacturer specifies the maximum shoe length and height allowed for each tier. This step ensures that longer shoes, such as men’s formal shoes, will not get jammed when the drawer pivots shut.
For most households, a thin cabinet cannot hold every single pair of shoes owned by the family. The most practical strategy is to reserve the slim entryway cabinet exclusively for high-rotation, everyday footwear. Seasonal items, such as heavy boots, specialized sports shoes, or formal heels worn only on special occasions, should be stored in bedroom wardrobes, under-bed storage boxes, or utility closets. By prioritizing your daily footwear, you can opt for a much sleeker, thinner cabinet that keeps your entryway tidy without overwhelming the physical space.
Measuring Your Space and Verifying Installation Limits
Before purchasing any slim cabinet, you must carefully measure your intended installation area to ensure a safe and functional fit. Begin by measuring the available floor footprint, paying close attention to the width and depth of the wall space. You must also measure the clearance zone in front of the cabinet. For tilt-out models, calculate the distance the drawers extend outward when fully open. For hinged-door models, ensure there is enough room for the doors to swing open completely without blocking hallways, striking adjacent doors, or forcing you to step backward uncomfortably.
Another critical detail that is often overlooked is the presence of baseboards along the bottom of your walls. If your home has thick baseboards, a standard freestanding cabinet cannot sit flush against the wall, leaving a gap at the top that compromises stability and looks untidy. To solve this, look for thin cabinets designed with a baseboard cutout at the back, which allows the unit to slide completely flush against the wall. Additionally, check the flatness of your walls and floors using a spirit level; uneven surfaces can cause tall, narrow cabinets to wobble or lean forward.
Because thin cabinets have a very narrow base and a high center of gravity, they present a significant tip-over hazard, especially when the drawers are pulled open and loaded with heavy shoes. To ensure safety, almost all tall, slim shoe cabinets must be securely anchored to the wall. Before buying, verify the manufacturer’s anchoring requirements and check your wall type. Mounting a heavy cabinet into drywall requires specialized anchors, while concrete or brick walls require masonry plugs and a hammer drill. If you are renting your home and cannot drill into the walls, you may need to look for a lower, wider freestanding unit that does not require wall mounting for stability.
Common Sizing and Capacity Mistakes to Avoid
One of the most common mistakes homeowners make is assuming that all ‘thin’ shoe cabinets share identical internal dimensions and layouts. Two cabinets might look identical from the outside and share the same external depth of 18 centimetres, yet one may use a single-row tilt-out drawer while the other features a double-row compartment with a central divider. The double-row design might sound superior, but it often splits the internal depth into two very shallow slots, making it completely unsuitable for thicker athletic shoes or high-top sneakers. Always verify the internal configuration rather than assuming a higher tier count automatically means better storage for your specific shoes.
Another frequent error is failing to account for the physical path of movement in narrow hallways or entryways. A slim cabinet that is only 15 centimetres deep might fit perfectly when closed, but if opening the drawer requires an additional 30 centimetres of clearance, it can completely block the walkway. This can create a safety hazard during emergencies or make it difficult to carry groceries and packages into the home. Always map out the full extension path of the drawers on your floor using painter’s tape before finalizing your purchase.
Finally, avoid the temptation to squeeze extra pairs of shoes into a compartment beyond its intended capacity. Overloading a thin cabinet can put excessive pressure on the plastic pivot hinges, leading to premature wear, misalignment, or structural failure. Jamming shoes into tight spaces can also scuff delicate leather, deform the shape of your shoes, or cause the tilt-out drawers to jam shut. If you find yourself struggling to close the cabinet doors, it is a clear sign that you need to purge your collection, adjust the internal shelves, or relocate some pairs to another storage area in your home.
Frequently Asked Questions (FAQ)
Storing Boots and High Heels in Tilt-Out Thin Cabinets
Tilt-out thin cabinets are primarily designed for flat shoes, low-top sneakers, and sandals. Standard ankle boots, high heels, and mid-top shoes often exceed the vertical clearance of the pivoting drawers, preventing them from closing smoothly. If you need to store these types of footwear, look for slim cabinets that feature removable internal dividers or adjustable shelves. Removing the central divider within a tilt-out drawer typically doubles the vertical clearance, allowing you to store taller shoes at an angle, though this will reduce the overall pair capacity of that specific compartment.
Wall-Mounted vs. Freestanding Thin Cabinets: Capacity Differences
Wall-mounted thin cabinets are suspended off the floor, offering a floating aesthetic that makes small entryways feel more spacious and allows for easy floor cleaning underneath. However, because they rely entirely on wall anchors for support, they generally have lower weight capacities and smaller storage volumes than freestanding units that rest on the floor. When installing a wall-mounted cabinet, you must verify the load-bearing capacity of your wall and ensure the mounting brackets are secured directly into wall studs or solid masonry. Freestanding thin cabinets, while still requiring wall anchoring for safety, transfer their primary weight to the floor, allowing them to be taller and hold more pairs of heavy shoes.

Community discussion
Share your experience or ask a question. Comments are reviewed before publication.