
Adding internal drawer units is an effective way to maximize storage space in built-in wardrobes. If you are considering units featuring 3mm plywood—typically utilized for the drawer bottoms—determining whether they will fit your HDB built-in wardrobe requires careful planning. While these drawer units are highly versatile, their compatibility depends entirely on matching the precise internal dimensions of your wardrobe cavity with the external dimensions of the drawer frame, while accounting for the clearances required by the slide hardware.
Because HDB built-in wardrobes are often custom-built or tailored to specific flat layouts, there is no single “standard” internal dimension. Whether you live in a newly renovated Build-To-Order (BTO) flat or an older resale unit, the internal carcass dimensions will vary based on the carpenter’s design, the thickness of the carcass panels, and the overall layout of the room. To avoid purchasing a drawer unit that is too wide, too deep, or structurally incompatible, you must evaluate the wardrobe’s internal structure and understand how drawer hardware affects the space required.
Understanding HDB Built-in Wardrobe Cavities
HDB flats feature a wide variety of bedroom layouts, which directly influences the design and dimensions of built-in wardrobes. In newer BTO flats, wardrobes are often designed to fit specific recessed walls, whereas older resale flats might feature custom floor-to-ceiling carpentry. Because these installations are tailored to individual homes, the internal width, depth, and height of the wardrobe cavities are rarely uniform. A drawer unit that fits perfectly in one flat’s wardrobe might be too wide or too shallow for another, making a pre-purchase assessment essential.
Products mentioned in this guide

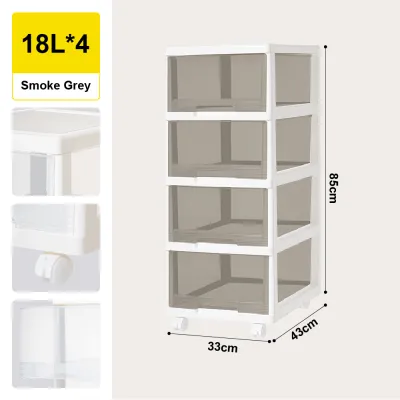
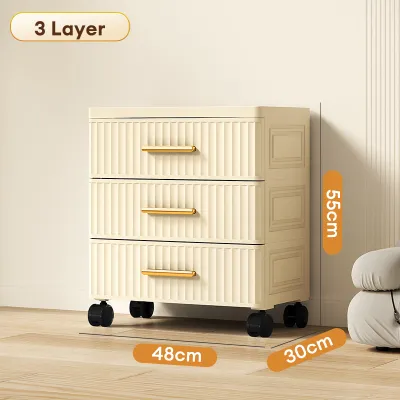
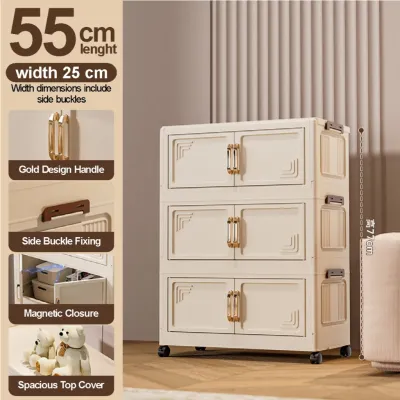
Prices are valid at publication and may change. Please refer to the product page for the latest price.
When examining your wardrobe cavity, you must look beyond the open space and identify potential structural obstructions. Built-in wardrobes often contain internal elements that reduce the actual usable width and depth. For instance, protruding door hinges, sliding door tracks, magnetic catches, and vertical partition frames can easily block a drawer from opening if the unit is installed too close to the front edge. Additionally, base skirting boards or decorative cornices at the bottom of the wardrobe can restrict the width at the floor level, preventing a drawer unit from sitting flush against the side panels.
Before adding any new storage units, evaluate the material and structural condition of the existing wardrobe carcass. Most built-in wardrobes in HDB flats are constructed from melamine-faced chipboard, blockboard, or plywood. Over time, exposure to humidity or heavy loads can cause shelves to sag or carcass panels to warp slightly. Installing a heavy drawer unit onto a compromised or sagging base panel can lead to operational failure or further structural damage. Inspect the joints, check for any signs of moisture damage, and ensure the carcass is sturdy enough to support both the weight of the new drawer unit and the items you plan to store inside it.
Evaluating 3mm Plywood Drawer Units and Clearances
When shopping for drawer units, it is easy to confuse the internal storage capacity with the external dimensions of the drawer box. The internal capacity refers to the usable space inside the drawer where you place your clothes. However, for installation purposes, you must focus strictly on the external dimensions of the drawer frame and the drawer boxes themselves. The outer width, height, and depth of the entire assembly are the critical figures that determine whether the unit will physically slide into your wardrobe cavity.

One of the most common mistakes in DIY wardrobe upgrades is failing to account for the side clearance required by drawer slides. Standard side-mount drawer runners, whether they are basic roller slides or ball-bearing slides, typically require a specific clearance on each side of the drawer box to operate smoothly. This clearance is usually around 12.5mm to 13mm per side, meaning the total width of the drawer box and the slides combined must match the internal width of the wardrobe cavity precisely. If the drawer unit is a pre-assembled freestanding chest designed to sit inside a wardrobe, ensure its overall external width is slightly less than the narrowest point of the wardrobe opening.
The term “3mm plywood drawers” generally refers to drawer units where 3mm plywood is used for the drawer base (the bottom panel), while the side walls of the drawer are constructed from thicker materials like 12mm or 15mm plywood, MDF, or solid wood. Plywood of this thickness is lightweight and cost-effective, making it ideal for storing lighter items such as clothing, linens, and accessories. However, because 3mm plywood is relatively thin, it is crucial to verify the manufacturer’s weight limits and rigidity specifications. Check how the bottom panel is secured; drawer bases that are slotted into grooves on all four sides offer significantly better structural integrity and resistance to sagging than bases that are simply nailed or stapled to the bottom of the drawer frame.
How to Measure Your Wardrobe Cavity Accurately
To ensure a seamless fit, measure your wardrobe cavity with high precision using a reliable steel measuring tape. Avoid relying on the original renovation floor plans or carpentry drawings, as actual built dimensions often deviate slightly from the initial designs. Begin by measuring the internal width of the cavity at three distinct points: near the top, in the middle, and close to the bottom. Walls and custom carpentry panels are rarely perfectly plumb, and even a minor deviation of a few millimeters can cause a drawer unit to bind or fail to fit. Always use the narrowest of these three measurements as your baseline width.
Next, measure the internal depth of the wardrobe carcass from the back panel to the front edge of the side panels. If your wardrobe has hinged doors, measure up to the point where the doors close to ensure the drawer fronts will not prevent the doors from shutting completely. During this step, inspect the back panel for any protruding screws, nails, or uneven backing material that might have bowed forward over time. These small obstructions can prevent the drawer runners or the drawer frame from sitting fully flush against the back, reducing your available depth and potentially misaligning the entire installation.
Finally, measure the available vertical height within the cavity where you plan to position the drawers. If you are stacking multiple drawer units or installing a tall pre-assembled unit, ensure there is sufficient clearance at the top so the top drawer can be accessed easily. You must also verify that the height of the drawer fronts will not interfere with existing fixed shelves, hanging rods, or internal lighting fixtures. Leave a small safety margin of at least 10mm to 20mm at the top of the installation to allow for easy positioning and to accommodate any minor leveling adjustments that may be required during the mounting process.
Adjustments, Limitations, and When to Seek Help
If your measurements reveal minor discrepancies between the wardrobe cavity and the drawer unit, there are several practical adjustments you can make. When the wardrobe cavity is slightly wider than the drawer assembly, you can install wooden spacer blocks or plywood shims between the wardrobe carcass and the drawer runners. These spacers bridge the gap, ensuring the runners remain parallel and allowing the drawer to slide smoothly without wobbling. Ensure that any spacers used are securely fastened to the carcass using appropriate wood screws to maintain structural stability.
In cases where side clearances are extremely tight, you might need to consider alternative hardware solutions. While standard side-mount slides are highly common, under-mount drawer slides are positioned beneath the drawer box rather than on the sides. This configuration can sometimes help accommodate slightly wider drawer boxes within a narrow cavity, though under-mount slides require specific drawer box designs and sufficient vertical clearance beneath the drawer bottom. Always check the hardware manufacturer’s installation specifications to confirm if your drawer boxes are compatible with under-mount runners.
There are, however, clear limits to what can be achieved through DIY adjustments. You should halt the installation immediately and consult a qualified carpenter or the drawer manufacturer if you discover that the wardrobe cavity is severely out of square, or if the carcass panels show signs of structural compromise such as splitting wood or loose wall anchors. Attempting to force a drawer unit into an unstable or warped frame can damage both the wardrobe and the new hardware. Furthermore, if installing the drawers requires making major physical modifications to the HDB built-in frame—such as cutting load-bearing supports or removing fixed structural shelves—professional expertise is required to ensure the safety and longevity of your cabinetry.
Frequently Asked Questions (FAQ)
Can I install 3mm plywood drawers in a wardrobe with sliding doors?
Yes, but you must take extra precautions regarding lateral clearance. Sliding doors do not open fully like hinged doors; instead, they slide over one another, meaning at least half of the wardrobe opening remains covered at any given time. The drawer unit must be narrow enough to clear the edge of the overlapping door panel when it is fully opened. Additionally, you will likely need to install thick wooden spacers on the side of the drawer unit adjacent to the door frame to prevent the drawer fronts from striking the sliding door tracks or the door panels as they are pulled out.
Do I need to reinforce the wardrobe base before adding heavy drawer units?
It depends on how the bottom panel of your wardrobe is supported. If the wardrobe carcass sits directly on a solid concrete plinth or the floor, the base panel can typically support a significant amount of weight without issue. However, if the bottom panel is a suspended shelf held up only by shelf pins or side screws, adding a heavy drawer unit filled with clothes can cause the panel to sag or collapse. In such cases, you should reinforce the base by adding vertical support blocks underneath the shelf or securing it with heavy-duty L-brackets anchored to the side carcass panels.

Community discussion
Share your experience or ask a question. Comments are reviewed before publication.