
Maximizing storage in a Singapore HDB flat requires a smart approach to vertical space. A modular stackable cabinet system offers a highly flexible, space-efficient alternative to bulky, permanent built-in carpentry. By stacking individual storage units upward, you can unlock valuable vertical real estate without sacrificing precious floor space in compact 3-room, 4-room, or Build-To-Order (BTO) layouts.
To choose the best stackable cabinet system for your home, you must prioritize structural stability, precise physical dimensions, and climate-appropriate materials. This guide outlines the essential steps to measure, select, and safely install stackable storage units that fit the unique architectural constraints of Singaporean homes.
Maximizing Vertical Space in Compact HDB Layouts
HDB flats have evolved over the decades, with modern BTO layouts prioritizing open-plan living but often presenting tighter room dimensions. While floor space is at a premium, standard HDB ceiling heights—typically ranging from 2.6 to 2.8 meters—provide ample vertical room that often goes underutilized. Utilizing a modular stackable cabinet allows you to reclaim this vertical volume, turning empty wall space into a high-capacity storage zone.
Products mentioned in this guide
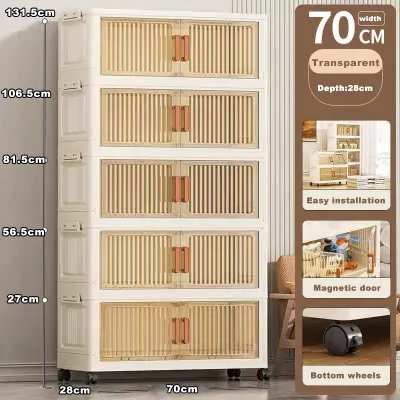
![Easyhome.sg [EASY INSTALL] JG Foldable Storage Cabinet with Wheels | Stackable Plastic Organizer Box | 45-65CM](https://img.lazcdn.com/g/p/eaee4372988fa662c9bd3fadb94d42a1.png_400x400q80.png_.webp)
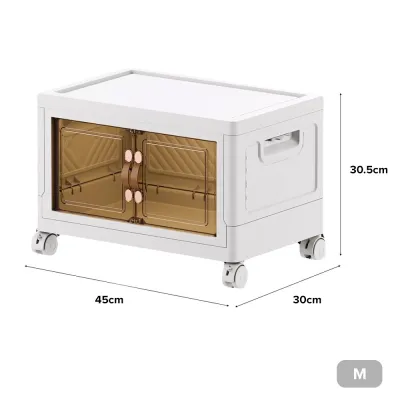
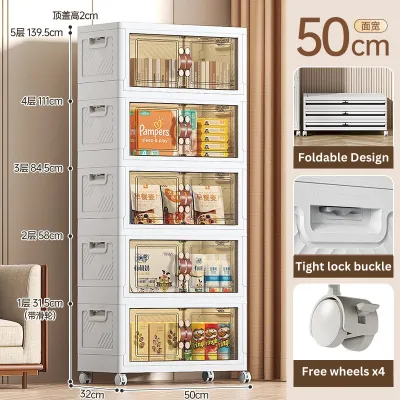
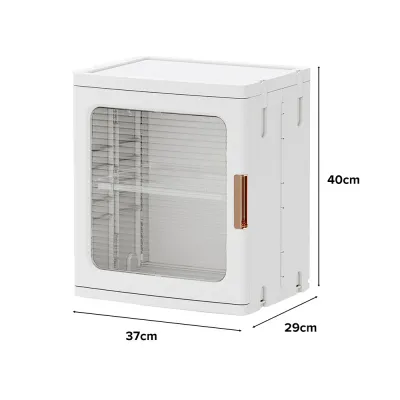
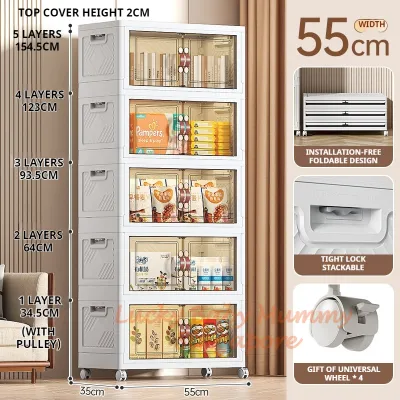
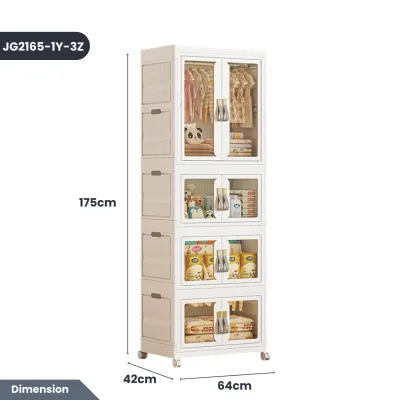
Prices are valid at publication and may change. Please refer to the product page for the latest price.
Several areas within an HDB flat are particularly well-suited for stackable configurations. The household shelter, commonly used as a pantry or utility storeroom, benefits immensely from floor-to-ceiling shelving that can be reconfigured as storage needs change. In the service yard, stacking units above or adjacent to the washing machine creates a dedicated laundry and cleaning hub without obstructing floor traffic. Narrow bedroom corridors and entryway recesses are also prime locations for shallow stackable units that keep daily essentials organized without blocking walkways.
Compared to traditional built-in carpentry, stackable modular furniture offers unmatched flexibility and cost-effectiveness. Custom built-ins are permanent, expensive, and cannot be easily modified or moved. If you are renting your flat or planning a future renovation, stackable systems allow you to disassemble, rearrange, or transport your storage units to a new home. This adaptability makes modular systems a highly practical investment for dynamic, modern households.
Furthermore, the storage requirements of a household naturally change over time. A family with young children may require low-level, easily accessible toy storage, which can later be stacked higher and converted into book or document storage as the children grow. Modular systems allow you to purchase only what you need initially and add compatible vertical modules later, avoiding the high upfront costs of full-scale home carpentry.
Crucial Measurements to Take Before Buying
Before purchasing any stackable cabinet system, taking meticulous measurements of your intended space is non-negotiable. Even a minor discrepancy of a few millimeters can prevent a cabinet from fitting flush against a wall or block an essential pathway.

Footprint and Obstructions Start by measuring the exact width and depth of the floor area where the base unit will sit. Do not simply measure from wall to wall; you must account for the thickness of skirting boards, which can push the cabinet several centimeters away from the wall. Locate all power sockets, light switches, water pipes, and internet fiber points. If a cabinet covers a socket, you will lose access to it unless the unit has a built-in cable management cutout. Additionally, measure the door swing clearances of nearby room doors, wardrobe doors, and windows to ensure the cabinet doors can open fully without collision.
Vertical Clearance Calculate the maximum safe stacking height by measuring from the floor to the lowest ceiling obstacle. This includes light fixtures, ceiling fans, air conditioning units, and exposed trunking. Always leave a ventilation and safety gap of at least 10 to 15 centimeters between the top of the highest cabinet module and the ceiling. This gap prevents heat buildup, allows for easier dust cleaning, and ensures you have enough physical clearance to lift and slide the top module into place during assembly.
Module Alignment When planning a multi-tier stack, check the individual dimensions of each module. The base unit must have a depth and width equal to or greater than the units stacked on top of it. Placing a deeper or wider module on top of a narrower base creates an unstable overhang, shifting the center of gravity forward and significantly increasing the risk of a structural collapse.
Access Routes Finally, verify that the physical components can actually enter your home. Measure the height and width of your HDB main gate, main door, internal doorways, and the service lift. Even if a cabinet is sold as a flat-pack, some pre-assembled frames or long side panels can be difficult to maneuver around tight corridor corners or inside standard residential lifts.
Floor Levelness In many HDB flats, floors may not be perfectly level, particularly in older units or areas close to floor traps in service yards. Use a spirit level to check the floor before installation. If the floor slopes, the tilt will be magnified as you stack units higher, causing gaps between modules or making the stack unstable. You must address this by using cabinets with adjustable leveling feet or inserting high-density plastic shims under the base unit.
Must-Have Features for Safe and Functional Stacking
Stacking furniture introduces unique structural challenges that do not apply to standalone pieces. To ensure your storage system remains stable and safe over years of daily use, look for specific engineering features designed for vertical configurations.
Secure Interlocking Mechanisms Never simply place one cabinet on top of another without a physical connection. Look for systems that feature dedicated interlocking mechanisms. These may include pre-drilled dowel holes with wooden or metal dowels, interlocking grooves that channel the upper unit into the lower one, or heavy-duty metal connector brackets that screw into the back panels of both units. These connectors prevent the upper modules from shifting or sliding off when doors are slammed or when the floor vibrates.
Weight Capacity and Load Distribution Review the manufacturer’s specifications for the load capacity of each individual module. Crucially, the base unit must be rated to support not only the items stored inside it but also the cumulative weight of all the empty upper modules and their intended contents. If a base unit is rated for 30 kilograms and you stack two 10-kilogram upper units on top of it, you only have 10 kilograms of remaining weight capacity for the entire stack.
Anti-Tip and Wall-Anchoring Kits Any stackable system that exceeds a height of 1 meter must be anchored securely to the wall. Opening a heavy drawer or door shifts the center of gravity forward, which can cause an unanchored cabinet to tip over. Ensure the manufacturer includes an anti-tip kit (such as L-brackets, nylon straps, or wall screws) with the purchase, or purchase a compatible high-quality anchoring kit separately. This is a critical safety requirement for homes with young children, elderly family members, or pets.
Climate-Resistant Materials Singapore’s tropical climate features high relative humidity year-round, which can cause low-grade engineered wood to swell, warp, or develop mold. When selecting materials, do not rely on generic terms like “wood” or “MDF” as a guarantee of durability. Instead, check the manufacturer’s specifications for moisture-resistant finishes, such as melamine coatings, high-pressure laminates (HPL), or thermo-wrapped vinyl. Ensure all exposed edges feature tight, professional edge banding to prevent moisture from penetrating the core material. For hardware like hinges and drawer slides, look for rust-resistant stainless steel or powder-coated metals.
Hardware Quality High-quality hinges and drawer runners are essential for modular cabinets. Soft-close mechanisms are highly recommended because they prevent doors and drawers from slamming shut. Violent slamming creates repetitive vibrations that can gradually loosen the interlocking joints between stacked modules and weaken the wall anchors over time.
A Step-by-Step Framework for Selecting Your Stackable System
Choosing the right modular system requires balancing your storage needs with structural realities. Follow this step-by-step framework to evaluate options at online marketplaces or local furniture showrooms.
Step 1: Define the Primary Storage Need Identify exactly what you plan to store. Heavy items like books, canned food, kitchen appliances, or heavy tools require thick shelves (at least 18mm to 25mm) and robust vertical support frames. Lighter items like linens, clothing, toys, or dry snacks can be accommodated by thinner shelves or lightweight plastic modular drawers. Matching the storage density to the structural rating of the cabinet prevents shelf sagging and frame bowing.
Step 2: Evaluate the Base Unit The base unit acts as the foundation of your entire stack. It must be structurally the strongest unit in the configuration. Ensure the base unit has a solid plinth or heavy-duty adjustable feet that can compensate for uneven HDB concrete floors. Avoid using units with slender, decorative legs as the base of a tall stack, as these legs may buckle under cumulative vertical loads. Never use caster wheels on a base unit that supports stacked modules, as movement can cause the upper units to slide or tip.
Step 3: Assess Modularity and Future-Proofing A great stackable system allows you to mix and match different storage styles within the same footprint. Look for collections that offer open shelving for display, closed doors to hide clutter, and drawer inserts for smaller items. This modularity allows you to adapt the cabinet’s function over time—for example, converting a study room bookshelf into a living room display cabinet or a nursery wardrobe. Check if the manufacturer offers replacement parts or additional modules separately so you can expand the system in the future.
Step 4: Verify Assembly Requirements Understand the level of assembly required before purchasing. Flat-pack furniture requires careful alignment and the use of specific tools like levels, screwdrivers, and drills. If you are stacking multiple tiers high, professional assembly is highly recommended. Professional installers have the expertise to ensure the units are perfectly level, the interlocking connectors are properly engaged, and the wall anchors are securely drilled into the structure.
| Stacking Configuration | Stability Rating | Aesthetic Appeal | Space Efficiency | Best Suited For |
|---|---|---|---|---|
| Uniform Width (Flush Stack) | High | Clean, Seamless | Excellent | Narrow corridors, tight niches, pantry closets |
| Stepped Design (Deeper Base) | Very High | Architectural, Balanced | Good | Living rooms, display walls, kids' playrooms |
| Mixed Open & Closed | High | Dynamic, Varied | Excellent | Home offices, study rooms, multi-purpose spaces |
Safe Installation and Weight Distribution Guidelines
Once you have selected your stackable cabinet system, proper installation and loading are vital to maintaining a safe home environment. Even the highest-quality modular furniture can fail if it is assembled incorrectly or overloaded.
Smart Weight Distribution Always follow the golden rule of storage: place the heaviest items in the bottom-most cabinet modules. This lowers the overall center of gravity, making the entire stack much more stable and resistant to tipping. Distribute items evenly across the width of each shelf rather than clustering heavy objects in the center, which can cause the shelf to sag or crack over time. Keep lighter items, such as extra pillows, seasonal decorations, or empty organizers, in the upper tiers.
Wall Anchoring for HDB Wall Types Anchoring your stackable cabinet to the wall is an essential safety step. However, the type of wall in your HDB flat dictates the anchoring method you must use.
Concrete Structural Walls: Many HDB internal walls, especially in newer BTO flats, are made of precast concrete. To anchor into concrete, you must use a rotary hammer drill, masonry drill bits, and plastic wall plugs (or metal expansion anchors) paired with heavy-duty screws.
Drywall Partition Walls: Some internal partition walls, such as those separating bedrooms, are made of gypsum board or drywall. You must never use standard plastic wall plugs in drywall. Instead, use specialized toggle bolts, hollow wall anchors, or locate the internal metal studs to secure your mounting brackets. If you are unsure of your wall material or do not own the correct tools, hire a qualified local handyman or professional installer.
Avoid Unauthorized Modifications Refrain from drilling custom holes, cutting panels, or modifying the structural frame of the cabinets to fit around pipes or trunking unless explicitly permitted by the manufacturer’s instruction manual. Modifying the load-bearing panels can severely compromise the structural integrity of the unit, void the warranty, and increase the risk of collapse.
Routine Maintenance Checks Over time, humidity changes, floor vibrations, and daily use can cause screws and connectors to loosen slightly. Establish a routine to inspect your stackable cabinets every six months. Check that the interlocking joints between modules are tight, verify that the wall-anchoring brackets remain firmly attached to both the cabinet and the wall, and adjust any cabinet door hinges that have sagged.
Frequently Asked Questions (FAQ)
Can I stack different brands or models of cabinets together?
It is highly discouraged to stack different brands or models of cabinets together. Different manufacturers use distinct dimensions, joinery methods, and load-bearing capacities. Mixing brands means you will not have matching pre-drilled holes, interlocking dowels, or compatible safety brackets, which can result in an unstable and dangerous stack. To ensure structural safety and maintain your manufacturer’s warranty, always stick to a single, cohesive modular system from the same brand.
Do I need HDB approval to install tall stackable cabinets?
Freestanding, modular furniture—including tall stackable cabinets—generally does not require HDB approval. However, you must comply with specific guidelines regarding structural modifications. For example, you are strictly prohibited from drilling into, modifying, or mounting heavy fixtures onto the steel-reinforced door or walls of your HDB household shelter (bomb shelter). Additionally, if your installation requires heavy drilling into structural beams or columns, always consult a qualified professional to ensure you do not damage the building’s structural integrity.
How do I prevent moisture damage to stacked cabinets in the kitchen or service yard?
To protect your stackable cabinets from Singapore’s high humidity, ensure there is a ventilation gap of at least 2 to 3 centimeters between the back of the cabinet and the wall. This allows air to circulate and prevents condensation from building up. Avoid placing cabinets directly adjacent to wet areas like the kitchen sink or washing machine unless they are specifically rated for high-moisture environments. Additionally, place disposable moisture absorbers (dehumidifying tubs) inside enclosed lower cabinets and periodically wipe down surfaces with a dry microfiber cloth to prevent mold growth.

Community discussion
Share your experience or ask a question. Comments are reviewed before publication.