
To fit a shoe rack beside your BTO main gate without blocking the walkway, you must ensure the remaining corridor space meets the minimum clearance required by local fire safety regulations. Typically, this means maintaining a clear, unobstructed path of at least 1.2 meters along the common corridor. Before purchasing any furniture, you must measure the exact distance from your wall to the edge of the corridor, subtract this mandatory clearance, and account for the full swing of both your wooden main door and metal gate.
Placing a shoe rack outside is a popular way to keep dirt and odors out of the home, but Singapore’s high-density public housing requires strict adherence to shared space rules. A rack that is too deep or wide can lead to complaints, safety hazards during emergencies, or forced removal by town councils. By focusing on slim-profile designs, precise measurements, and non-permanent installations, you can keep your entryway organized while remaining a considerate neighbor.
Navigating HDB and Fire Safety Clearance Rules for Corridors
Living in a Housing & Development Board (HDB) flat means sharing common corridors with your neighbors, making fire safety a shared responsibility. The Singapore Civil Defence Force (SCDF) and HDB maintain strict guidelines to ensure these corridors remain safe evacuation routes during emergencies. The most critical rule is maintaining a minimum clear walkway width of 1.2 meters at all times. Any shoe rack or personal item placed in the corridor must not reduce the remaining path below this threshold.
Products mentioned in this guide
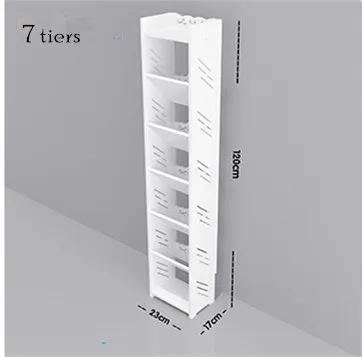
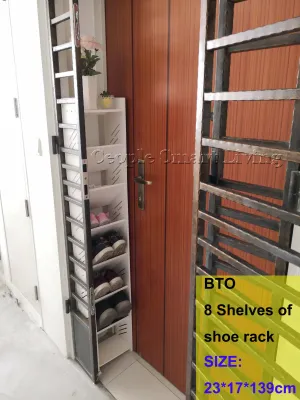
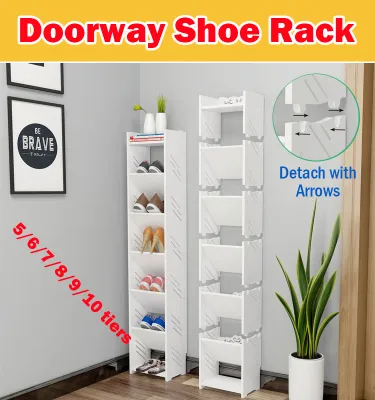
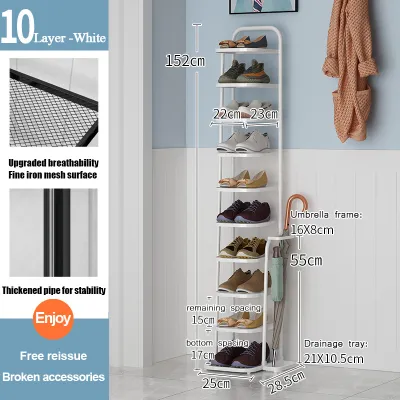
![[SG Seller]BTO Shoe Rack / Narrow Slim Cabinet/ Storage Organizer / Fit HDB between Doorway and Gate](https://img.lazcdn.com/g/p/3c8b9de4903eba6df4ece76a6a271ec7.jpg_400x400q80.jpg_.webp)
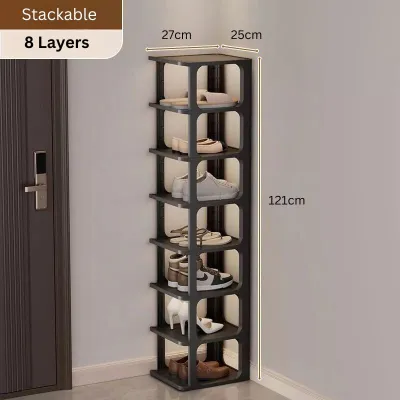
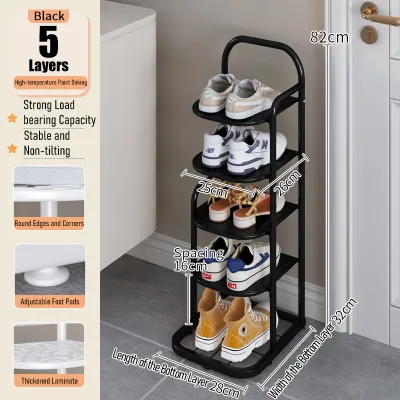
Prices are valid at publication and may change. Please refer to the product page for the latest price.
Beyond the 1.2-meter clearance, your shoe rack must not obstruct the escape path of neighboring units. This means that even if your corridor is exceptionally wide, you cannot place furniture in a way that forces neighbors to detour or navigate around an obstacle. It is highly recommended to check the latest circulars from your specific Town Council, as local enforcement priorities and rules can vary slightly across different housing estates.
Another vital safety consideration is the clearance for your unit’s entry points. Both your main wooden door and your outer metal gate must be able to swing open to their maximum angles without striking the shoe rack. If a gate hits the cabinet during a hurried exit, it could jam or cause physical injury, creating a dangerous bottleneck during an evacuation.
Your specific unit location on the floor plan also dictates what is permissible. Corner units and units at the end of dead-end corridors sometimes have slightly more flexibility, but they are still subject to strict rules regarding lift lobby proximity and fire hydrant access. If your unit is located immediately adjacent to a lift lobby, staircase exit, or dry riser, you must keep the area completely clear of any furniture, as these are high-priority emergency access zones.
Step-by-Step Guide to Measuring Your BTO Entrance Space
To avoid purchasing a shoe rack that you will later have to return or discard, you must conduct a precise on-site measurement of your BTO entrance area. Start by opening your main wooden door and your metal gate to their fullest possible angles. Use a physical measuring tape to trace the outer arc of the gate’s swing, marking the floor with a piece of easily removable masking tape. This marked arc represents a strict no-encroachment zone where no part of your shoe rack should ever sit.

Next, determine the maximum allowable depth for your furniture. Measure the total distance from the wall where you plan to place the rack to the outer edge of the common corridor or parapet wall. From this total measurement, subtract the mandatory 1.2-meter clearance required for the walkway. The remaining distance is the absolute maximum depth your shoe rack can have; if your corridor is 1.5 meters wide, your rack’s depth must not exceed 30 centimeters.
After establishing the depth, you must map out the usable width along the wall. Do not simply measure the blank wall space; look closely for physical obstacles that could prevent a flat cabinet from sitting flush. Common BTO corridor features such as electrical meter boxes, water meters, downpipes, and structural pillars can significantly reduce your usable width.
You must also account for the proximity of neighboring doors and shared walls. Ensure that the proposed width of your shoe rack does not overlap with your neighbor’s boundary or block access to their gate swing. If your BTO layout features doors that are close together or perpendicular, coordinate with your neighbor to ensure both of your entryways remain completely unobstructed when doors are opened simultaneously.
Matching Shoe Rack Depth and Width to Your Measured Space
Once you have your maximum depth and width limits, you can select a shoe rack design that fits these parameters. For corridors with extremely limited depth, standard horizontal shelving is often impractical because typical shoes require a shelf depth of at least 30 to 35 centimeters to sit flat. In these tight spaces, an ultra-slim tilt-out shoe cabinet is the most effective choice. These cabinets store shoes vertically, allowing the overall depth of the unit to be as slim as 15 to 18 centimeters.
If your measurements show you have more than 35 centimeters of clearance, you can consider standard horizontal shelving or closed-door cabinets. Closed cabinets keep your footwear protected from dust and rain, but you must ensure that the cabinet doors themselves do not block the corridor when opened. Sliding doors or open shelving are excellent alternatives to hinged doors in narrow walkways, as they require zero additional clearance to access your shoes.
The width of your shoe rack should be chosen to maximize storage without crowding the door frame. A rack that sits too close to the door frame can make the entrance feel cramped and may interfere with your daily movement or the carrying of large items into the home. Aim to leave a buffer of at least 10 to 15 centimeters between the edge of the shoe rack and the edge of your door frame.
Height and stability are equally important when selecting a corridor shoe rack. Because these units are placed in high-traffic public walkways, a tall, narrow cabinet can easily become top-heavy and pose a tipping hazard if bumped. If you choose a taller unit to maximize vertical storage, you must ensure it has a low center of gravity, with heavier shoes stored at the bottom, and check if the unit remains stable on the slightly uneven concrete or tiled surfaces of common corridors.
Space-Saving Alternatives for Extremely Tight Entrances
If your BTO corridor is too narrow to accommodate even an ultra-slim freestanding cabinet without violating safety rules, you must look for alternative storage solutions. One option is using over-the-door or behind-the-door hanging organizers on the inside of your main wooden door. While this keeps shoes completely out of the common corridor, you must check the weight limits of the organizer and ensure it does not interfere with the door’s latching or self-closing mechanisms.
Another flexible alternative is using modular, stackable, or wall-mounted floating shelves. Small, individual plastic shoe boxes can be stacked in a low profile beside the gate and easily reconfigured or moved indoors if corridor enforcement rules change or if you need to clear the path for building maintenance. Wall-mounted floating shelves can be installed at a higher level to keep the floor area completely clear, though you must ensure they do not protrude dangerously at eye or shoulder level.
Ultimately, you may need to weigh the practical trade-offs of keeping all your footwear outside versus relocating your primary storage indoors. Many BTO homeowners choose to keep only a few pairs of daily-wear shoes on a tiny, low-profile mat or single-tier rack outside, while storing the bulk of their collection in a dedicated shoe cabinet within the interior foyer or service yard. This approach keeps your corridor clean, compliant with fire safety laws, and free from potential theft or weather damage.
Ensuring Stability, Safety, and Daily Maintenance
Installing a shoe rack in a shared, semi-exposed environment requires careful attention to stability and safety. Many tall shoe cabinets require anti-tip anchoring to prevent them from falling over, especially in households with young children or pets. However, HDB regulations generally prohibit drilling permanent fixtures into common corridor walls, as these walls are public property and may contain hidden electrical conduits or water pipes. You must check with your Town Council before attempting any wall drilling, or opt for freestanding units designed with wide, stable bases that do not require wall anchoring.
Because BTO corridors are semi-exposed to Singapore’s tropical climate, your shoe rack will be subjected to high humidity, blowing rain, and dust from nearby foot traffic. Avoid materials like untreated particle board or cheap MDF, which can swell, warp, and grow mold when exposed to moisture. Instead, look for shoe racks made of rust-resistant metals, treated plastics, or solid wood with water-resistant outdoor finishes, and regularly check the joints and hinges for signs of wear.
Pest management is another critical factor when storing footwear outdoors. Dark, damp shoe cabinets can attract insects, lizards, or even rodents looking for shelter. To prevent this, choose cabinets with adequate ventilation slots to keep air flowing, and avoid leaving damp shoes inside closed compartments. Regularly cleaning the interior of the rack and applying non-toxic pest deterrents can help keep your footwear safe and hygienic.
Finally, maintaining a strict daily routine is essential for keeping the area tidy and preserving good relations with your neighbors. Avoid letting shoes pile up around the base of the rack, as loose footwear quickly becomes a tripping hazard in a dark corridor. Ensure the rack is cleaned regularly to prevent unpleasant odors from wafting into the common walkway, demonstrating respect for your community while keeping your entryway welcoming.
Frequently Asked Questions (FAQ)
Do I need HDB approval to place a shoe rack outside my BTO door?
You do not typically need to apply for formal written approval from HDB to place a temporary, freestanding shoe rack outside your door, provided it complies with all safety guidelines. However, the Town Council and SCDF retain the authority to request the immediate removal of any item that obstructs the common corridor, blocks fire escape routes, or violates the 1.2-meter clearance rule. Permanent fixtures, built-in carpentry, or items that block access to utility risers and fire safety equipment are strictly prohibited and subject to enforcement action.
What is the standard depth for a slim tilt-out shoe rack?
A standard slim tilt-out shoe rack typically ranges in depth from 15 to 24 centimeters, making it significantly shallower than traditional horizontal cabinets. When checking this dimension against your measured space, you must add a small margin of 2 to 3 centimeters to account for wall baseboards, skirting tiles, and any protruding door handles or cabinet hardware. Always verify the manufacturer’s exact finished dimensions and check if your specific shoe sizes will fit comfortably within the tilted compartments.
Can I install a built-in shoe cabinet in the BTO common corridor?
No, you cannot install custom built-in carpentry or permanent shoe cabinets in the BTO common corridor. The walls and floors outside your unit’s main gate are common property managed by the Town Council, and permanent structural alterations are strictly illegal. Built-in cabinets can block access to essential building services, interfere with structural maintenance, and create permanent fire hazards, so all custom shoe storage must be kept strictly within your unit’s interior foyer.

Community discussion
Share your experience or ask a question. Comments are reviewed before publication.