
Maximizing storage space is a constant challenge in Singapore’s high-density housing. Most HDB flats, particularly newer Build-To-Order (BTO) units, feature compact linear or L-shaped kitchens where countertop real estate is highly contested by essential appliances like microwave ovens, rice cookers, and dish drying racks. This leaves little room for daily food preparation and food styling. An under shelf rack is a highly effective, non-invasive solution that reclaims the often-wasted vertical clearance directly beneath upper cabinets or inside deep pantry shelves. By suspending lightweight items, you free up valuable counter surfaces while keeping frequently used tools and ingredients within arm’s reach.
Integrating these organizers into your kitchen requires a clear understanding of your cabinetry’s structural limits and the unique environmental conditions of a Singaporean home. Selecting the wrong type of rack can lead to sagging shelves, damaged laminates, or rusted organizers that stain your tableware. By evaluating your space systematically, you can choose a storage solution that balances accessibility, weight capacity, and aesthetic appeal.
How to Choose the Right Under Shelf Rack for Your HDB Kitchen
Cabinet Thickness and Depth Compatibility
Most built-in HDB kitchen cabinets are constructed from engineered wood panels, such as blockboard or plywood cores, finished with high-pressure laminates (HPL) or melamine. These panels typically measure between 15mm and 18mm in thickness. Before purchasing any slide-on or clamp-on under shelf rack, you must measure this thickness precisely. If a clamp is designed for a thinner shelf, forcing it onto a standard HDB panel can chip the brittle laminate edge or crack the melamine surface, exposing the underlying wood core to moisture. Conversely, if the clamp is too wide, the rack will tilt forward when loaded, causing items to slide out.
Products mentioned in this guide
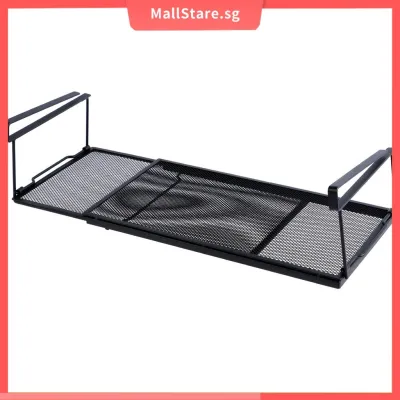
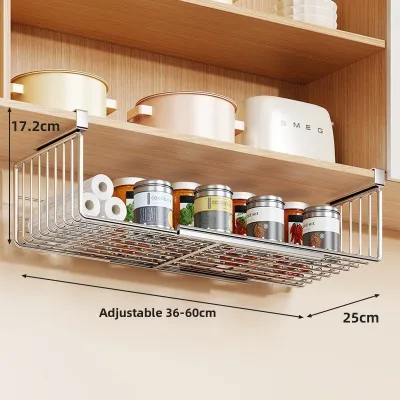
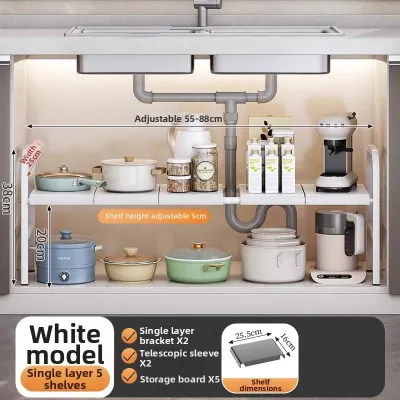
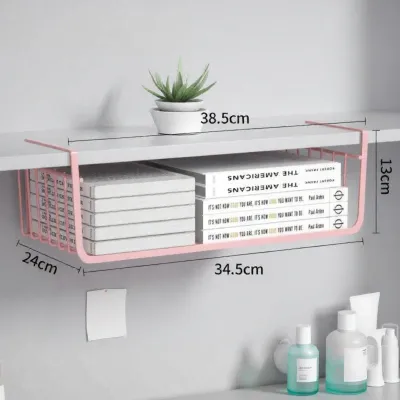
Prices are valid at publication and may change. Please refer to the product page for the latest price.
Cabinet depth is equally critical. Standard HDB upper cabinets generally have an external depth of 300mm to 350mm. Many under shelf organizers are designed for deeper wardrobes or pantry units and may protrude past the front edge of your kitchen cabinets. If a rack sticks out even by a few millimeters, it will prevent the cabinet doors from closing fully, creating a visual misalignment and allowing cooking grease and dust to enter your clean storage areas. Always measure the internal depth from the back wall to the inside of the closed door before finalizing your purchase.
Installation Methods
Choosing how to mount your rack depends on your housing status, the weight of the items you plan to store, and your comfort level with DIY tools. The three primary options are clamp-on, adhesive, and screw-mounted designs, each presenting distinct trade-offs in stability and flexibility.
- Clamp-On Racks: These models slide directly onto the shelf board using flat metal arms. They require zero tools, make excellent use of the cantilever effect, and can be repositioned instantly. However, they rely on a snug fit and can scratch laminates if they lack protective padding.
- Adhesive Racks: Utilizing double-sided acrylic foam tapes, these models stick directly to the underside of the cabinet. They are highly favored by renters because they leave no screw holes, but their load capacity is strictly limited by the adhesive's shear strength and the quality of the laminate bond.
- Screw-Mounted Racks: These systems are secured directly into the cabinet board using short wood screws. They offer the highest load capacity and stability, making them ideal for heavy plates or glass jars, but they require drilling and permanent alteration of the cabinet.
Material and Finish
Singapore’s tropical climate brings high relative humidity, often hovering around 80% or higher, which is further amplified in kitchens by cooking steam and boiling water. Under these conditions, cheap iron wire racks coated with thin plastic or low-grade paint will rapidly rust once the protective layer is scratched or chipped. Rust not only ruins the aesthetic of your kitchen but can also transfer to your ceramic tableware or stain your cabinet shelves.
To ensure long-term durability, prioritize rust-resistant materials. Marine-grade 304 stainless steel is the gold standard for humid environments, offering natural corrosion resistance without the need for delicate coatings. Heavy-duty carbon steel finished with a thick, electrostatic powder coating is another excellent option, provided you check for seamless welds where moisture cannot penetrate. Anodized aluminum is lightweight, naturally rust-proof, and offers a sleek, modern look, though it may flex slightly more under heavy loads than stainless steel.
Clearance and Accessibility
Adding an under shelf organizer inevitably reduces the vertical clearance of the space below it. If your upper cabinet is mounted 60cm above the countertop, installing a 20cm-deep hanging basket leaves 40cm of usable space underneath. This is generally sufficient for standard coffee makers, toasters, or prep bowls. However, if the cabinet is only 45cm above the counter, a deep basket will restrict your workspace, block light, and make it difficult to operate appliances safely.
Before choosing a design, map out your countertop workflow. Measure the height of the tallest items that sit on the counter directly below the proposed installation site. Ensure that the bottom of the hanging rack leaves at least 10cm of buffer space above these items. This prevents accidental collisions when you are lifting appliance lids or moving hot pots across the counter.
Top Under Shelf Rack Designs to Maximize HDB Kitchen Space
Screw-Mounted Wire Baskets for Heavy Cookware
For deep upper cabinets or pantry units where you need to store heavy, bulky items, screw-mounted wire baskets offer unmatched structural integrity. These designs are ideal for organizing ceramic mixing bowls, small pots, frying pans, or heavy glass baking dishes that would otherwise clutter your lower cabinets or countertops. They typically range in price from S$25 to S$50, depending on the wire gauge and slide-out mechanism.

When shopping for this design, look for reinforced steel wire frames with a wire diameter of at least 4mm to prevent sagging. If you choose a slide-out drawer style, ensure it features smooth-glide ball-bearing tracks with built-in safety stops so the basket cannot be pulled entirely out of its housing. Robust metal screw anchors are essential to distribute the weight evenly across the underside of the cabinet board.
The primary limitation of this design is that it requires permanent drilling into the cabinet base. This makes it unsuitable for renters or homeowners who prefer not to alter their original HDB carpentry. Additionally, you must verify that the screws supplied are shorter than your shelf board thickness. For a standard 15mm shelf, use screws no longer than 12mm to prevent them from piercing through the top surface and ruining the interior of the cabinet above.
Adhesive Slide-Out Bins for Light Dry Goods
Adhesive slide-out bins are an excellent, tool-free solution for organizing lightweight pantry items, snacks, seasoning packets, and coffee capsules. These bins slide smoothly on tracks attached to the underside of the shelf, allowing you to access items stored at the very back of the cabinet without having to rummage through the front row. They generally cost between S$15 and S$30.
Key features to look for include high-quality, humidity-resistant adhesive tapes (such as acrylic-based foam tapes) and bins made from durable, BPA-free ABS or transparent PET plastic. Transparent bases are highly recommended as they allow you to see the contents of the bin from below, saving you from pulling down multiple drawers to find what you need.
However, these bins have strict weight limits, usually capped at 2kg to 3kg. The adhesive bond can degrade over time when exposed to steam from rice cookers, kettles, or stovetops. To prevent unexpected failures, avoid placing heavy glass jars or liquids in these organizers, and periodically check the adhesive backing for any signs of peeling or lifting.
Hanging Rails and Hooks for Mugs and Utensils
If you want to clear up counter space near the sink or stove, hanging rails with integrated hooks are an incredibly efficient option. They allow you to suspend everyday coffee mugs, soup ladles, spatulas, whisking tools, and small scissors directly under your upper cabinets, keeping them dry, hygienic, and within arm’s reach. These rails are highly affordable, typically costing between S$10 and S$25.
Look for rails with adjustable widths or sliding hooks that allow you to customize the spacing between items of different sizes. A safety lip or a deep, curved hook design is essential to prevent mugs from slipping off when bumped. Some models feature a dual-clamp system that slides onto the shelf board, providing tool-free installation while maintaining excellent stability.
Keep in mind that hanging rails are only suitable for lightweight items. Overloading a hanging rail with heavy cast-iron mugs or small pans can cause the metal arm to sag or bend. This bending puts uneven pressure on the shelf clamp, which can warp or compress the cabinet board over time, leading to permanent damage to your built-in furniture.
Adjustable Tension Racks for Spices and Small Jars
Adjustable tension racks are designed to create a secondary, floating mini-shelf within the wasted vertical space of narrow pantry cabinets. By dividing a tall shelf into two shorter levels, these racks are perfect for storing spice jars, small condiment bottles, tea boxes, and canned goods. They generally retail for S$15 to S$35.
When selecting a tension-based rack, look for models with non-slip, rubberized end pads to protect your cabinet’s interior laminate from scratches and scuffs. An adjustable width mechanism (usually a telescoping metal pole with a secure locking collar) allows you to customize the fit to your exact cabinet dimensions. A raised front lip is also crucial to prevent round spice jars from rolling off the shelf when you retrieve adjacent items.
Because these racks rely entirely on lateral friction to stay in place, they can slip if the cabinet interior has a highly polished, slippery melamine finish. They are not suitable for heavy items like large glass oil bottles, stone mortars, or heavy ceramic jars. Regular cleaning of the contact pads is necessary to maintain a secure grip.
Safe Installation and Maintenance for HDB Kitchen Cabinets
Pre-Installation Checks
Before you begin drilling or mounting any under shelf rack, a thorough inspection of your cabinet is essential to prevent costly structural damage. Open the cabinet doors and check for the presence of hidden hardware, such as concealed door hinges, gas spring lift struts, or internal wiring for under-cabinet LED strip lights. Ensure that your proposed mounting location does not interfere with these components or block their movement.
If you are installing a screw-mounted rack, always use a drill depth stop to control how deep the drill bit penetrates. If you do not have a professional depth stop, you can wrap a piece of brightly colored masking tape around the drill bit at your desired depth measurement (e.g., 10mm). Stop drilling the instant the tape reaches the wood surface. This simple precaution guarantees you will not accidentally pierce through the top of the shelf, preserving the clean look of your cabinet interior.
Surface Preparation for Adhesives
To achieve a reliable, long-lasting bond on laminated or melamine-faced HDB cabinet surfaces, proper surface preparation is non-negotiable. Household dust, cooking grease, and oil aerosol residues naturally accumulate on the undersides of kitchen cabinets, creating a barrier that prevents adhesives from bonding directly to the laminate.
First, wipe down the mounting area thoroughly with a clean microfiber cloth saturated with isopropyl alcohol (rubbing alcohol). Avoid using standard glass cleaners, multi-purpose sprays, or soapy water, as these products often leave behind a thin chemical residue or film that compromises adhesive performance. Allow the alcohol to evaporate completely so the surface is bone dry. Apply the adhesive tape to the rack’s mounting plate, press it firmly against the prepared cabinet surface for at least 30 seconds to activate the pressure-sensitive adhesive, and let it cure undisturbed for 24 to 48 hours before loading any items onto the rack.
Load Testing and Maintenance
Never load a newly installed under shelf rack to its maximum rated capacity immediately. Instead, perform a gradual load test. Start by placing a few lightweight items on the rack and monitoring it for 24 hours. If there is no sagging, slipping, or peeling, you can gradually add heavier items up to the manufacturer’s recommended weight limit.
Given Singapore’s high humidity and steam levels, establish a bi-annual maintenance routine for your kitchen organizers. For screw-mounted designs, use a manual screwdriver to gently check and tighten any loose screws, taking care not to over-torque and strip the wood fibers. For adhesive and clamp-on designs, closely inspect the mounting brackets for signs of peeling, sagging, or structural fatigue. Clean the racks regularly with a damp cloth and mild dish soap, avoiding abrasive scrubbers that can scratch the protective powder coating or stainless steel finish.
When to Stop
During your pre-installation check, if you discover that the cabinet board feels hollow, shows signs of water damage (such as swollen edges, bubbling laminates, or soft spots), or is thinner than 12mm, stop immediately. Do not attempt to install a screw-mounted rack into compromised wood, as the screws will not hold and the shelf may split under the load.
In these scenarios, pivot to lightweight, clamp-on, or tension-based alternatives that distribute weight across a wider surface area. Alternatively, you can use freestanding countertop organizer shelves that require no mounting. If you still require a heavy-duty hanging solution, consult a professional carpenter to reinforce your existing cabinets with solid wood backing supports before proceeding.
Frequently Asked Questions (FAQ)
Will adhesive racks damage my HDB kitchen cabinet finish?
Yes, aggressive industrial-strength adhesives can damage standard HDB cabinet finishes if they are removed improperly. When pulled away forcefully, high-tack adhesive tapes can tear off the decorative melamine layer or peel the high-pressure laminate away from the underlying plywood core, leaving unsightly patches and exposing the wood to moisture.
To mitigate this risk, always use a hairdryer on a medium-heat setting to gently warm and soften the adhesive backing before attempting removal. Once the adhesive is warm and pliable, slowly peel it away at a shallow 45-degree angle, using a plastic scraper or an old credit card to help lift the tape without scratching the wood. If you want to avoid adhesives entirely, opt for slide-on clamp designs that use soft silicone or rubber padding to grip the shelf securely without any glue.
How do I measure my cabinet for an under shelf rack?
To ensure a perfect fit and prevent cabinet door obstruction, you must take four precise measurements using a metal measuring tape:
- Internal Width: Measure the clear distance between the left and right inner walls of the cabinet to ensure the rack can slide in smoothly without rubbing against the sides.
- Shelf Depth: Measure from the back wall of the cabinet to the front edge of the shelf. Choose a rack that is at least 20mm shorter than this measurement to ensure your cabinet doors can close completely without hitting the organizer.
- Vertical Clearance: Measure the distance from the underside of the shelf to the surface below (either the countertop or the next lower shelf). Ensure the height of the rack, plus the height of the items you plan to store inside it, is less than this clearance.
- Shelf Thickness: Measure the exact thickness of the shelf board to guarantee that clamp-on models will slide on snugly, or that the screws for mounted models are short enough to avoid piercing through the top surface.

Community discussion
Share your experience or ask a question. Comments are reviewed before publication.