
Finding the ideal balance between modern home automation and space-saving design is a common challenge for homeowners in Singapore. As robotic cleaners become essential household appliances, housing their bulky docking stations without disrupting your home’s aesthetic requires careful planning. The best robot vacuum cabinets for HDB flats are those that seamlessly integrate into compact floor plans, provide proper ventilation for charging safety, and maintain clear navigation paths for the device’s sensors.
In typical HDB apartments—where floor space along narrow entryways, living rooms, and utility areas is highly contested—leaving a large docking station exposed can quickly disrupt the flow of your home. Modern vacuum docks with auto-empty dustbins and water tanks have grown significantly in size, making them prominent visual distractions and potential tripping hazards.
Whether you are designing custom carpentry for a new Build-To-Order (BTO) flat or looking for a freestanding furniture piece to fit into a resale apartment, selecting the right cabinet involves evaluating size, accessibility, and utility. A well-designed storage solution not only conceals the vacuum and its trailing cords but also protects the unit from accidental damage. By choosing a dedicated cabinet, you can maintain a clean, minimalist home environment while ensuring your automated helper remains fully functional and ready for its next cleaning cycle.
Products mentioned in this guide
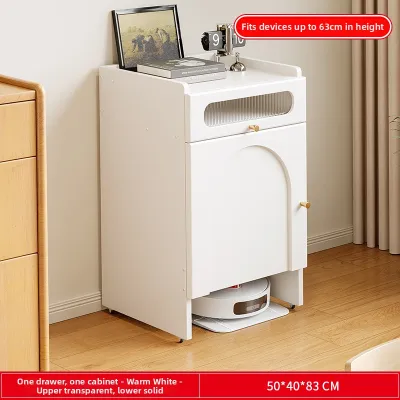
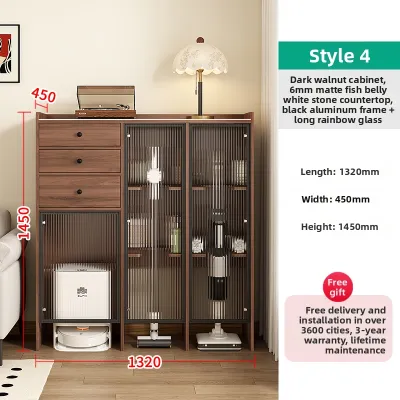
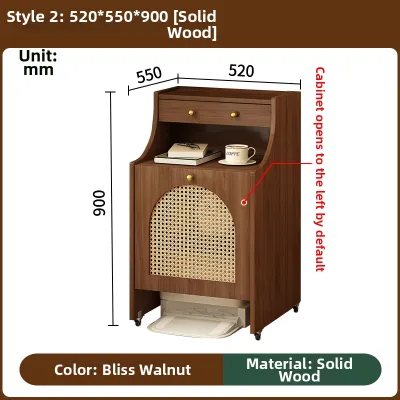
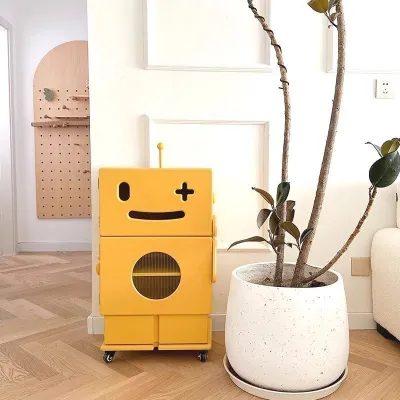
Prices are valid at publication and may change. Please refer to the product page for the latest price.
Why HDB Flats Need Dedicated Robot Vacuum Storage
Typical HDB flat layouts, particularly modern BTO apartments, feature highly optimized floor plans where every square metre of living space must be utilized efficiently. High-traffic zones like entryways, living room corridors, and narrow walkways quickly become cluttered when large appliances are left exposed on the floor. A standard robot vacuum docking station—especially modern models equipped with auto-empty dustbins and large water tanks—can occupy a significant footprint, protruding into walkways and creating persistent tripping hazards.
Beyond the physical obstruction, exposed docking stations introduce visual clutter to an otherwise tidy home. Trailing power cables, plastic base plates, and the sight of a parked vacuum can disrupt the cohesive interior design of your living space. Furthermore, open docks are prone to accumulating dust, hair, and household debris around their charging contacts, which can interfere with electrical connectivity and charging efficiency over time.
Concealing your robot vacuum inside a dedicated cabinet provides essential physical protection for the device itself. In busy households, an exposed vacuum on the floor is vulnerable to accidental kicks from family members or impact from heavy items. For homes with pets, an open dock can become a target for curiosity, leading to accidental button presses or displaced docking alignments. A dedicated cabinet acts as a protective shield, keeping the vacuum safe from external disruptions while keeping it tucked away out of sight.
Ultimately, the primary goal of integrating a robot vacuum cabinet into your HDB flat is to hide the hardware without compromising its operational capabilities. Modern robotic cleaners rely on complex routines to leave their docks, clean the home, and navigate back to charge. A successful storage solution accommodates these routines by providing a clear entry and exit path, ensuring that your home remains clutter-free while your vacuum operates autonomously and reliably in the background.
What to Look for in a Robot Vacuum Cabinet: Size, Ventilation, and Access
Selecting or designing a robot vacuum cabinet requires a clear understanding of your specific vacuum model’s physical and technical requirements. Before purchasing any furniture or finalizing carpentry designs, it is vital to consult your vacuum manufacturer’s manual for exact dimensions and clearance guidelines.

Dimensions and Sensor Clearance Robot vacuum docking stations vary significantly in size, particularly those that feature automated water refilling, mop washing, and dustbin emptying. You must measure the finished dimensions of your dock—including its height when the top lid is fully opened to access water tanks—to ensure it fits within the cabinet’s internal compartment. Additionally, pay close attention to sensor clearance. Most robot vacuums utilize LiDAR towers, infrared sensors, or front-facing cameras to navigate. If the cabinet opening is too narrow or deep, it can block these sensors, preventing the vacuum from locating its dock or mapping the room accurately. Most manufacturers recommend maintaining a clear zone of at least 0.5 metres on either side of the dock and 1.5 metres directly in front.
Ventilation and Heat Dissipation Charging lithium-ion batteries generates heat, and many modern docking stations feature active heating elements to dry mop pads after a cleaning cycle. Placing these docks inside a fully enclosed, unventilated space presents a safety risk and can lead to localized humidity, mold, or battery degradation. When choosing a cabinet, prioritize designs with open backs, slatted front panels, or dedicated ventilation grilles that facilitate continuous airflow. If you are using custom wood cabinetry, check the interior finish and joints; high humidity from damp mop drying cycles can warp untreated wood or degrade low-grade laminates over time. Ensure the materials used are moisture-resistant and easy to wipe down.
Power and Cable Management A reliable power source is critical for uninterrupted vacuum operation. Your cabinet must be positioned close to an existing HDB wall socket to avoid running long extension cords across the floor, which can pose a tripping hazard or be run over by the vacuum itself. Look for cabinets with integrated cable routing holes or cutouts at the base. This allows you to route the power cable neatly behind the furniture, keeping the excess cord secured and out of the vacuum’s path. Ensuring the main plug remains easily accessible is also important for quick power-downs during maintenance or emergencies.
Accessibility and Ramps The physical threshold of the cabinet’s entry point determines whether your vacuum can successfully dock. Most robot vacuums can climb thresholds of up to 1.5 to 2 centimetres, depending on the wheel design and suspension. If your freestanding cabinet features a bottom frame lip or is raised on a slight platform, the vacuum may struggle to climb inside, leading to docking failures or wheel slippage. Evaluate the entry point carefully; the opening must be wide enough to accommodate the vacuum’s turning radius as it aligns itself to back into the dock. If a raised threshold is unavoidable, you will need to install a gentle transition ramp with a non-slip surface to assist the vacuum’s ascent.
Best Robot Vacuum Cabinet Designs for Compact HDB Layouts
To integrate a robot vacuum cabinet into your HDB flat, you can choose from several distinct design approaches depending on your budget, space constraints, and whether you are currently renovating.
Multi-Functional Freestanding Furniture
For homeowners who prefer a non-permanent, budget-friendly solution, multi-functional freestanding furniture is an excellent choice. These ready-made pieces serve a dual purpose, allowing you to maximize your floor space without the need for professional installation or drilling.
Side tables with hidden bottom compartments are highly popular for living rooms. These tables feature a solid top surface for lamps, drinks, or books, while the lower section is left completely open or fitted with a recessed shelf designed specifically to house a docking station. This keeps the vacuum tucked neatly beside a sofa or armchair, utilizing space that would otherwise remain empty.
Another highly practical option is an entryway shoe cabinet with a bottom cutout. In many HDB flats, the entryway is the most logical place to store a robot vacuum because it provides central access to the rest of the home. Specially designed shoe cabinets feature a raised bottom shelf, leaving a clear gap of 15 to 20 centimetres at the floor level. This allows the vacuum to park underneath the cabinet, while the upper shelves provide ample storage for footwear, keys, and daily essentials.
Pros and Cons:
- Pros: Freestanding furniture offers excellent flexibility, as it can be easily moved during cleaning, rearranged, or taken with you if you relocate to a new home. There is zero installation required, making it a highly accessible option.
- Cons: These pieces may not accommodate very large, tall auto-empty docking stations, and their weight capacity on upper shelves must be monitored. When purchasing tall, narrow shoe cabinets with bottom cutouts, always verify their stability and consider anchoring them to the wall to prevent tip-over risks, particularly in homes with children or pets.
Custom Built-In Carpentry Solutions
If you are planning a BTO renovation or a major overhaul of a resale HDB flat, custom built-in carpentry allows you to create a seamless, tailored home for your robot vacuum. Working with an interior designer or carpenter enables you to integrate the dock directly into your home’s structural woodwork.
One of the most seamless options is integrating a recessed alcove into a floating TV console in the living room. By raising the TV console off the floor by 20 to 25 centimetres, you create a dedicated parking zone underneath. A specific section of the console can be designed with a removable front panel or a custom cutout, hiding the bulk of the dock while allowing the vacuum to slide out effortlessly.
Alternatively, you can utilize the toe-kick space or lower cabinets in a kitchen or utility yard. In Singapore, utility rooms and kitchen perimeters often have access to both power and water points, making them ideal for modern vacuums that require plumbing connections for auto-draining and auto-filling. A custom “vacuum garage” can be built into the base of a tall pantry cabinet or utility shelf, complete with an internal power point and water supply line.
Pros and Cons:
- Pros: Custom carpentry provides an unmatched, high-end aesthetic that completely hides the vacuum and its cables from view. It maximizes every millimeter of available space and allows you to locate the dock in the most efficient spot.
- Cons: Custom carpentry is a permanent addition with a significantly higher cost, often running into hundreds or thousands of SGD. It also limits your ability to upgrade to a larger vacuum model in the future if the new dock does not fit the custom-carved dimensions.
Under-Console and Floating Shelf Designs
For very tight corridors, narrow entryways, or minimalist living rooms where floor space is exceptionally scarce, under-console and floating shelf designs offer a lightweight, space-clearing alternative.
Floating shelves with integrated power routing are mounted directly to the wall at a height that matches your vacuum dock. The dock sits on the floor beneath the shelf, while the shelf itself can hold decorative items, plants, or smart home hubs. This design leaves the surrounding floor area completely open, making it easy to sweep or mop around the dock manually when needed.
Similarly, utilizing the open space beneath a slim, wall-mounted entryway console table keeps the floor clear while providing a designated home for the vacuum. Because these consoles are narrow, they do not protrude deeply into corridors, preserving valuable walkway space in compact HDB layouts.
Pros and Cons:
- Pros: These designs provide excellent floor clearance and a modern, airy look that makes small spaces feel larger. They are relatively easy to install compared to full carpentry.
- Cons: They do require drilling into HDB concrete walls, which requires a hammer drill and appropriate masonry wall plugs to ensure stability. You must verify the weight capacity of the floating shelf and ensure that any mounted items are secure to prevent them from falling onto the vacuum or docking station below. Additionally, cables may remain partially visible unless routed through paintable wall covers.
How to Measure and Prepare Your HDB Space for Installation
Proper preparation is key to ensuring your robot vacuum cabinet functions flawlessly. Follow these practical steps to measure, test, and set up your chosen storage zone safely.
Mapping the Zone Begin by measuring the physical dimensions of your robot vacuum and its docking station. Note the height, width, and depth. If your dock has a top-opening lid for water tanks or dust bags, measure the total height required when the lid is fully extended. Add a buffer of at least 5 to 10 centimetres of clearance above and around the dock to allow for easy maintenance. Mark the proposed floor footprint in your home using masking tape to visualize how much space the cabinet or console will occupy.
The “Return Path” Test Before assembling or mounting any furniture, place your docking station in the proposed location and plug it in. Carry your robot vacuum to the opposite side of the room and trigger the “return to dock” command via its mobile app. Observe the vacuum’s path closely as it approaches. Check if it can navigate smoothly into the designated spot without colliding with nearby walls, door frames, or furniture legs. If the vacuum struggles to align itself or repeatedly bumps into obstacles, you may need to adjust the dock’s position or choose a cabinet with a wider opening.
Cord Securing Loose power cords are a primary cause of robot vacuum malfunctions, as the rotating brushes can easily tangle in trailing wires. Use adhesive cable clips, zip ties, or paintable plastic cord covers to secure the power cable firmly against the wall or along the back legs of your cabinet. Ensure that there is no slack on the floor where the vacuum operates. The main plug should remain plugged directly into the wall socket without being pinched behind heavy furniture, which can damage the cord and pose a fire hazard.
Safety Verification Perform a final safety check of the installation zone. Ensure that no flammable household items, such as long curtains, loose papers, or synthetic rugs, are blocking the ventilation areas of the docking station or the cabinet’s air vents. If your vacuum dock features a hot-air drying cycle for mop pads, monitor the area during its first few operations to ensure that heat and moisture can escape freely without causing condensation on the surrounding cabinet walls or floor.
Frequently Asked Questions (FAQ)
Can I hide the robot vacuum dock inside a fully closed cabinet?
It is not recommended to hide a robot vacuum dock inside a fully closed cabinet with solid, unventilated doors. Closed doors block the infrared, LiDAR, and camera signals that the vacuum uses to locate and align itself with the charging contacts, causing docking failures. Furthermore, enclosing the dock completely traps the heat generated during charging and mop-drying cycles. This lack of airflow can lead to battery overheating, reduced appliance lifespan, and potential safety hazards. If you must use a cabinet with doors, ensure the doors feature open slatted designs, mesh panels, or are kept open whenever the vacuum is scheduled to operate.
Do I need a ramp for my robot vacuum cabinet?
You will only need a transition ramp if your cabinet has a raised bottom lip, is built on a platform, or sits on a surface that is higher than your vacuum’s maximum climbing limit. Most standard robot vacuums can climb thresholds between 1.5 and 2 centimetres. If the entry barrier to your cabinet exceeds this height, the vacuum’s sensors may detect it as an obstacle and refuse to cross it, or the wheels may slip. A gentle ramp with a maximum slope of 10 to 15 degrees and a non-slip texture will allow the vacuum to transition smoothly into its parking space.
How do I manage the power cord in a freestanding cabinet?
To manage power cords in freestanding furniture, utilize the built-in cable management holes often located at the back of the unit. If your cabinet does not have these, you can drill a neat hole near the base using a hole saw attachment. Run the cord through the opening and secure any excess length using adhesive cable organizers or hook-and-loop straps attached to the underside or back of the furniture. Keep the cable elevated off the floor to prevent the vacuum from running over it, and ensure the plug remains accessible for easy disconnection when performing maintenance.

Community discussion
Share your experience or ask a question. Comments are reviewed before publication.