
Protecting your home’s flooring from the constant scraping of chair legs is essential for maintaining both the beauty and value of your property. Whether you have polished parquet, homogeneous tiles, or modern luxury vinyl tiles, the friction of moving furniture can quickly cause unsightly scratches, scuffs, and deep gouges. Choosing the right rubber chair leg protector depends on matching the physical shape of your chair legs with the specific floor surface in your home. Standard straight legs benefit most from slip-on rubber caps, while tapered or angled legs require the flexible grip of rubber sleeves. Flat, wide, or unusual bases rely on adhesive rubber pads. Selecting the wrong type can lead to protectors slipping off, adhesive failure, or accelerated wear on your floors.
How to Match the Protector Type to Your Floor and Chair Legs
Before purchasing any floor protection accessories, you must assess the specific characteristics of your flooring material. Hardwood and parquet floors are highly susceptible to scratching from trapped grit, requiring a protector that glides smoothly without grinding debris into the wood grain. Homogeneous tiles and ceramic floors are more resilient but feature grout lines that can catch on thin or poorly fitted protectors, causing them to shear off. Vinyl and laminate floors require careful material compatibility checks, as certain rubber compounds can cause chemical staining over time.
Next, measure the finished dimensions of your chair legs with high precision. Do not rely on visual estimates; use a caliper or a firm measuring tape to determine the exact diameter of round legs or the side lengths of square legs. Note whether the legs are perfectly vertical or if they flare outward at an angle. Angled legs exert uneven lateral pressure on protectors, which can cause standard flat-bottomed caps to wear through rapidly on one side.
Products mentioned in this guide
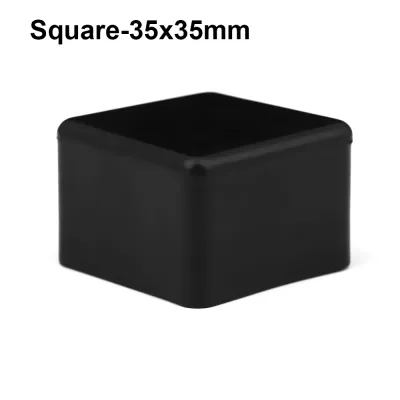
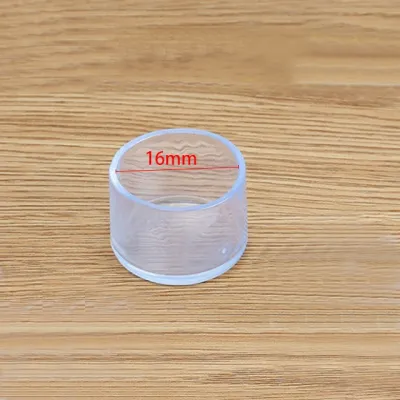
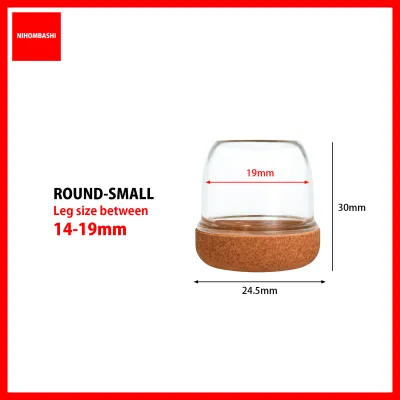
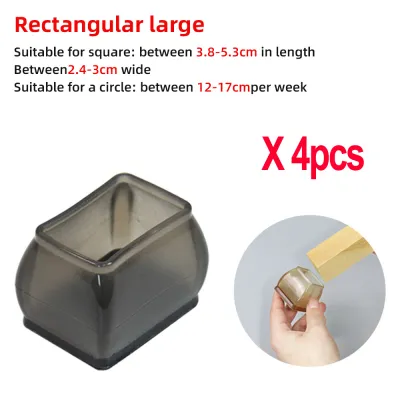
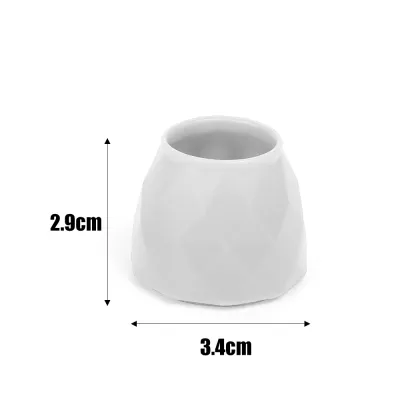
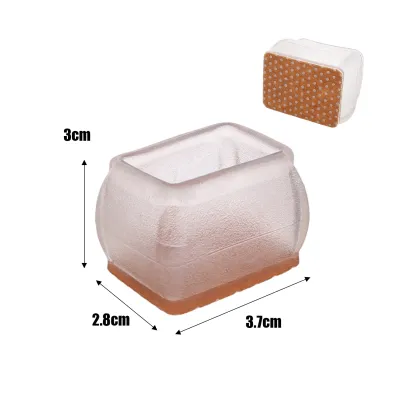
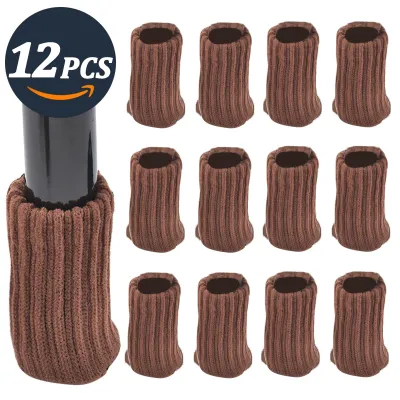

Prices are valid at publication and may change. Please refer to the product page for the latest price.
Additionally, consider the load capacity and stability of the furniture. Heavy dining chairs or solid wood armchairs exert significant downward force, which can compress thin rubber protectors and cause the hard chair leg to cut through the material. The frequency of lateral movement also dictates the anchoring method you should choose. Chairs that are moved multiple times a day require highly secure, mechanically stable protectors like caps or sleeves, whereas decorative accent chairs that remain stationary can easily utilize adhesive pads. Finally, ensure that the added outer dimensions of the protectors do not interfere with the available space between table legs or prevent the chairs from sliding neatly under the table.
Rubber Caps: Best for Standard Round or Square Legs
Slip-on rubber caps are the traditional choice for standard, straight chair legs that maintain a uniform shape from the frame to the floor. These protectors function like a protective glove, wrapping around the bottom of the leg to provide a thick barrier of rubber between the furniture and your floor. They are highly effective for straight metal or wooden legs with round or square profiles, as the uniform shape allows the cap to distribute weight evenly across its entire base.

To ensure a secure fit, you must match the cap’s internal diameter to the exact external measurement of the chair leg. A cap that is even slightly too large will wobble, collect dust, and eventually slide off when the chair is moved. Conversely, attempting to force a cap that is too small onto a leg will stretch the rubber to its limit, leading to premature splitting along the seams. When installing caps, perform a physical check to ensure the leg is pushed completely to the bottom of the cap, leaving no trapped air pockets that could slowly push the protector off over time.
While rubber caps offer excellent durability and shear resistance, they have distinct limitations. They perform poorly on heavily tapered or angled legs, as the uneven pressure causes the cap to tilt, slide down, and eventually pop off. Furthermore, if your wooden chair legs have rough, splintered, or uneven bases, these sharp edges can puncture the rubber from the inside. Always inspect the bottom of the chair legs and sand down any rough spots before slipping the caps on to protect the integrity of the rubber.
Rubber Sleeves: Ideal for Tapered or Irregular Legs
Modern chair designs often feature tapered, angled, or mid-century modern hairpin legs that standard rigid caps cannot accommodate. For these irregular shapes, rubber sleeves—often made from highly flexible rubber or stretchable silicone-rubber hybrids—offer an adaptable solution. The elastic nature of these sleeves allows them to stretch over wider sections of the leg and contract tightly around narrower parts, conforming to the unique contour of the furniture.
When selecting sleeves, it is crucial to verify their grip and slip-resistance to ensure they stay anchored under the weight of the chair. Look for sleeves that feature internal ribbing or a high-friction inner coating, which prevents the sleeve from sliding down the tapered leg during lateral movement. The flexibility of the material also helps distribute lateral shear forces more evenly, making them highly stable on angled legs that would otherwise reject standard caps.
However, rubber sleeves come with aesthetic and practical trade-offs. Because they must climb higher up the chair leg to secure a firm grip, they are much more visible than low-profile caps or pads. This added bulk can detract from the sleek lines of designer furniture. Additionally, the stretchable material can attract and trap household dust, pet hair, and lint along the upper rim, requiring regular cleaning to maintain a neat appearance. Ensure that the sleeve’s thickness does not reduce the clearance between closely spaced chair legs, which could cause them to rub against each other when the chairs are tucked away.
Adhesive Rubber Pads: The Solution for Flat or Unusual Bases
When chair legs feature flat, wide pedestals, sled-style metal frames, or highly unusual shapes that cannot accommodate slip-on options, adhesive rubber pads serve as the primary solution. These pads rely on a high-tack adhesive backing to bond directly to the flat underside of the furniture foot. Because they do not wrap around the sides of the leg, they remain completely hidden from view, preserving the original aesthetic design of your furniture.
Achieving a long-lasting bond with adhesive pads requires meticulous surface preparation. The bottom of the chair leg must be entirely free of dust, wax, old adhesive residue, and manufacturing oils. Clean the area thoroughly with isopropyl alcohol and allow it to dry completely before applying the pad. Once applied, exert firm pressure across the entire surface of the pad to activate the pressure-sensitive adhesive. For the best results, allow the adhesive to cure undisturbed—ideally for 24 hours—before subjecting the chair to any lateral sliding or weight.
Despite their convenience, adhesive pads carry inherent risks that require ongoing monitoring. They are highly susceptible to lateral shear forces; repeatedly sliding a heavy chair across the floor can cause the adhesive to shift, leading to the pad sliding off-center. When a pad detaches, it exposes the sticky adhesive backing to your floor, which quickly traps abrasive dirt and grit. This trapped debris can act like sandpaper, scratching your floor finishes far worse than the bare chair leg would. Additionally, some adhesives can leave a stubborn residue or chemically react with delicate floor sealants, requiring careful removal.
Quick Comparison: Choosing the Right Format
To select the most effective floor protection for your home, apply a simple decision framework based on your furniture’s structural design. Choose rubber caps if your chair legs are standard, straight, and uniform in shape. Opt for rubber sleeves if your legs are tapered, angled, or feature irregular profiles that require a flexible, conforming fit. Select adhesive pads if the chair base is flat, wide, or has an unusual geometry that prevents any slip-on protector from being installed.
The table below summarizes the key performance characteristics and installation requirements for each protector type:
| Protector Type | Ideal Leg Shape | Installation Effort | Shear Resistance | Removal Cleanliness |
|---|---|---|---|---|
| Rubber Caps | Straight, round, or square | Low (Slip-on) | High | Excellent (No residue) |
| Rubber Sleeves | Tapered, angled, or irregular | Moderate (Stretch-on) | High | Excellent (No residue) |
| Adhesive Pads | Flat, wide, or sled-style | Low (Peel-and-stick) | Low to Moderate | Poor (Leaves residue) |
In some cases, standard off-the-shelf protectors may not fit your furniture. If you have extremely thin metal legs, highly intricate antique feet, or chairs used in wet environments like outdoor patios, standard rubber protectors may fail. In these scenarios, consider alternative floor protection strategies, such as custom-molded glides, heavy-duty felt-bottomed wraps, or protective area rugs to safeguard your flooring.
Installation and Maintenance Checks for Long-Lasting Protection
Proper installation and routine maintenance are vital to ensure your floor protectors continue to safeguard your home without causing secondary damage. Before installing any protector, always clean and dry the chair leg base thoroughly. Any moisture trapped beneath a rubber cap or sleeve can lead to wood rot or corrosion on metal legs, while dust will immediately compromise the bond of adhesive pads.
Establish a routine inspection schedule—ideally every three to six months—to check the condition of all chair leg protectors. Inspect the rubber for signs of physical wear, such as thinning bases, cracking, or splitting along the seams. Pay close attention to the bottom of the protectors; over time, tiny particles of sand, grit, and household debris can become embedded in the rubber. If left unchecked, these embedded particles will grind against your polished floors every time the chair is moved, defeating the purpose of the protector.
Define clear stopping conditions and replacement triggers. If you observe any splitting in a rubber cap, sliding or peeling of an adhesive pad, or if the rubber has worn thin enough to expose the chair leg, replace the protector immediately. Do not attempt to extend the life of a failing protector with temporary fixes like tape, as this can lead to sudden floor damage.
Frequently Asked Questions (FAQ)
Will rubber protectors leave marks on light-colored vinyl flooring?
Yes, certain rubber compounds can cause permanent discoloration on light-colored vinyl or polyurethane-finished floors. This occurs due to a chemical reaction known as plasticizer migration, where oils in the rubber migrate into the vinyl surface, leaving yellow or dark stains that cannot be washed away. To prevent this, check the manufacturer’s specifications to ensure the protectors are rated as non-staining, or opt for silicone-based sleeves or felt-bottomed alternatives if you have sensitive vinyl flooring.
How do I remove adhesive residue if I switch from pads to caps?
To remove stubborn adhesive residue without damaging your furniture or floors, use gentle, non-abrasive cleaning methods. Start by applying a small amount of mild soapy water or a specialized adhesive remover that is explicitly rated safe for your specific furniture material (such as finished wood, metal, or plastic). Gently rub the residue with a microfiber cloth or use a plastic scraper to lift the softened adhesive. Avoid using harsh solvents like acetone or lacquer thinner, as these chemicals can easily strip protective floor sealants, dissolve plastic parts, or ruin the finish on wooden chair legs.

Community discussion
Share your experience or ask a question. Comments are reviewed before publication.