
Maximising wardrobe space in Singapore apartments can be a constant challenge. Between daily tropical wear, formal office attire, and bulky winter clothing stored for overseas travel, standard built-in closets often reach their limits quickly. When storage space becomes tight, adding a new storage rack seems like the most straightforward solution, but buying without a plan often leads to mismatched organizers that fail to solve the underlying problem.
To resolve closet chaos permanently, you must take a systematic approach. This involves diagnosing your specific storage failures, matching those pain points to the correct rack type, and verifying your physical space constraints before committing to a purchase. By following this diagnostic path, you can ensure that every storage addition is highly functional, safe, and perfectly suited to your lifestyle.
Step 1: Diagnose Your Current Wardrobe Pain Points
Before browsing online marketplaces or local furniture showrooms, stand in front of your open wardrobe to observe where the visual chaos peaks. Look for specific failure signals that indicate structural storage issues rather than simple untidiness.
Products mentioned in this guide
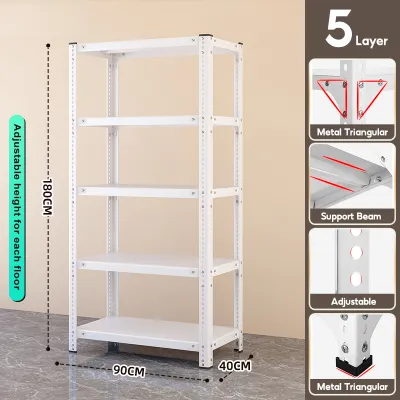
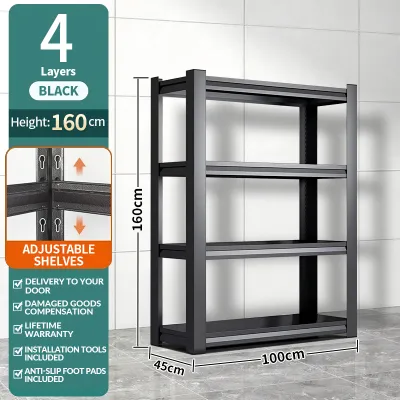
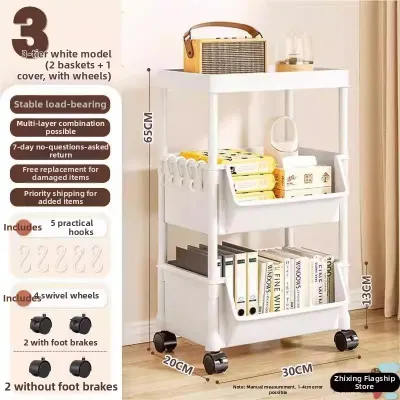
Prices are valid at publication and may change. Please refer to the product page for the latest price.
Are your daily work shirts crushed and heavily wrinkled? This is a classic symptom of insufficient hanging space or overstuffed rods. Do folded t-shirts and knitwear topple over whenever you try to retrieve a single item? This indicates poor vertical shelf utilisation. Check the floor of your closet as well; if shoes are piled on top of each other, forcing you to dig through a dusty mound every morning, your bottom-tier space is failing you. Similarly, if small accessories like belts, ties, and watches are scattered across random flat surfaces, they will remain difficult to find when you are in a rush.
To make a precise diagnosis, perform a quick physical inventory. Group your clothing by type—such as long dresses, short shirts, folded knitwear, and shoes—to quantify exactly how many linear centimetres of hanging space or cubic centimetres of shelf space you actually need. Take note of “the sag test” on your existing shelves and rods. If a rod is bowing in the middle, it is already overloaded and needs immediate support or replacement.
It is critical to recognise that buying a new rack will not solve a fundamental clutter problem if the root cause is over-accumulation. If your wardrobe is packed with items you no longer wear, adding more storage structures simply delays the inevitable. Begin by sorting your items, identifying what you actually use, and assessing the specific categories that lack a dedicated home.
Step 2: Match Your Storage Challenges to the Right Rack Type
Once you have identified your primary storage bottlenecks, you can match them to targeted rack categories. Each type of rack is engineered to solve a specific structural issue, and selecting the right one depends on your specific inventory.

Hanging Rods and Freestanding Garment Racks
Hanging rods are the optimal solution for items that crease easily, such as linen dresses, cotton shirts, tailored trousers, and structured blazers. They keep your clothing suspended, allowing air to circulate and preventing the deep wrinkles that require time-consuming ironing.
If your built-in wardrobe is already full, you must decide between internal add-on rods and freestanding garment racks. Internal add-on rods, such as double-hanging tension bars, are excellent for maximising vertical space under existing high rods, allowing you to hang two tiers of shorter items like shirts and skirts. In contrast, freestanding garment racks are ideal for handling overflow clothing or creating an open-concept wardrobe in a spare bedroom. They offer high visibility and easy access to your most frequently worn items.
Before purchasing or installing any hanging system, always check the manufacturer’s specified weight capacity for the rod and verify the structural integrity of your supporting cabinet walls or ceiling. Loading a weak rod with heavy winter coats or dense leather jackets can cause the fixtures to pull loose, potentially damaging your wardrobe carcass or causing personal injury.
Shelving Units and Stackable Storage Racks
Shelving units and stackable racks are designed to conquer wasted vertical space on flat surfaces. They are the ideal storage medium for folded knitwear, denim, activewear, handbags, and fabric storage bins.
Adjustable shelving systems offer the highest level of flexibility, allowing you to reposition the shelves as your wardrobe needs change over time. Fixed stackable racks, on the other hand, are highly modular and can be placed inside existing deep shelves to create smaller, manageable compartments. This prevents the “toppling tower” effect common with tall stacks of folded clothes.
When selecting shelving, always measure the depth of your closet cabinet carefully. A shelf that is too deep may block sliding doors, prevent hinged doors from closing fully, or protrude into your bedroom’s walking path, creating a tripping hazard. Additionally, check the finish of the shelves; look for smooth, snag-free surfaces or protective linings to ensure delicate fabrics like silk or wool do not catch on rough edges.
Shoe Racks and Bottom-Tier Organizers
The bottom of a wardrobe is frequently treated as a dumping ground, but it represents prime real estate for reclaiming floor space. Shoe racks and bottom-tier organisers keep your footwear off the ground, protecting them from dust, crushing, and the high humidity levels often found at floor level in tropical climates.
You can choose from several configurations depending on your collection. Tiered metal or plastic racks offer open, breathable storage that is excellent for daily-use shoes. Drop-front stackable boxes provide a sealed environment that protects delicate leather shoes or high heels from dust and moisture, while slanted shoe shelves maximise vertical space within shallow closets.
Before buying, measure the height of your tallest footwear. High-top sneakers, boots, and heels require significantly more vertical clearance than flat sandals or loafers. Ensure the rack you select has adjustable tiers or sufficient spacing to accommodate your specific shoe heights without bending or crushing the collars of your footwear.
Accessory Racks and Pull-Out Systems
Small items like belts, ties, scarves, watches, and jewellery are easily lost or tangled when tossed into general drawers. Accessory racks and specialised pull-out systems are engineered to keep these small pieces visible, organised, and easily accessible.
Door-mounted utility racks utilise the otherwise wasted space on the back of hinged wardrobe doors, making them perfect for hanging belts and long necklaces. Velvet-lined drawer inserts partition deep drawers into individual compartments, protecting delicate jewellery and watches from scratching against each other. For high-density storage, pull-out valet rods and tie racks slide smoothly out of the wardrobe carcass, allowing you to view your entire collection at a glance.
If you plan to install a pull-out system, you must verify the internal depth of your cabinet and ensure there is adequate side clearance. If the system is installed too close to the front edge or the hinges of your wardrobe doors, it may scrape against the cabinet walls or fail to slide out completely, rendering it useless.
Step 3: Verify Space, Clearance, and Weight Limits
Before making any purchase, you must perform a thorough physical verification of your space. Do not rely on visual estimates; even a discrepancy of a few millimetres can prevent a rack from fitting or functioning correctly.
Begin by measuring the exact internal width, height, and depth of your wardrobe compartment. Use a steel measuring tape for accuracy, and take measurements at the top, middle, and bottom of the space, as older or budget-friendly cabinets may have slight warping or structural variations.
Next, analyse the operational clearance. If you are adding a freestanding rack or stackable drawers inside your wardrobe, ensure they do not obstruct the path of sliding doors or prevent hinged doors from shutting. For sliding doors, remember that the track itself often eats up 5 to 10 cm of the wardrobe’s total internal depth; if you install a rack that is flush with the front edge of the shelf, the sliding door will hit it. For pull-out accessories, measure the distance between the open door hinge and the opposite cabinet wall to ensure the drawer or tray can glide past the door frame without scraping.
Weight capacity and structural material are equally critical. Evaluate the material of your cabinet or walls before mounting any heavy-duty rods or shelving. Hollow drywall or thin plywood backboards cannot support the weight of wall-mounted shelves loaded with heavy storage bins. For heavy loads, ensure you are anchoring the racks into solid concrete walls or the structural studs of your wardrobe. Always consult the manufacturer’s installation guidelines and load limits before mounting.
Finally, consider the logistics of delivery and assembly. In Singapore, many apartments feature tight entryways, narrow corridors, and compact lifts. If you are ordering a large, pre-assembled freestanding garment rack or a heavy metal shelving unit, measure your apartment door frame, the lift door clearance, and the stairwell turnings. Ensuring the product can physically travel from the delivery truck to your bedroom is a crucial step that prevents costly returns and logistical headaches.
Step 4: Decide Your Action Plan (Reorganize, Modify, or Buy)
With your diagnostic insights and physical measurements in hand, you can now choose the most logical and cost-effective path forward. Avoid the temptation to buy new furniture immediately; instead, evaluate these three distinct action plans.
- Path 1: Reorganise – If your space check reveals that you have enough physical shelf and hanging space but it is simply poorly utilised, start by decluttering. Remove items you no longer wear. Implement space-saving folding techniques, such as vertical file folding, which keeps clothes visible and prevents piles from collapsing.
- Path 2: Modify – If you need minor structural adjustments but want to avoid a permanent installation, look for low-cost, reversible internal accessories. Adding simple shelf dividers, hanging fabric organisers that hook onto existing rods, or lightweight tension rods can instantly partition your space. Always check the manufacturer's care and safety instructions for these temporary accessories to ensure they do not damage your wardrobe finish.
- Path 3: Buy New – Invest in a new freestanding garment rack, a heavy-duty shoe tower, or custom built-in rack systems only when you face a genuine capacity deficit that reorganisation cannot solve. This is the correct choice if you have open floor space, require a significant increase in hanging capacity for heavy garments, or need a highly stable, long-term storage solution.
Frequently Asked Questions (FAQ)
Can I install closet racks in a rented HDB or condo without drilling?
Yes, renters can easily optimise their wardrobe space without risking their security deposit. Opt for non-permanent, freestanding garment racks, adjustable tension rods designed for lightweight clothing, or over-the-door hanging hooks. These solutions provide ample storage and can be completely removed without leaving holes or structural damage.
However, you should avoid using standard adhesive strips or heavy-duty mounting tape for load-bearing shelves or hanging rods. Adhesive backing can easily peel away paint or laminate finishes when removed, and more importantly, they often fail under dynamic weight, causing the rack to collapse and risking personal injury or property damage. Always review your tenancy agreement regarding wall modifications and consult your landlord before attempting any semi-permanent installations.
Community discussion
Share your experience or ask a question. Comments are reviewed before publication.