
Replacing a broken or sagging wardrobe pole bracket requires matching three critical elements: the exact outer diameter of your existing pole, the mounting style of your closet panels, and the weight capacity required for your clothing. A mismatch in any of these areas can lead to loose poles, damaged wardrobe panels, or a collapse of your hanging space. By taking precise measurements and evaluating your wardrobe’s material, you can select a replacement bracket that restores stability to your closet.
Measure Your Existing Pole and Closet Configuration
To find the correct replacement bracket, start by measuring the outer diameter of your wardrobe pole. Use a caliper or a flexible measuring tape wrapped around the pole to find the circumference, then divide by 3.14 to calculate the diameter. Standard wardrobe poles are typically round or oval, and even a millimeter of difference can prevent the pole from fitting into a new bracket or cause it to wobble.
Next, inspect the interior side panels of your wardrobe. Note whether the panels are made of solid wood, plywood, or melamine-faced chipboard, as this determines how well they can hold new screws. Measure the thickness of these side panels to ensure any replacement screws you use will not pierce through to the other side of the cabinet.
Products mentioned in this guide
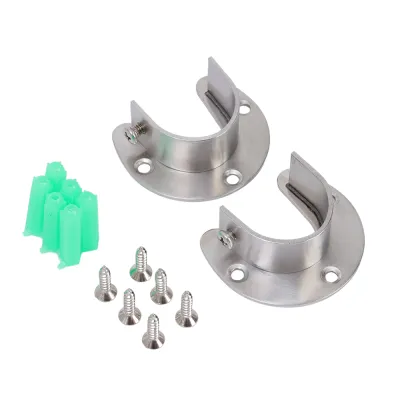
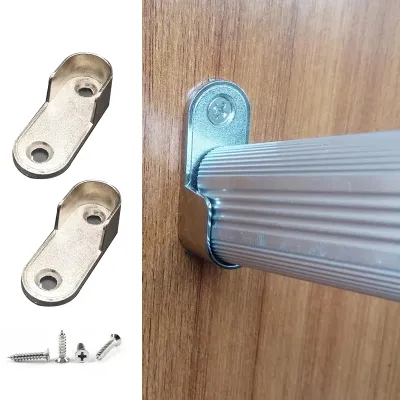
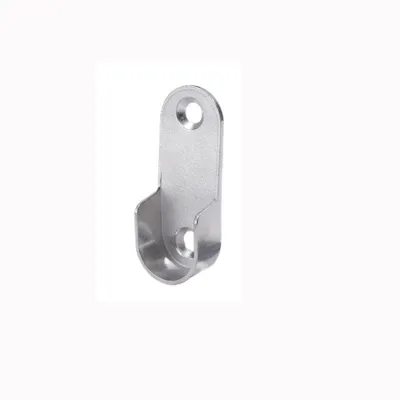
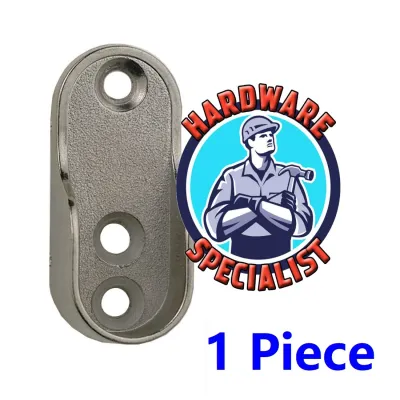
Prices are valid at publication and may change. Please refer to the product page for the latest price.
Finally, examine the existing mounting setup. Check if the current brackets are mounted directly to the side walls, suspended from the top shelf, or fixed to a back wall. Look for existing screw holes and measure the distance between them, as finding a replacement bracket with matching hole spacing can save you from drilling new holes into your wardrobe panels.
Match Bracket Size and Shape to Your Pole Profile
Your replacement bracket must match the geometric profile of your wardrobe pole to distribute weight evenly. Round poles require round brackets, which are commonly available in standard sizes such as 19mm, 25mm, or 32mm. Trying to force a pole into a bracket that is slightly too small will fail, while using a bracket that is too large allows the pole to slide and tilt, putting uneven stress on the mounting screws.

Oval and rectangular poles require specialized brackets designed to cradle their unique shapes. These brackets prevent the pole from rotating when hangers are moved back and forth. Ensure the inner width and depth of the replacement bracket match the maximum cross-section dimensions of your oval pole for a flush, secure fit.
You will also need to choose between enclosed socket brackets and open-cradle designs. Enclosed sockets slide onto the ends of the pole before installation and offer added security because the pole cannot lift out. Open-cradle or U-shaped brackets allow you to drop the pole in from the top, making installation and future removal much easier, though they require a snug fit to prevent the pole from shifting upward.
Choose the Right Mounting Style for Your Closet
The structural layout of your wardrobe dictates the mounting style of your replacement brackets. Side-mount brackets are the most common, securing directly to the vertical side panels of the wardrobe. If your wardrobe spans a wide distance or lacks sturdy side panels, ceiling-mount or top-mount brackets can suspend the pole from an overhead shelf or the closet ceiling instead.
When planning the installation, check the alignment of the screw holes on the new bracket. If you are mounting to thin melamine or particleboard panels, standard wood screws may strip the material if reused in the same holes. In these cases, you may need to use specialized hollow-wall anchors, Euro screws, or sleeve inserts designed for manufactured wood to ensure a firm grip.
For non-standard wardrobe spaces, such as angled walk-in closets under staircases or corner wardrobes, adjustable or swivel brackets can accommodate non-perpendicular angles. Regardless of the style, evaluate the number of mounting screws each bracket requires. Brackets with three screw holes generally offer greater stability and resistance to twisting than those with only one or two holes.
Determine Load Capacity and Material Requirements
To prevent future sagging or bracket failure, estimate the weight of the clothing you plan to hang. Heavy winter coats, suits, and densely packed garments exert significant downward force, especially in humid climates where fabrics can absorb moisture and increase in weight. A standard rule of thumb is to choose brackets and poles that can comfortably support your typical wardrobe load without bending.
Check the manufacturer specifications of the replacement brackets for their rated load capacity. Keep in mind that the overall weight limit of your wardrobe pole setup is determined by its weakest link—whether that is the bracket material, the strength of the mounting screws, or the wardrobe panel itself. For long spans, you may need to install an additional center-support bracket to prevent the pole from bowing.
Bracket materials play a major role in structural rigidity and longevity. Heavy-duty steel and solid brass brackets offer high resistance to bending under heavy loads. Zinc alloy and plastic brackets are common in lighter-duty wardrobes, but they can suffer from material fatigue or cracking over time if overloaded. Inspect your old bracket for signs of stress, such as hairline cracks, bending, or widened screw holes, to determine if you need to upgrade to a stronger material.
Execute a Safe Bracket Replacement and Stability Check
Before starting the replacement, unload all clothing from the wardrobe pole. Attempting to replace a bracket while the pole is under load can cause the pole to fall, potentially damaging your wardrobe panels or causing personal injury. Once the pole is empty, carefully lift it out of the brackets and set it aside in a safe place.
Carefully unscrew the old brackets to avoid splintering or stripping the wardrobe panels. If the old screws are rusted or stuck, apply a small amount of lubricant and turn them slowly. Inspect the exposed panel surface for any damage or wood rot, especially in humid environments, and clean the area thoroughly before proceeding with the new installation.
Align the new bracket with your pre-marked mounting points. If you are drilling new holes, use a drill bit slightly smaller than the screw threads to create precise pilot holes, which prevents the wood panel from splitting. Secure the bracket tightly with the appropriate fasteners, ensuring it sits flush against the mounting surface. Once both brackets are installed, place the pole back into position and test the assembly by applying gradual downward pressure by hand, checking for any wobble, sagging, or panel movement before re-hanging your clothes.
Frequently Asked Questions (FAQ)
Can I Use a Round Bracket for an Oval Wardrobe Pole?
No, you should not use a round bracket for an oval wardrobe pole. An oval pole will not sit flush inside a round bracket, creating localized pressure points that can deform the pole or crack the bracket. Additionally, the mismatch allows the pole to rotate and slide, making your hanging space unstable and increasing the risk of a structural failure.
What to Do If the New Bracket Screw Holes Do Not Align?
If the new bracket’s screw holes do not align with the existing holes, do not try to force the screws in at an angle. Instead, fill the old screw holes with wood filler or wooden dowels glued in place, allow them to dry, and sand the surface flush. You can then drill fresh pilot holes in the correct positions to secure the new bracket safely.
Community discussion
Share your experience or ask a question. Comments are reviewed before publication.